


24
17
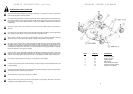
DRIVELINE SAFETY SIGNSTROUBLESHOOTING (continued)
PROBLEM POSSIBLE CAUSE SOLUTION
Belt slippage Mower is overloading, grass is too Slow tractor’s ground speed but
tall or heavy maintain 540 RPM PTO speed.
Cut grass twice. Raise the mower for
the first pass and lower to the desired
cutting height for the second and cut
at 90 degrees to the first pass.
Cut a partial swath only.
Oil on belt from over lubrication Clean lubricant from belt and sheaves
with a clean rag. Replace oil soaked
belts.Be sure to follow operator’s
manual recommendations.
Belt hung or rubbing Check belt for free travel in sheaves.
Check under mower deck and spindles
for debris or other foreign material
and remove if any is present.
Belt rollover Sheave misalignment Consult with authorized dealer.
Damaged belt Replace it with correct specified
belt*.
Foreign object in sheave groove Inspect all sheave grooves for rust,
paint or other foreign material.
Remove these if present.
Worn sheave groove Replace with correct specified sheave.
Damaged belt Rollover, high shock loads or Replace it with correct specified belt*.
installation damage
Belt breakage High shock loads Avoid abusive mowing.
Avoid hitting ground with the mower
and large obstructions.
Belt came off sheave Check sheave for proper alignment
and foreign material.
Ensure proper belt tension.
Avoid hitting the ground with mower
and large obstructions.
* Check damaged belt for cause of damage by laying it flat on the floor. If the belt does not lie flat (check for humps,
kinks, twists or other damage), this is an indication that it has broken or stretched cords. Do not reinstall this belt,
replace it with a correct specified part.
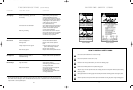
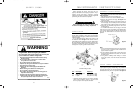
DANGER
SHIELD MISSING
DO NOT OPERATE
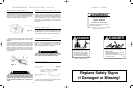
DANGER
SHIELD MISSING
DO NOT OPERATE
DANGER
Be sure that the installation area is clean and dry.
Be sure temperature is above 50˚F (10˚C).
Decide on the exact position before you remove the backing paper.
Remove the smallest portion of the split backing paper.
Align the sign over the specified area and carefully press the small portion with the exposed sticky
backing in place.
Slowly peel back the remaining paper and carefully smooth the remaining portion of the sign in place.
Small air pockets can be pierced with a pin and smoothed out using the piece of sign backing paper.
HOW TO INSTALL SAFETY SIGNS:
Part No. 650806
Part No. 650810
24 / 17 - FM001 12/6/00 3:23 PM Page 1