


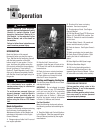

Section 4: Operation
• Turn the vehicle’s engine off and apply
its parking brake.
• Position the loading vehicle so that the
ramp angle is as flat as possible (the
less incline to the ramp, the better).
Loading the Tiller
1. Use loading ramps that are strong and
wide enough to safely hold the weight of
the tiller and the operator combined—
your tiller weighs between 280 and 325
lbs.
2. Move the Tines/PTO Clutch Lever
(Figure 4-2) into DISENGAGE position.
3. Set the Depth Regulator lever (Figure
4-2) to the Travel position.
4. Move Wheel Speed Lever (Figure 4-2)
into SLOW position and reduce the
engine throttle speed.
5. Shift the Wheels/Tines/PTO Lever
(Figure 4-2) into FORWARD position and
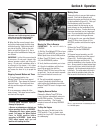
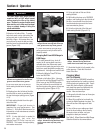
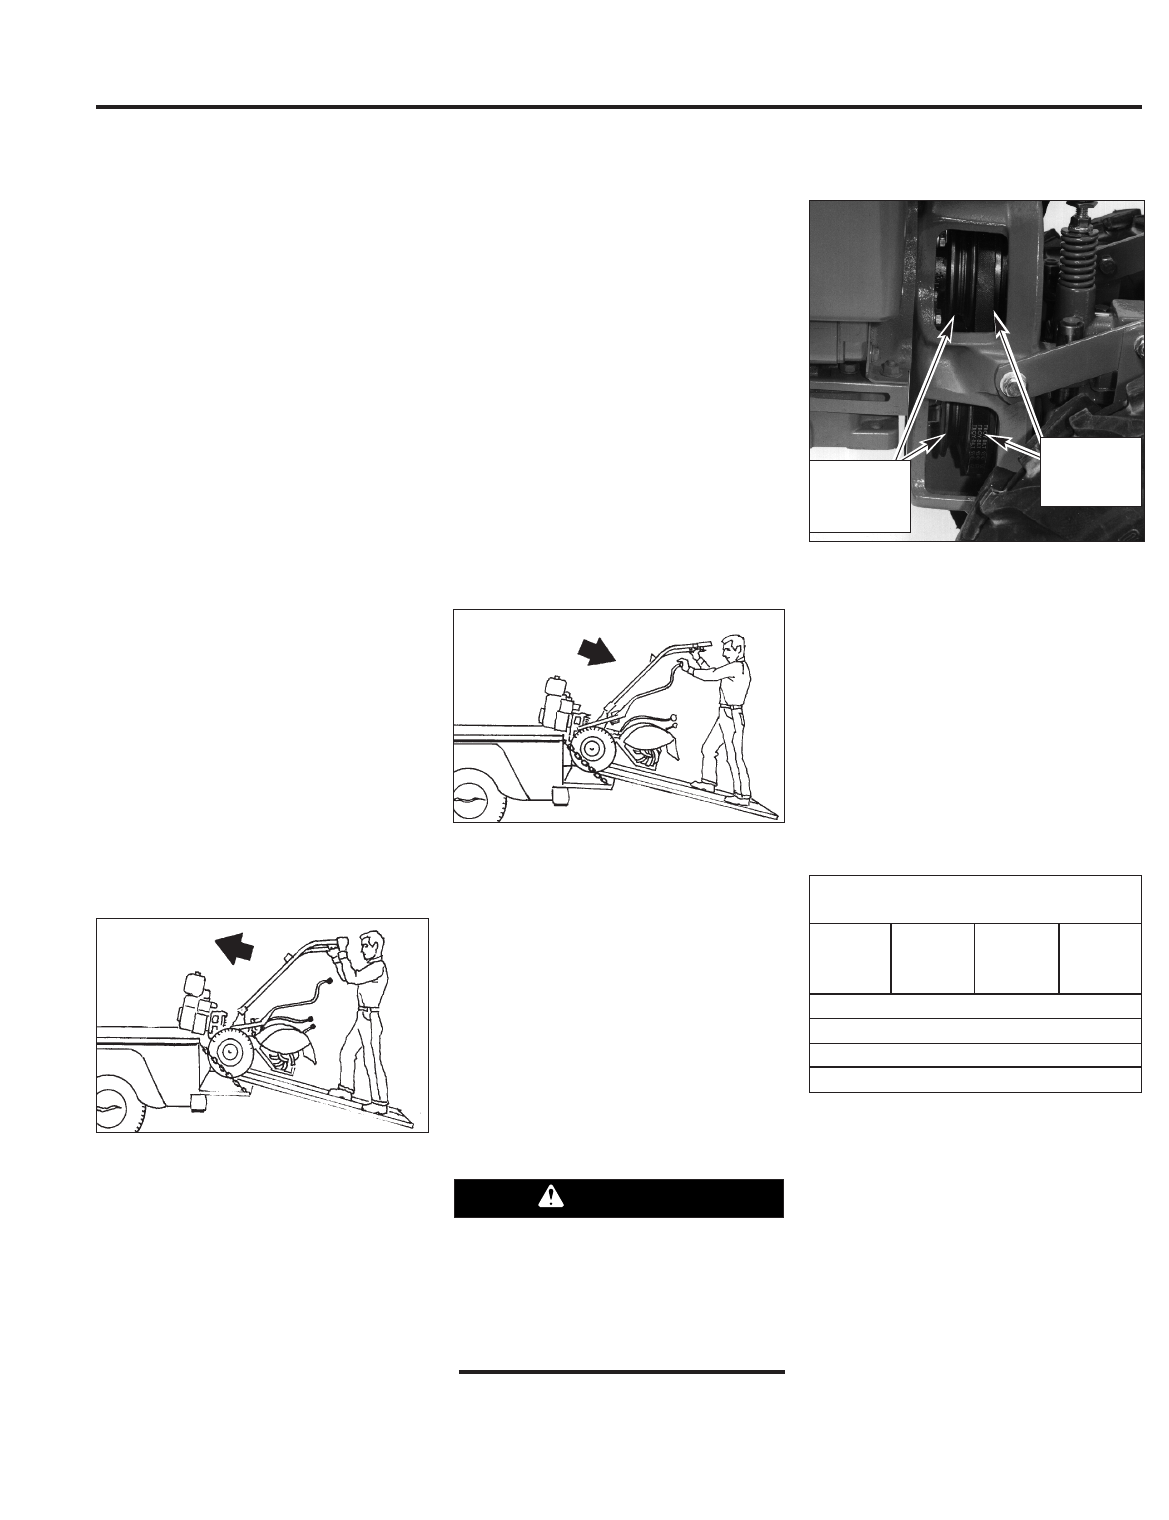
follow the tiller up the ramps (Figure 4-7).
Check the wheels as you move the tiller
forward. Ensure that they move up the
center of each ramp.
6. Prevent tiller from rolling in vehicle.
Leave Wheel Speed Lever in FAST or
SLOW position, chock wheels with blocks
and tie down the tiller.
Unloading the Tiller
IMPORTANT: Never unload the tiller in
FORWARD drive. The tiller could tip
forward and expose you to the tines
(which should be disengaged as
instructed).
1. Use loading ramps that are strong and
wide enough to safely hold the weight of
the tiller and the operator combined—
your tiller weighs between 280 and 325
lbs.
2. Move the Tines/PTO Clutch Lever
(Figure 4-2) to DISENGAGE position.
3. Set the Depth Regulator Lever (Figure
4-2) to the Travel position.
4. Move Wheel Speed Lever (Figure 4-2)
to SLOW position and reduce the engine
throttle speed.
IMPORTANT: Look behind you before
you back down the ramp to ensure that all
is clear. While descending, keep checking
for obstacles behind you.
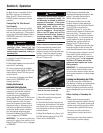
5. Move and hold the Wheels/Tines/PTO
Lever into REVERSE drive and back down
the ramps (Figure 4-8). Check the wheels
as you move the tiller backward. Ensure
that they move down the center of each
ramp.
Changing Speed Belts
Your tiller has two belt-driven speed
ranges – HIGH RANGE and LOW RANGE
– you pick one or the other by deciding
which set of pulley grooves to move the
forward belt into. By moving the belt
from one speed range into the other, in
combination with the FAST and SLOW
wheel speeds, you obtain a choice of four
different forward wheel speeds and two
different tine speeds.
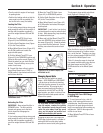
Changing the belt from LOW range into
HIGH range (or back again) is a matter of
moving the belt from one set of pulley
grooves to a second set of pulley grooves.
This change is done quickly and without
tools (Figures 4-9 through 4-13).
When the tiller is moving in REVERSE, the
wheels are powered by a rubber reverse
disc, not by the belt. Therefore, you have
only two reverse speeds SLOW and FAST,
as set with the Wheel Speed Lever.
Table 4-1 shows the range of wheel and
tine speeds available when using the two
belt speed ranges and the FAST and
SLOW selections on the Wheel Speed
Lever.
Changing Belt From LOW Range
to HIGH Range
1. To avoid personal injury, shut off
engine, let all moving parts come to a
complete stop, then disconnect spark
plug wire from spark plug and move it
away from spark plug before making any
adjustments. Wait for the engine and
muffler to cool down.
2. Move Wheels/Tines/PTO Drive Lever
into NEUTRAL.
19
Figure 4-7: To go up ramps, use
FORWARD drive.
Figure 4-8: To go down ramps, use
REVERSE drive.
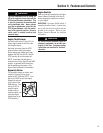
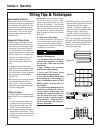
Figure 4-9: Belt range positions.
To help avoid serious personal injury,
stop the engine, remove the ignition
key, disconnect spark plug wire and
move the wire away from the spark
plug, and let engine and muffler cool
down before changing belt speeds.
WARNING
Low Range
Pulley
Grooves
High Range
Pulley
Grooves
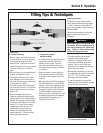
Table 4-1
Available wheel and tine speeds at 3000 RPM
engine speed.
Belt
Position
Wheel
Speed
Lever
Wheel
Speed
Tine
Speed
Low Range Slow .5MPH 146RPM
Low Range Fast 1.2MPH 146RPM
High Range Slow .7MPH 200RPM
High Range Fast 1.72MPH 200RPM