


Section 4: Operation
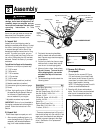
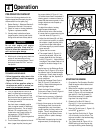
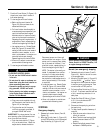
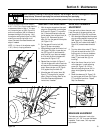
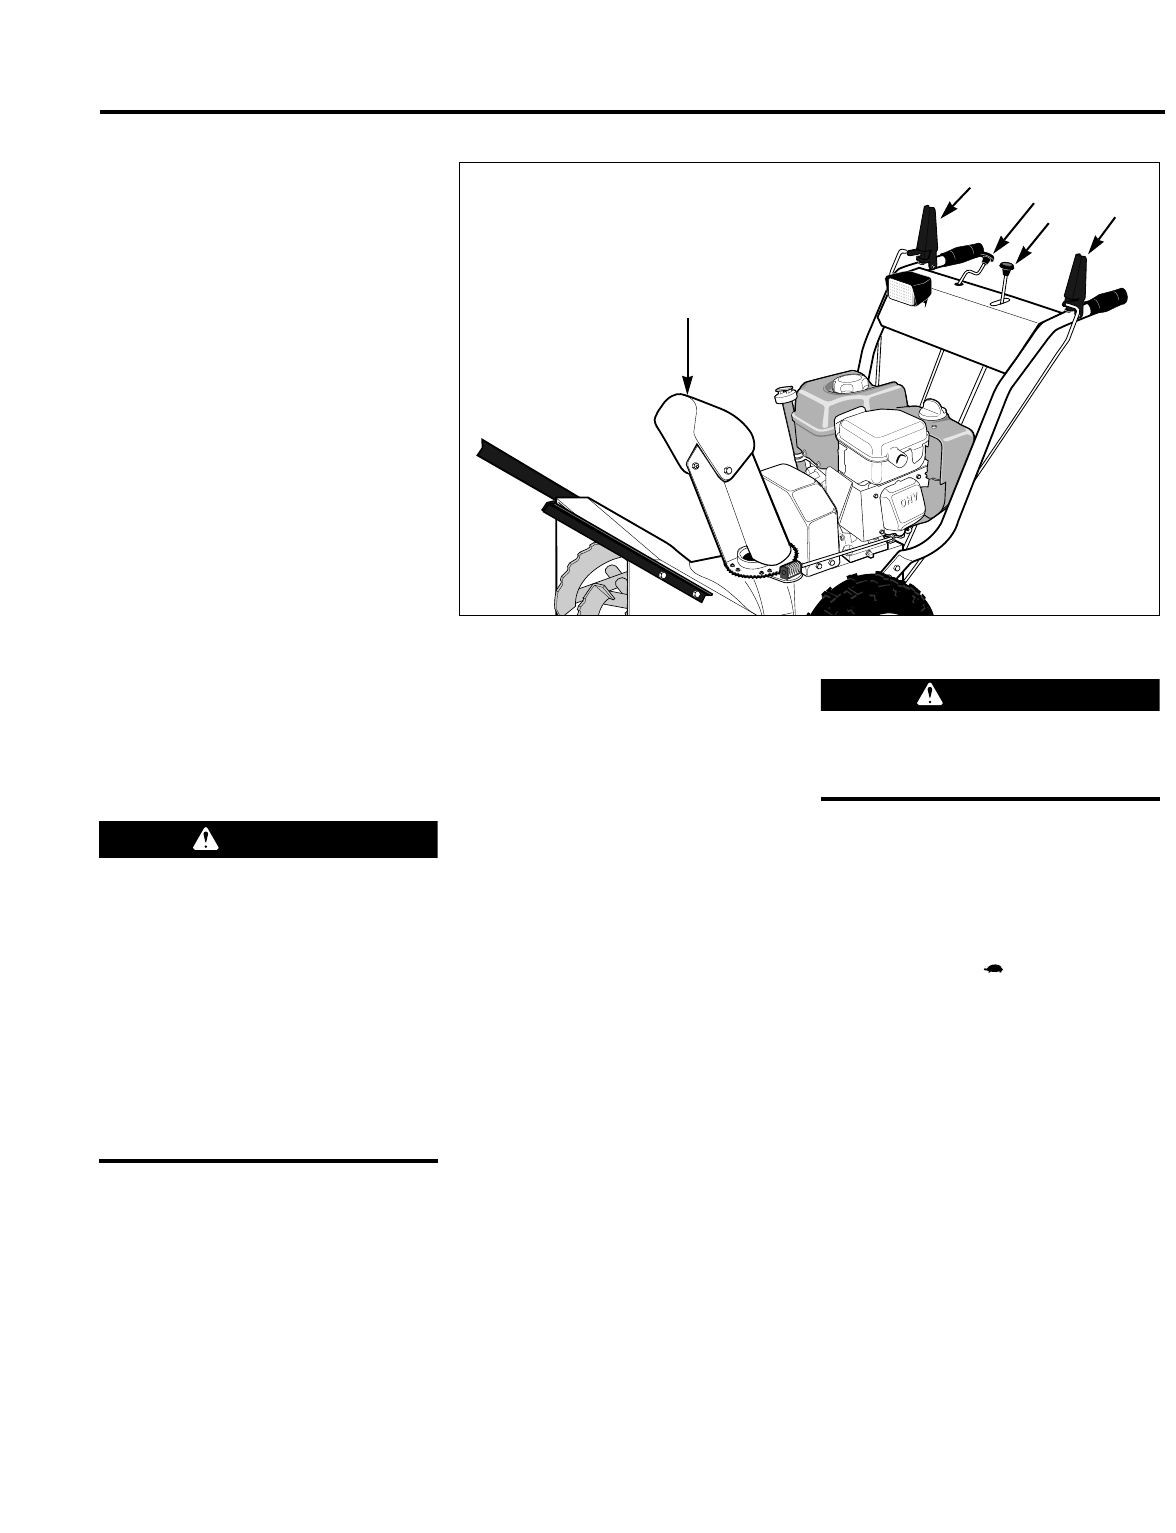
7. Push the Primer Button (O, Figure 4-2)
three times (cover hole in center of
bulb when pushing).
8. To start engine with recoil starter:
a. Before pulling recoil starter (N,
Figure 4-2), be sure there are no
obstacles behind you.
b. Pull recoil starter handle rapidly to
overcome engine compression, pre-
vent kick-back and start engine.
Maintain control of rope so it slowly
returns into the starter mechanism.
Repeat pulling until engine starts. If
engine fails to start, repeat starting
instructions beginning with Step 3.
c. Let engine warm up. Rotate Choke
Knob (M, Figure 4-2) toward RUN
setting a little at a time over several
seconds in warm weather, or min-
utes in cold weather. Let engine run
smoothly before each change.
Operate engine with choke in RUN.
d. Allow unit to adjust to outside tem-
perature before clearing snow.
8. To start engine with electric starter:
a. Plug power cord supplied with unit
into the electric start switch box (R,
Figure 4-2) on the engine.
b. Plug the other end of the power
cord into a properly grounded, 3-
pronged 120VAC wall outlet.
IMPORTANT: To prolong starter life, use
short starting cycles (five seconds maxi-
mum, then wait one minute).
c. Push the starter button (P, Figure
4-2) on the switch box. When the
engine starts, release the button.
Disconnect power cord from wall
outlet and then from engine. (Store
power cord in a secure place, safely
out of the reach of children.) If en-
gine fails to start, repeat starting in-
structions beginning with Step 3.
NOTE: The starter is thermally pro-
tected. If overheated from continu-
ous use, it will stop automatically
and can be restarted only when it
has cooled to a safe temperature (a
wait of approximately 5-10 minutes
is required).
d. Let engine warm up. Rotate Choke
Knob (M, Figure 4-2) toward RUN
setting a little at a time over several
seconds in warm weather, or min-
utes in cold weather. Let engine run
smoothly before each change.
Operate engine with choke in RUN.
e. Allow unit to adjust to outside tem-
perature before clearing snow.
STOPPING
Emergency stopping
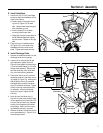
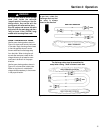
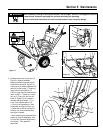
1. Release both control levers (F and G,
Figure 4-3).
2. Move the Throttle Lever (L, Figure 4-2)
to the STOP position or pull the engine
Stop Switch key (K, Figure 4-2) out.
Normal (non-emergency) stopping
1. Release both control levers (F and G,
Figure 4-3). Wait for the unit to come
to a complete stop.
2. Move the Throttle Lever (L, Figure 4-2)
into the SLOW “” position. Allow
the engine to idle for several minutes
to melt any snow on the engine. Then
move throttle to STOP position.
3. Pull engine Stop Switch key (K, Figure
4-2) out. To prevent unauthorized use
of unit, remove key and store it in a
safe place.
4. Rotate Fuel Shut-Off Valve (J, Figure
4-2) 1/4 turn clockwise to OFF
(closed) position.
5. Disconnect the spark plug wire from
the spark plug.
6. To help prevent possible freeze-up of
controls:
a. Wipe all snow and moisture from
vicinity of controls.
b. Move Throttle Lever back and forth
several times and leave in STOP
position.
c. Rotate Choke Knob several times
and leave in CHOKE position.
Figure 4-3
H
G
F
E
D
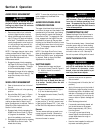
TO PREVENT ELECTRIC SHOCK:
• Do not use the 120VAC electric starter
in the rain.
• Do not stand in water or on damp sur-
faces when using the electric starter or
when connecting power cord.
• Connect the power cord only to a prop-
erly grounded, 120VAC wall outlet.
• Review electric start safety messages
in the Engine Owner’s Manual and in
Section 1 of this Manual.
WARNING
13
Do not attempt to stop engine by moving
Choke Control to CHOKE. Backfire, fire
or engine damage could occur.
WARNING