


16
Removal & Installation
Removal & Normal Installation
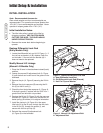
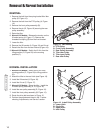
REMOVAL
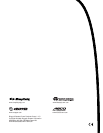
1. Remove the belt from the spring-loaded tiller idler
pulley (D, Figure 15).
2. Remove the belt from the PTO pulley (A, Figure
14).
3. Remove the front pulley assembly (B).
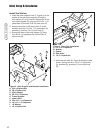
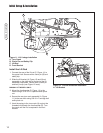
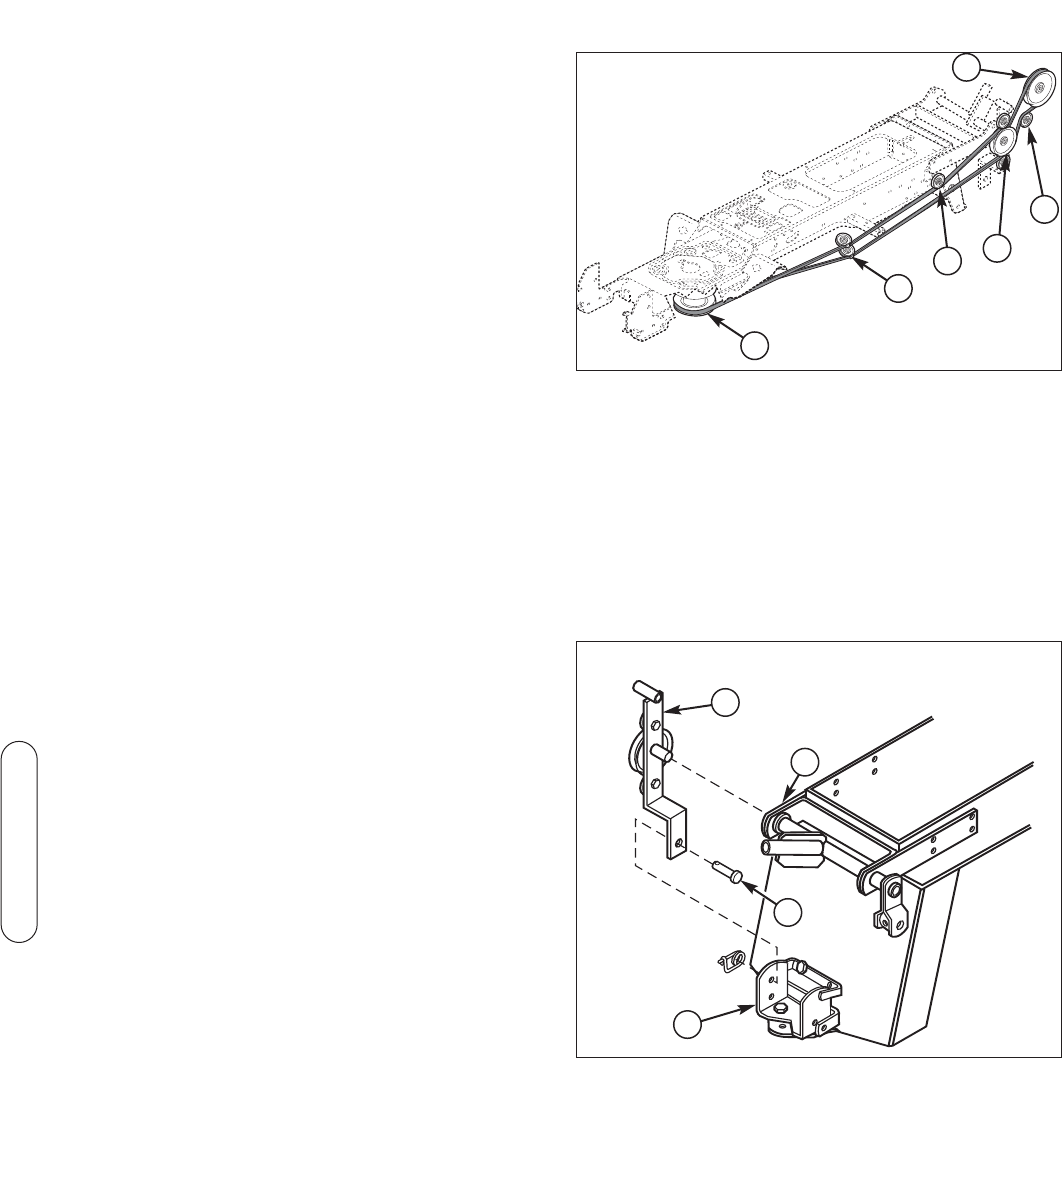
4. Remove the pin (B, Figure 16) securing the rear
pulley assembly.
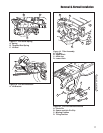
5. Raise the tiller.
6. Manual Lift Models: Release the tension on the
lift assist spring (A, Figure 17). Remove the
threaded rod spring (B) from the front bracket.
7. Lower the tiller.
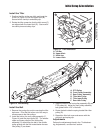
8. Remove the lift bracket (A, Figure 18) and lift rod.
9. Detach the tiller from the rear hitches (Figure 18).
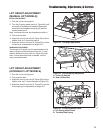
10.Manual Lift Models: Switch the lift link from the
tilling position (D, Figure 20) to the mowing
position (C).
1. Manual Lift Models: Switch the lift link from
mowing position (C, Figure 20) to tilling position
(D).
2. Attach the tiller to the rear hitch (see Figure 19).
3. Install the lift bracket (A, Figure 18).
4. Install the lift rod (C, Figure 17).
5. Manual Lift Models: Raise the tiller. Install the
lift assist spring assembly (A, B, Figure 18).
6. Install the rear pulley assembly (D, Figure 16).
7. Install the front pulley assembly (B, Figure 15).
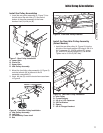
8. Route the drive belt as shown in Figure 15.
9. Perform the adjustments listed in the “Trouble-
shooting, Adjustments, and Service” section.
NORMAL INSTALLATION
A
B
F
D
E
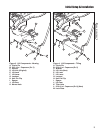
Figure 15. Belt Routing
A. PTO Pulley
B. Front Pulley Assembly
C. Rear Pulley Assembly
D. Tiller Idler Pulley
E. Tiller Input Pulley
F. Rear Idler Pulley
Figure 16. Install Pulley Assembly
A. Lower Hitch
B. Clevis Pin
C. Upper Hitch
D. Idler Pulley
A
C
D
B
C