


11
Setup & Installation
Initial Setup & Installation
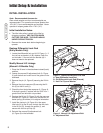
Install the Pulley Assemblies
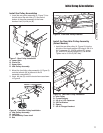
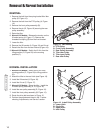
1. Install the rear pulley assembly (D, Figure 7) into
the left side of the rear hitch (C). Secure the
bottom of the pulley assembly to the lower
drawbar hitch (A) with pin (B).
D
C
A
B
Figure 7. Rear Pulley Installation
A. Lower Hitch
B. Clevis Pin
C. Upper Hitch
D. Idler Pulley Assembly
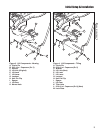
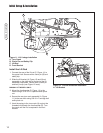
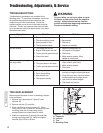
2. Mount the front idler pulley assembly (A, Figure 8)
onto the left stub (B) at the end of the lift
assembly cross-shaft (C).
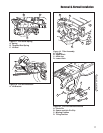
3. Hook the slot (D) onto the tractor frame as shown
in Figure 9.
Figure 8. Front Idler Pulley Installation
A. Idler Pulley Assembly
B. Left Stub
C. Lift Assembly Cross-shaft
D. Slot
Figure 9. Front Idler Pulley Installed
A
B
C
D
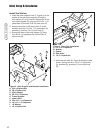
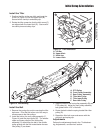
Install the Rear Idler Pulley Assembly
(Select Models)
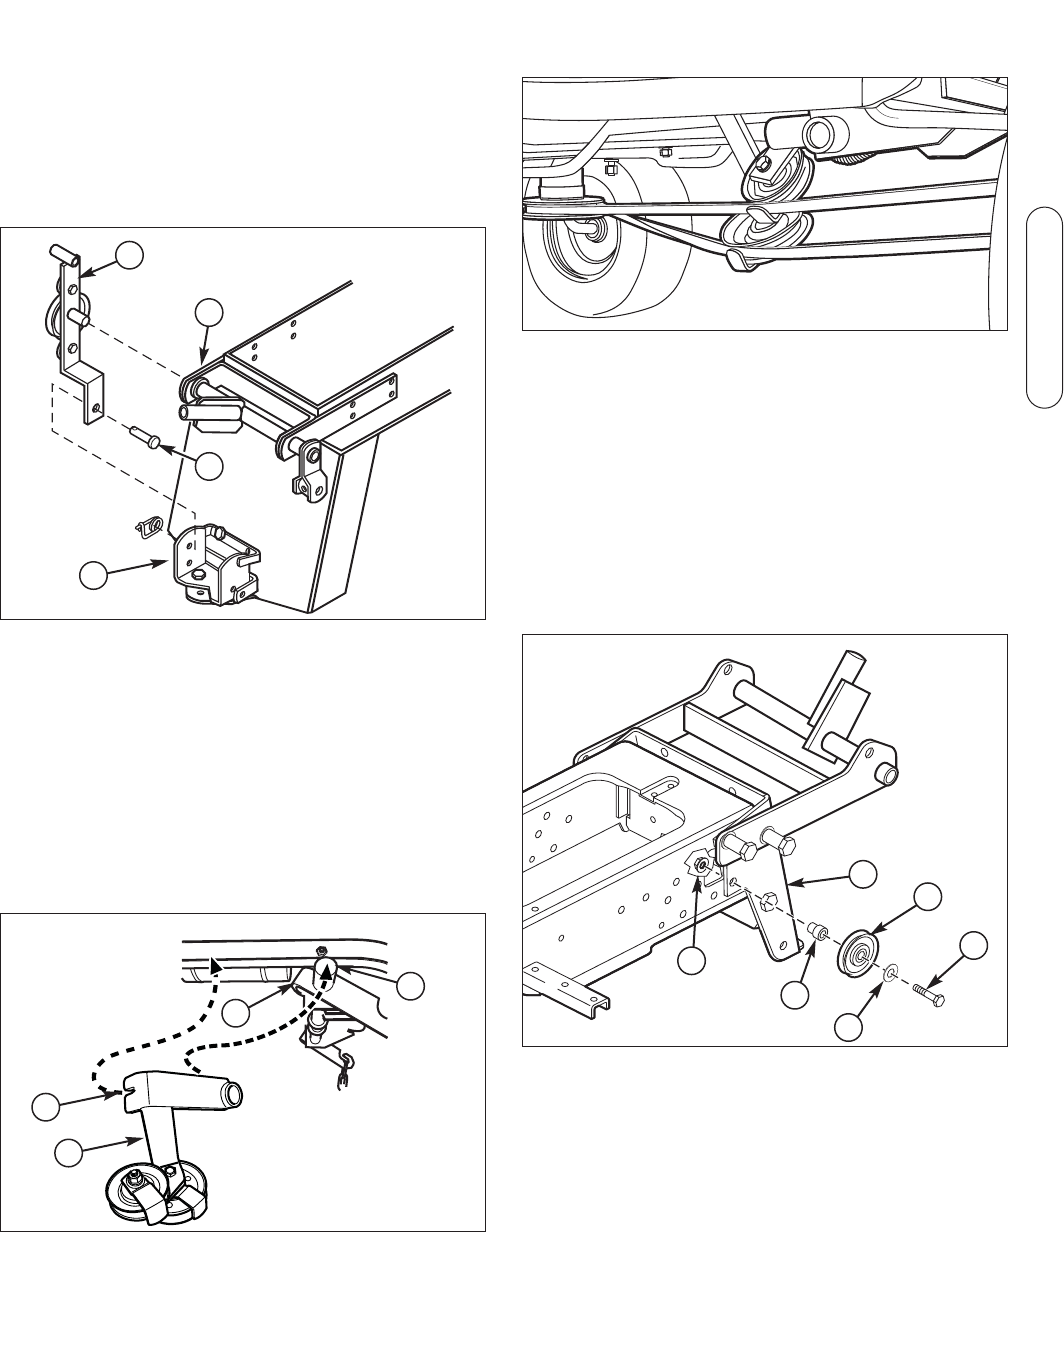
1. Install the rear idler pulley (A, Figure 10) into the
left side of the frame wrapper (B) using a 3/8-16 x
2-1/2 capscrew (C), 3/8 flat washer (D), spacer
(E), and 3/8-16 locking flange nut (F) as shown.
Tighten nut to 19.5 lb-ft (26.5 Nm).
B
E
A
D
F
C
Figure 10. Rear Idler Pulley Installation
A. Idler Pulley
B. Frame Wrapper
C. 3/8-16 x 2-1/2 Capscrew
D. 3/8 Flat Washer
E. Spacer
F. 3/8-16 Flanged Locknut