


10
Setup & Installation
Initial Setup & Installation
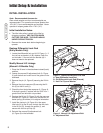
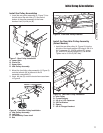
Install the Hitches
1. Install the lower drawbar hitch (F, Figure 5) on the
outside of the rear frame wrapper (E) and the
hitch support (C) on the inside. Secure both to the
rear frame wrapper (E) using two 5/16-18 x 1-1/4
capscrews (G) and two 5/16-18 nylock nuts (A).
2. Secure the bottom of the lower hitch (F) to the
drawbar using two 1/2-13 x 1-1/2 capscrews (H),
washers (I), and two 1/2-13 nylock nuts (J).
3. Secure the sides of the hitch support (C) using
four 3/8-16 x 1 capscrews (D) and four 3/8-16
nylock nuts (B).
D
B
A
C
C
B
E
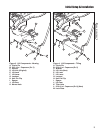
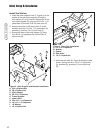
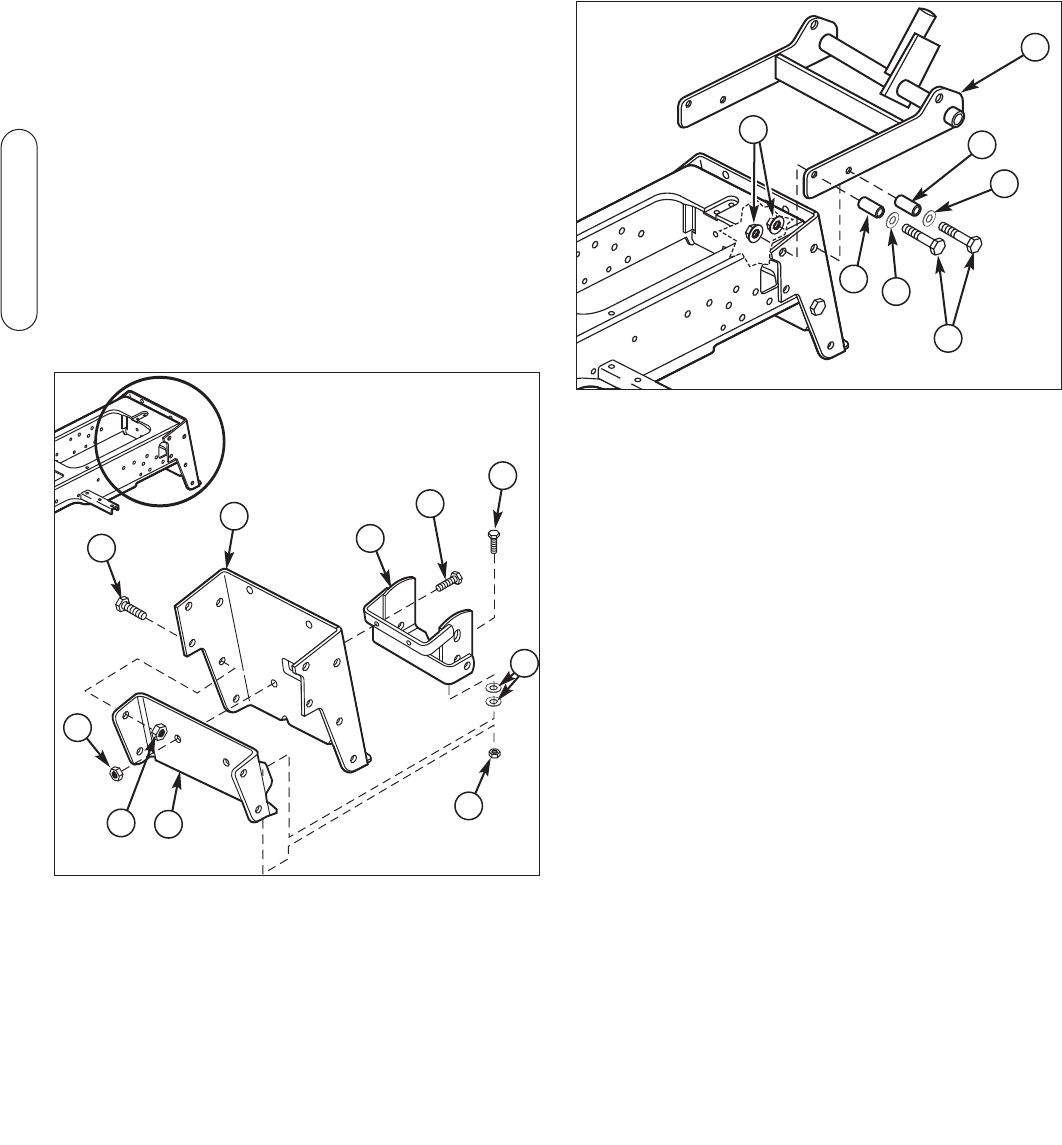
Figure 6. Rear Hitch Installation
A. 1/2-13 x 2 Capscrew
B. Washer
C. Spacer
D. Rear Hitch
E. 1/2-13 Nylock Nut
4. Install the rear hitch (D, Figure 6) using the holes
shown. Secure with four 1/2-13 x 2” capscrews
(A), washers (B), spacers (C), and nylock nuts
(E).
E
D
C
A
B
F
G
H
I
J
Figure 5. Hitch Support and Drawbar Installation
A. 5/16-18 Nylock Nut
B. 3/8-16 Nylock Nut
C. Hitch Support
D. 3/8-16 x 1 Capscrew
E. Frame Wrapper
F. Lower Hitch
G. 5/16-18 x 1-1/4 Capscrew
H. 1/2-13 x 1-1/2 Capscrew
I. 1/2 Washer
J. 1/2-13 Nylock Nut