


15
WARNING!
Before performing any maintenance,
repair, or cleaning work on the unit,
make sure the engine and cutting
attachment are completely stopped.
Disconnect the spark plug wire
before performing service or mainte-
nance work.
IMPORTANT!
For detailed maintenance information
about your
T230/231, AH230/231, or
PB230
, consult the owner's manual that
was provided with it. If it has been lost
or misplaced, contact Shindaiwa for a
replacement.
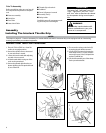
Maintenance
WARNING!
Non-standard parts may not oper-
ate properly with your unit and may
cause damage and lead to personal
injury.
IMPORTANT!
Using non-standard replacement parts
could invalidate your Shindaiwa war-
ranty.
Prior to each work day, perform the follow-
ing:
Clean any debris or dirt from the
cutting attachment. Check the bar
and chain for damage or incorrect
adjustment.
Daily Maintenance
WARNING!
The saw chain is very sharp. Wear
gloves to protect your hands when
working with or around the saw
chain.
Check for loose or missing screws or
components.
Check the entire machine for leaking
fuel or grease.
Make sure that nuts, bolts, and
screws (except carburetor adjusting
screws) are tight.
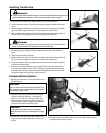
15-hour Maintenance
Every 15 hours of operation
(more frequently in dusty or dirty
conditions):
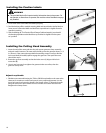
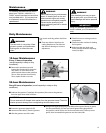
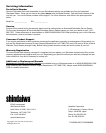
Remove the sprocket cover and
inspect the sprocket (A) for excessive
dirt, debris, or wear. Remove the
guide bar and clean out the guide bar
groove. If the sprocket is excessively
worn, replace it with a new one.
A
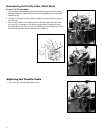
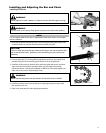
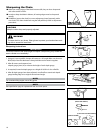
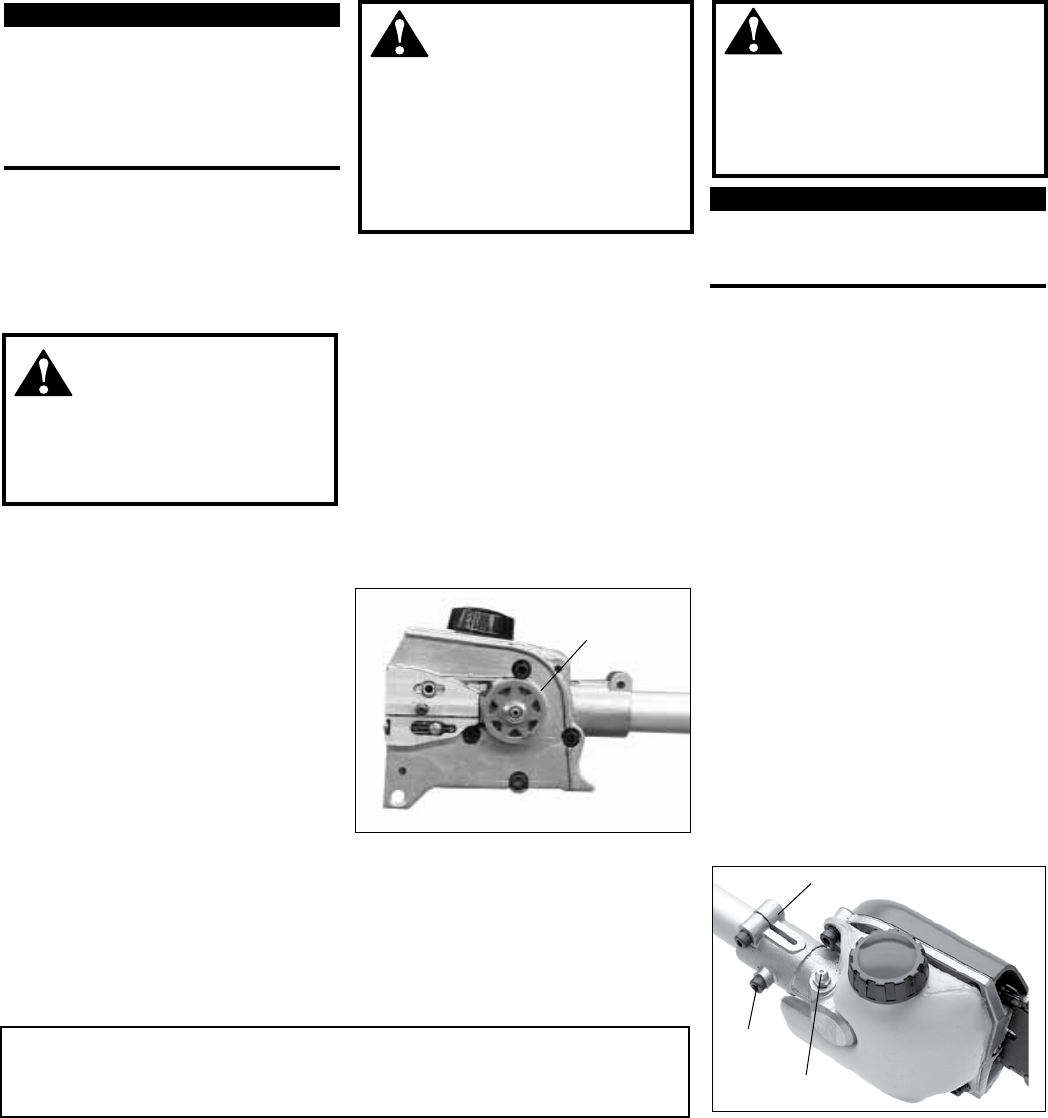
Lubricate the gearcase. To perform this operation, rst remove the gearcase
from the upper outer tube as follows.
CAUTION!
Do not remove the D-shaped shim washer from the gearcase clamp! The shim
washer prevents damage from overtightening the tube clamp screw.
■ loosen the gearcase clamp bolt (B).
■ remove the index bolt (C) from the gearcase.
■ slide the gearcase out of the tube.
B
C
D
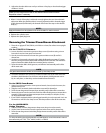
50-hour Maintenance
Every 50 hours of operation (more frequently in dusty or dirty
conditions):
■ Using a lever-type grease gun, pump lithium-base grease (about 10 grams)
into the grease tting (D) until you see old grease being purged from
the gearcase, which can be seen in the outer tube cavity. Clean up excess
grease, then reassemble the gearcase onto the outer tube.