


30 200-2341
Engine spark plugs are an important part of the
engine ignition system. Worn or incorrectly adjusted
spark plugs can negatively affect engine starting and
operation. Therefore, it is important to inspect and regap,
or replace the engine spark plugs as indicated in the
service interval table. The listed steps are recommended
to access and service the engine spark plugs.
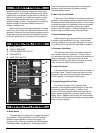
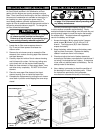
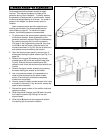
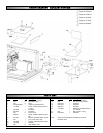
1. To gain access to the spark plug on the rear side of
the engine, some disassembly of the generator
cabinet is required. Begin the disassembly by
carefully removing the lid from the enclosure. First
remove the ground strap by removing the screw
holding it to the lid. Push in the hinge retaining stop
(A), then slide the lid (B) to the left to free it from the
rest of the enclosure as shown in Fig G. Set the lid
aside on a soft surface to avoid scratching the paint.
2. Open the battery access panel by removing the 3
screws and rotating the panel outward (see Fig. E on
page 28).
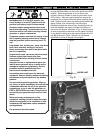
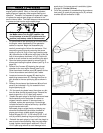
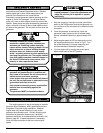
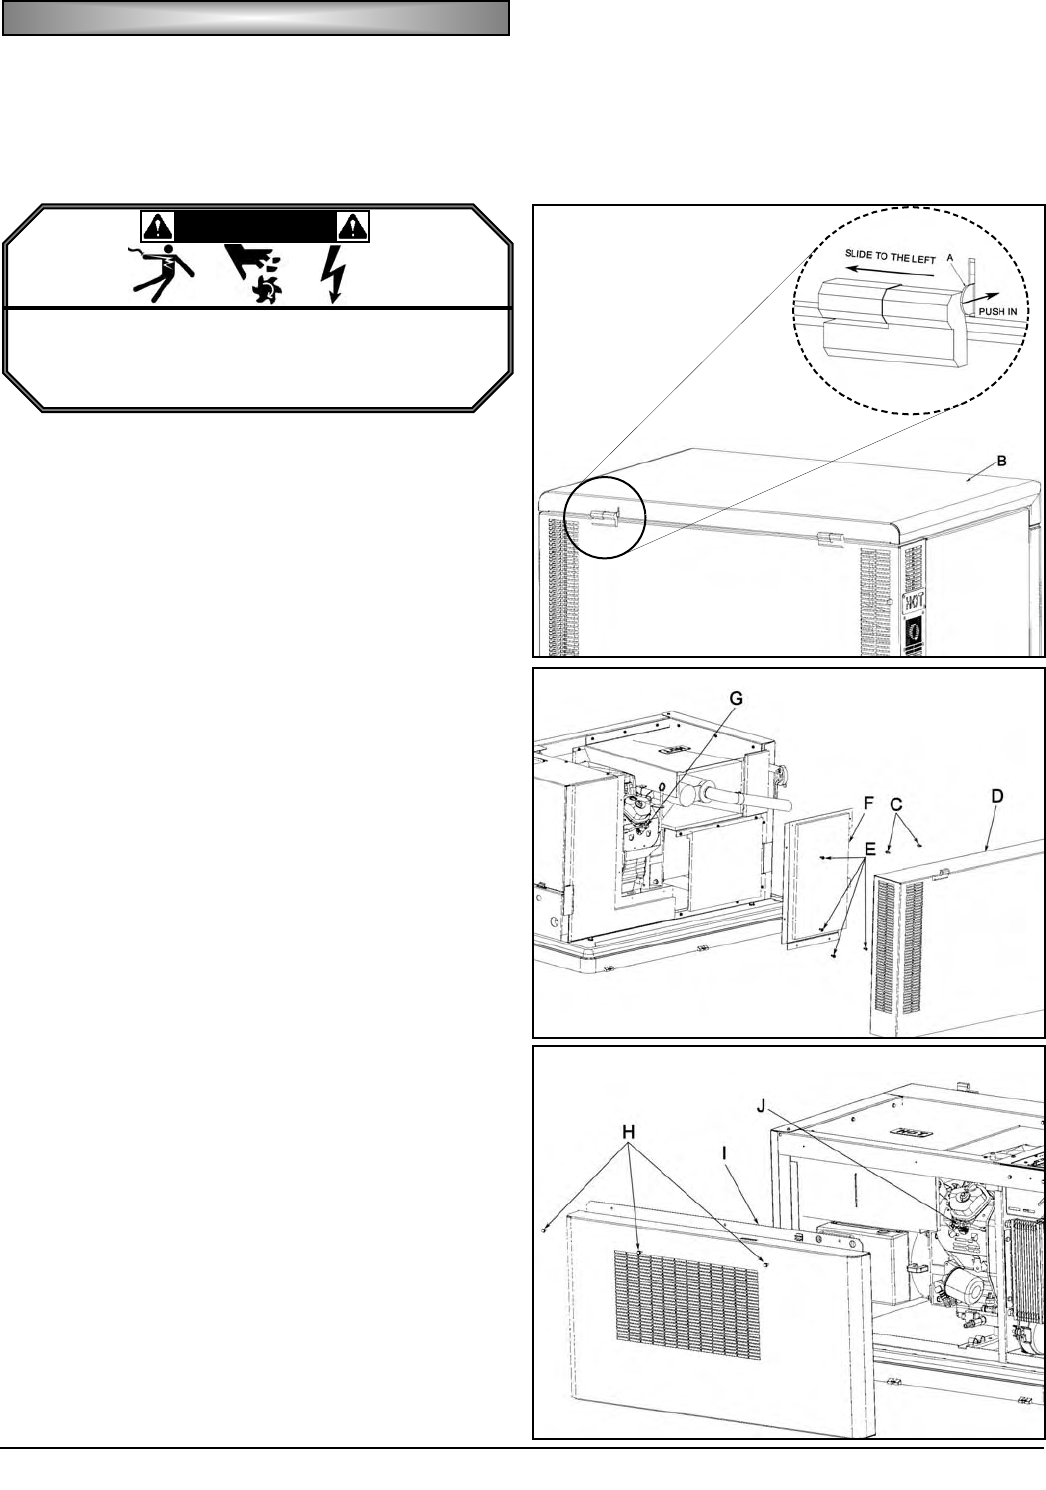
3. Remove the 2 screws (C) fastening the exhaust
chamber to the rear engine firewall (see Fig H).
Slide the exhaust chamber panel (D) upward to free
it from the enclosure and carefully set it aside.
4. Locate and remove the screws (E) retaining the
spark plug access cover (F). Remove the cover to
gain access to the rear spark plug (G) as shown in
Fig H.
5. Remove the enclosure inlet fasteners (H) and front
panel (I) as indicated in Fig I to access the front
engine spark plug (J).
6. Pull the spark plug boots loose, then clean any dirt
from the area around the spark plugs. Remove the
spark plugs with a 13/16" spark plug wrench.
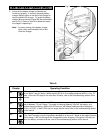
7. Inspect the spark plugs for fouling or abnormal wear
like excessively worn electrodes or cracked or
chipped insulator material. If abnormal wear is
indicated, replace the spark plugs. Fouled plugs
indicate the need for engine service by a qualified
engine service technician.
New spark plugs or plugs that do not display any
abnormal characteristics should be checked for
proper gap using a suitable spark plug gauge.
Adjust the gap to 0.012 - 0.016 inches (0.30 - 0.40
mm) by carefully bending the grounding electrode.
8. Reinstall the spark plugs by hand until they begin to
seat to avoid cross-threading. After the plugs begin
to seat, tighten used plugs an additional ¼ turn or
13/16" spark plug wrench to avoid damage to the
spark plugs. If a torque wrench is available, tighten
all plugs to 13 in-lbs (18 N-m).
9. Finish the procedure by reassembling the enclosure
front panel (I), spark plug access cover (F), exhaust
chamber (D) and enclosure lid (B).
SS
SS
PP
PP
AA
AA
RR
RR
KK
KK
PP
PP
LL
LL
UU
UU
GG
GG
CC
CC
HH
HH
EE
EE
CC
CC
KK
KK
Fig. G
Fig. H
Fig. I
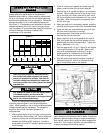
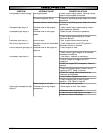
WWAARRNNIINNGG
• Before performing any maintenance, make sure
the Mode switch is in the OFF position, the
circuit breaker is in the OFF position and the
positive (red) battery cable is disconnected.