


8
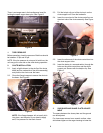
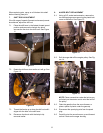
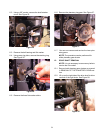
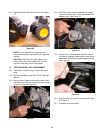
10.9. Holding the friction wheel assembly, slide the
hex gear shaft to the right. See Figure 22.
NOTE: It may be necessary to use a drift punch
on the left side of the shaft to drive it from the
bearing.
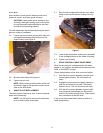
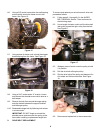
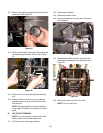
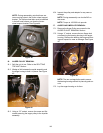
10.10.Lift the chain off the small sprocket.
10.11. Catch the bearing, sprocket and friction wheel as
they come off the shaft. See Figure 23.
NOTE: Maintain the correct order of parts during
disassembly.
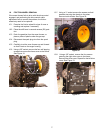
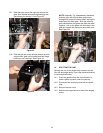
10.12.Inspect the friction wheel for wear or damage.
NOTE: The friction wheel can be replaced as an
assembly or repaired.
If you're replacing the friction wheel assembly as a
whole, discard the worn assembly and slide the new
assembly onto the hex shaft. Follow the steps above in
reverse order to reassemble components.
If you're disassembling the friction wheel and replacing
only the rubber ring, proceed as follows:
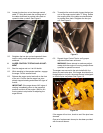
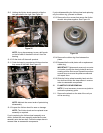
10.13.Remove the four screws that secure the friction
wheel's side plates together. See Figure 24.
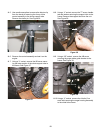
10.14.Remove the rubber ring from between the
plates.
10.15.Reassemble the side plates with a replacement
rubber ring.
IMPORTANT: Tighten each screw only one rota-
tion before turning the wheel clockwise and pro-
ceeding with the next screw. Repeat this process
several times to ensure the plates are secured
with equal force.
10.16.Slide the friction wheel assembly back onto the
hex shaft and follow the steps above in reverse
order to reassemble components.
11. PLANETARY GEAR REMOVAL
NOTE: It is not necessary to remove any belts to
service the planetary gears.
11.1. Remove the wheels on the side of the unit you
will be servicing.
Figure 22
Drift Punch
Friction Wheel Assembly
Figure 23
Hex Shaft
Figure 24