


6
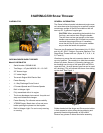
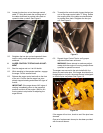
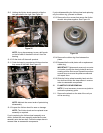
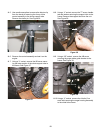
8.6. Using a 3/8” socket, remove the four self-tapping
screws which secure the frame cover to the
frame. See Figure 15.
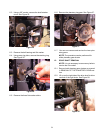
8.7. Using a piece of starter cord, unhook the support
bracket spring from the frame. See Figure 16.
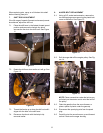
8.8. Using a 9/16” socket and a ¾” wrench, loosen
and remove the shoulder screw which acts as a
belt keeper.
8.9. Remove the belt from around the auger pulley,
and slip the belt between the support bracket
and the auger pulley
8.10. Reassemble auger belt by following instructions
in reverse order.
IMPORTANT: DO NOT forget to reinstall the
shoulder screw and reconnect the spring to the
frame after installing a replacement auger belt.
9. DRIVE BELT REPLACEMENT
To remove and replace your snow thrower's drive belt,
proceed as follows:
9.1. Follow steps 8.1 through 8.6 in the AUGER
BELT REMOVAL Section. Then continue with
the following steps.
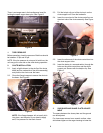
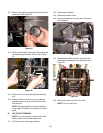
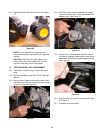
9.2. Use a length of starter cord to pull the drive belt
idler pulley toward the right, away from the belt.
See Figure 17.
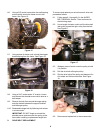
9.3. Wedge a piece of wood under the pulley to hold
it in position.
9.4. Roll the drive belt off engine pulley.
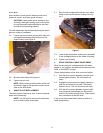
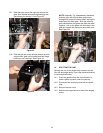
9.5. Slip the drive belt off the pulley and between fric-
tion wheel and friction wheel disc. See Figure
18.
9.6. Remove and replace belt in the reverse order.
Figure 15
Self Tapping Screws
Figure 16
Starter Cord
Support Bracket Spring
Figure 17
Starter Cord
Wood Block
Figure 18
Friction Wheel Disc
Drive Belt