


18
Which One’s the Alignment Star?
If you’re not familiar with objects in the night sky, how can you be sure if the star
in y
our eyepiece is really the alignment star?
The rule of thumb is that an alignment star is usually the brightest star in that
area of the sky. If you perform a GO TO to an alignment star and you're not sure
if you have located the alignment star or it isn't in the eyepiece, look through your
smartfinder. When you view an alignment star in the SmartFinder, it stands out
dramatically from the rest of the stars in that portion of the sky. The SmartFinder
will help y
ou locate a star more quic
kly than the e
yepiece. Using AutoStar, set the
sle
w speed to 6 (press Number k
e
y 6) or higher and use the Arro
w k
e
ys to
center the alignment star in the SmartFinder. If your SmartFinder has been
aligned with the telescope, the alignment star should now be in the eyepiece. Set
the sle
w speed to 4 or less and center the star in the e
y
epiece. Also see the
SPIRAL SEARCH tip, page 19.
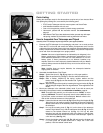
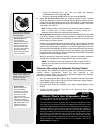
ETX TIPS
•
Grasp the telescope by a fork arm and rotate the telescope
counterclockwise until it stops (
Fig. 24).
• Re-lock the horizontal (
9, Fig. 1a) and vertical locks (6, Fig. 1b).
2.
Level, Tilt and Find North:
Ne
xt your telescope begins to move. AutoStar
moves your telescope so that it can calculate the level position and tilt of your tel-
escope
, and also calculate the location of True North.While it is performing these
functions, the following messages will appear on AutoStar’s display: “Calc Level,”
“Calc North” and “Calc Tilt.”
Note: During this step in the procedure, the telescope may not become
level or actually point to North. AutoStar is merely moving the
telescope about so that it can calculate these positions
.
3 . Star Alignment: Next, AutoStar continues to move the telescope (you don’t need
to press any buttons) in order to choose two stars for alignment. AutoStar will
display a name of a star and the word “Slewing” as it moves to the first star. It will
then prompt you to center the star.
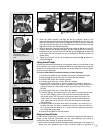
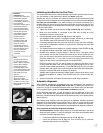
However, when the telescope slews to the first star, it may not appear in the field
of view in the eyepiece. Use the SmartFinder (
2, Fig. 1a) to locate the star. The
alignment star will be easy to recognize—it will be the brightest star in the area
of the sky where the telescope is pointing. Look through the SmartFinder and use
the Arrow keys to move the telescope until the star is visible. Then look through
the eyepiece and center the star using the Arrow keys. Press ENTER. Repeat the
procedure for the second alignment star.
When the procedure is performed correctly, "Alignment Successful" displays. If
AutoStar does not display this message, perform this procedure again.
NOTE: The alignment stars may change from night to night. All that is
required is for the observer to center the selected stars in the eyepiece
when prompted.
Observe a Star using the Automatic Tracking Feature
In this example, the AutoStar Arrow keys are used to find a star and then AutoStar's
tracking feature automatically keeps the star centered in your
telescope's eyepiece. Make sure you have initialized and aligned your telescope
before you try out this feature (see page 17).
1. Once your telescope has been aligned, “Align Successful” and then “Select Item:
Object” display. Push the Scroll Up key once and “Select Item: Setup” displays
2. Press ENTER. “Setup: Align” displays.
3. Press the Scroll Down key repeatedly until "Setup: Targets" displays. Press
ENTER.
4.
"Targets: Terrestrial" displays. Press one of the Scroll keys once. "Targets:
Astronomical" no
w displa
ys
.
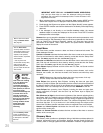
Fig. 24 [top view]: Rotate the
telescope tube counterclock-
wise until it stops.
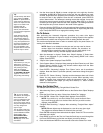
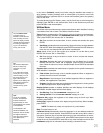
Fig. 25: During alignment, the
alignment star is always the
brightest star in the area of
the sky at which the
telescope is pointing.
Important Note:
While performing the
automatic tracking
procedure
, only use the
Arrow keys to move the
telescope. Once the
telescope has been
aligned, do not loosen the
telescope’s vertical or
horizontal locks (
6 and 9,
Fig.
1a and 1b
) or mo
ve
the base manually or
alignment will be lost.
Important Note: The
home position for
Automatic Alignment
is
different
than the home
position used with One
Star and Two Star Alt/az
alignments. See page 36
for setting the Home
Position during One Star
and Two Star Altaz
Alignment
Star