


20
Section 4: Adjustments
SB1051, SB1064, SB1574, & SB2584 with S/N 881640- Snow Blowers 370-027M
10/08/14
Table of Contents
Chute Rotation
!
WARNING
Never rotate chute to throw snow at the tractor. The Snow
Blower is capable of picking up large solid objects and
discharging them out the chute causing serious bodily injury
or death.
!
WARNING
Never operate Snow Blower with chute throwing snow
towards animals or people. The Snow Blower is capable of
picking up large solid objects and discharging them out the
chute at high speeds causing serious bodily injury or death.
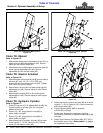
Chute rotation can be accomplished in one of three ways
depending upon which option was purchased.
Manual Rotation
1. Stop tractor, place gearshift in park, shut tractor
engine off and remove switch key. Stay on tractor
until PTO has come to a complete stop.
2. Turn rotation handle to rotate chute in the direction
snow is to be thrown.
3. Resume snow blowing once new chute angle is set.
Electric Motor Rotation
Refer to Figure 3-6 on page 17:
1. Stop tractor and place gearshift in park before
adjusting chute rotation angle.
2. Push and hold control box red toggle switch to rotate
chute to the left and pull and hold switch to rotate
chute to the right. Release toggle switch when
desired angle is reached.
3. Resume snow blowing once new chute angle is set.
Hydraulic Motor Rotation
1. Stop tractor and place gearshift in park before
adjusting chute rotation angle.
2. Push on hydraulic control lever to rotate chute to the
left and pull to rotate chute to the right.
3. Resume snow blowing once new chute angle is set.
IMPORTANT: Never operate a Snow Blower with
chute throwing snow towards property such as
vehicles, buildings, trailers etc. that can be
scratched, dented or broken by thrown projectiles.
IMPORTANT: Do not operate a Snow Blower that
throws snow towards the tractor or operator. Repair
chute rotation stop if chute can be rotated to throw
snow towards tractor and operator before putting the
Snow Blower back into service.
IMPORTANT: Adjustmentscrews onhydraulicmotor
are preset at the factory. Do not change factory
settings. Changing factory settings can cause
structural damage to the Snow Blower.
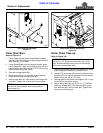
Discharge Chute Tilting
The end of the chute can be angled up or down to direct
blown snow up close or far away. This is accomplished in
one of three ways depending upon which option was
purchased.
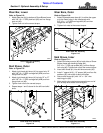
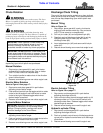
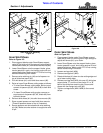
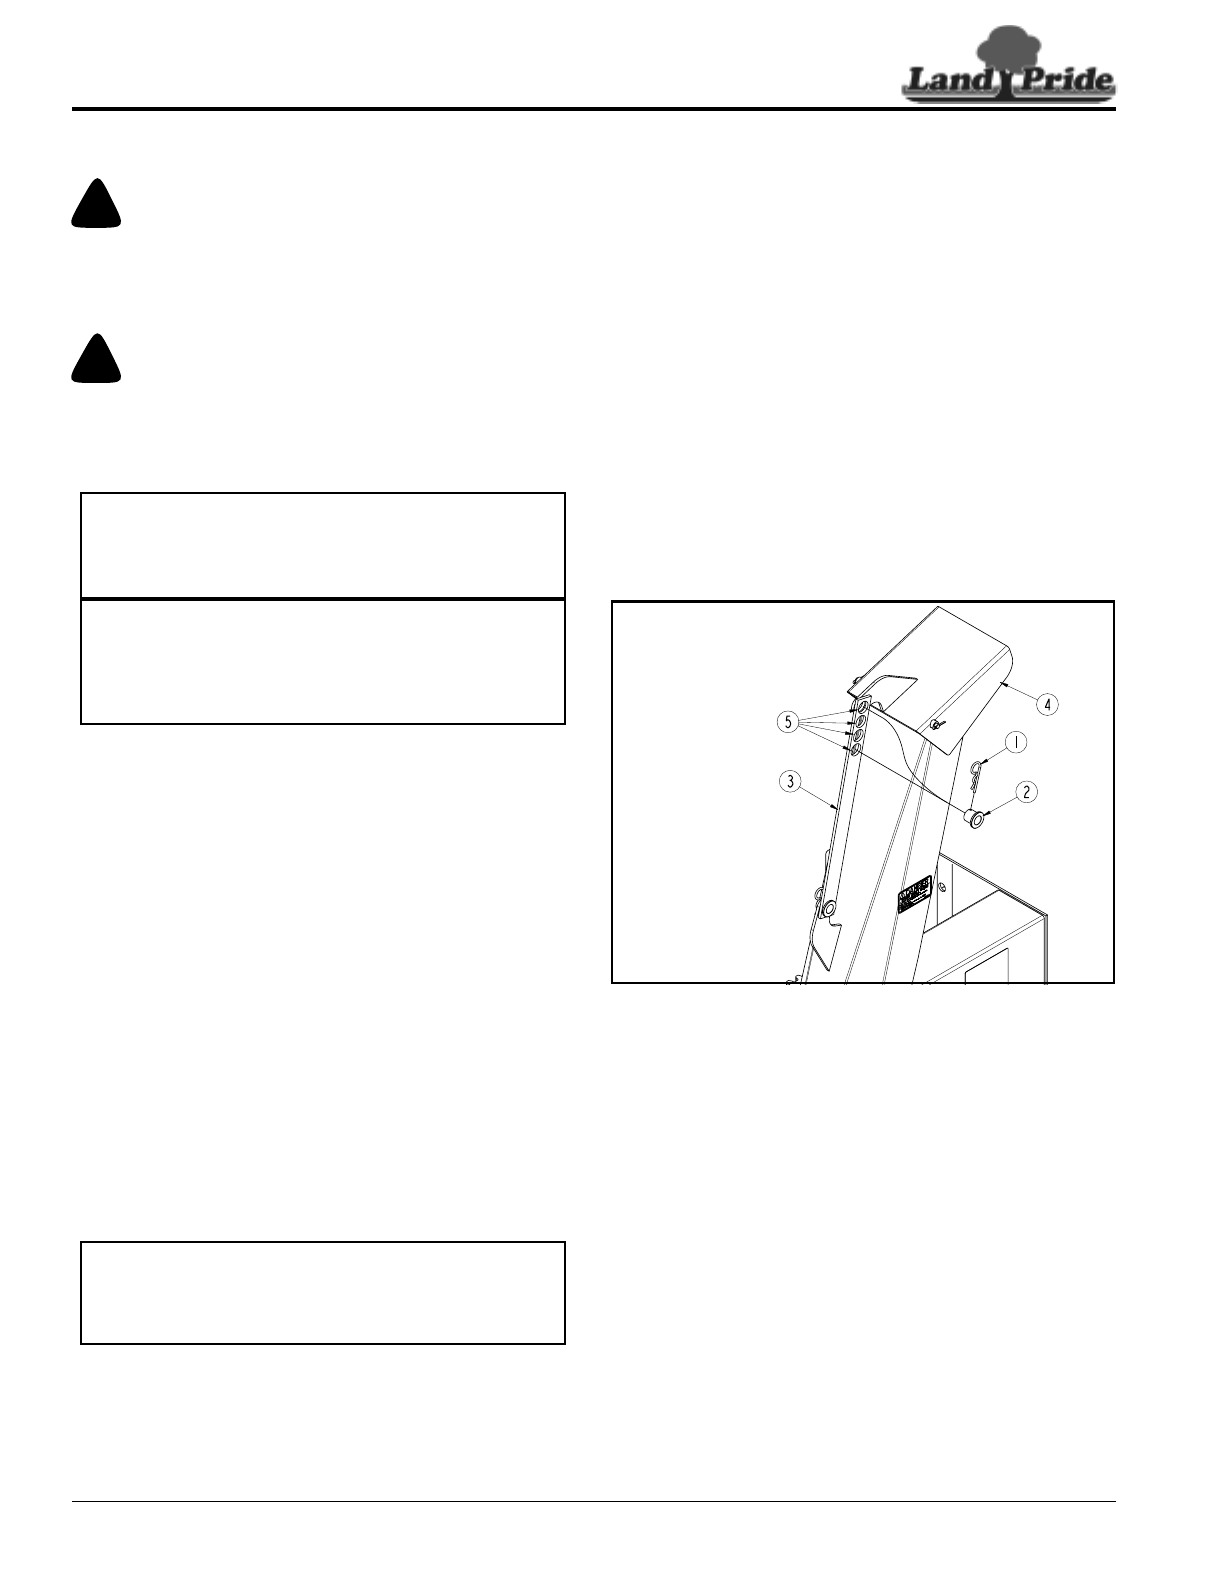
Manual Tilting
Refer to Figure 4-4:
1. Stop tractor, place gearshift in park, shut tractor
engine off and remove switch key. Stay on tractor
until PTO has come to a complete stop.
2. Pull hair pin cotter (#1) and adjustment pin (#2).
3. Readjust angle of discharge chute (#4) to suit by
realigning one of the 4 holes (#5) with hole in
discharge chute (#6).
4. Insert adjustment pin (#2) and secure with hairpin
cotter (#1).
5. Resume snow blowing once new chute angle is set.
Manual Chute Tilt
Figure 4-4
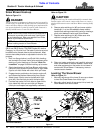
Electric Actuator Tilting
Refer to Figure 3-6 on page 17:
1. Stop tractor and place gearshift in park before
adjusting discharge chute tilt.
2. Push and hold control box white toggle switch to tilt
discharge chute up. Pull and hold on switch to tilt
discharge chute down. Release toggle switch when
desired angle is reached.
3. Resume snow blowing once new tilt angle is set.
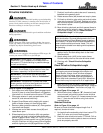
Hydraulic cylinder Tilting
1. Stop tractor and place gearshift in park before
adjusting discharge chute tilt.
2. Push on hydraulic control lever to tilt discharge chute
up and pull on hydraulic control lever to tilt discharge
chute down.
3. Resume snow blowing once new tilt angle is set.
33285