


14
Section 3: Tractor Hook-up & Unhook
SB1051, SB1064, SB1574, & SB2584 with S/N 881640- Snow Blowers 370-027M
10/08/14
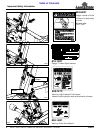
Table of Contents
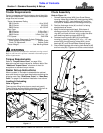
Snow Blower Hook-up
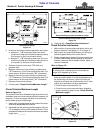
Refer to Figure 3-1:
!
DANGER
Tractor hook-up to equipment is dangerous and can result in
serious injury or death. Do not allow anyone to stand between
tractor and Snow Blower while backing-up to implement. Do
not operate hydraulic 3-point lift controls while someone is
directly behind tractor or near the Snow Blower.
A tractor with 3-point Category l hitch is required for
SB10 and SB15 Series. The SB25 Series will receive
Category l or ll 3-point hich.The lower 3-point arms must
be stabilized to prevent side-to-side movement. Most
tractors have sway blocks or adjustable chains for this
purpose.
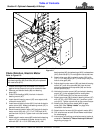
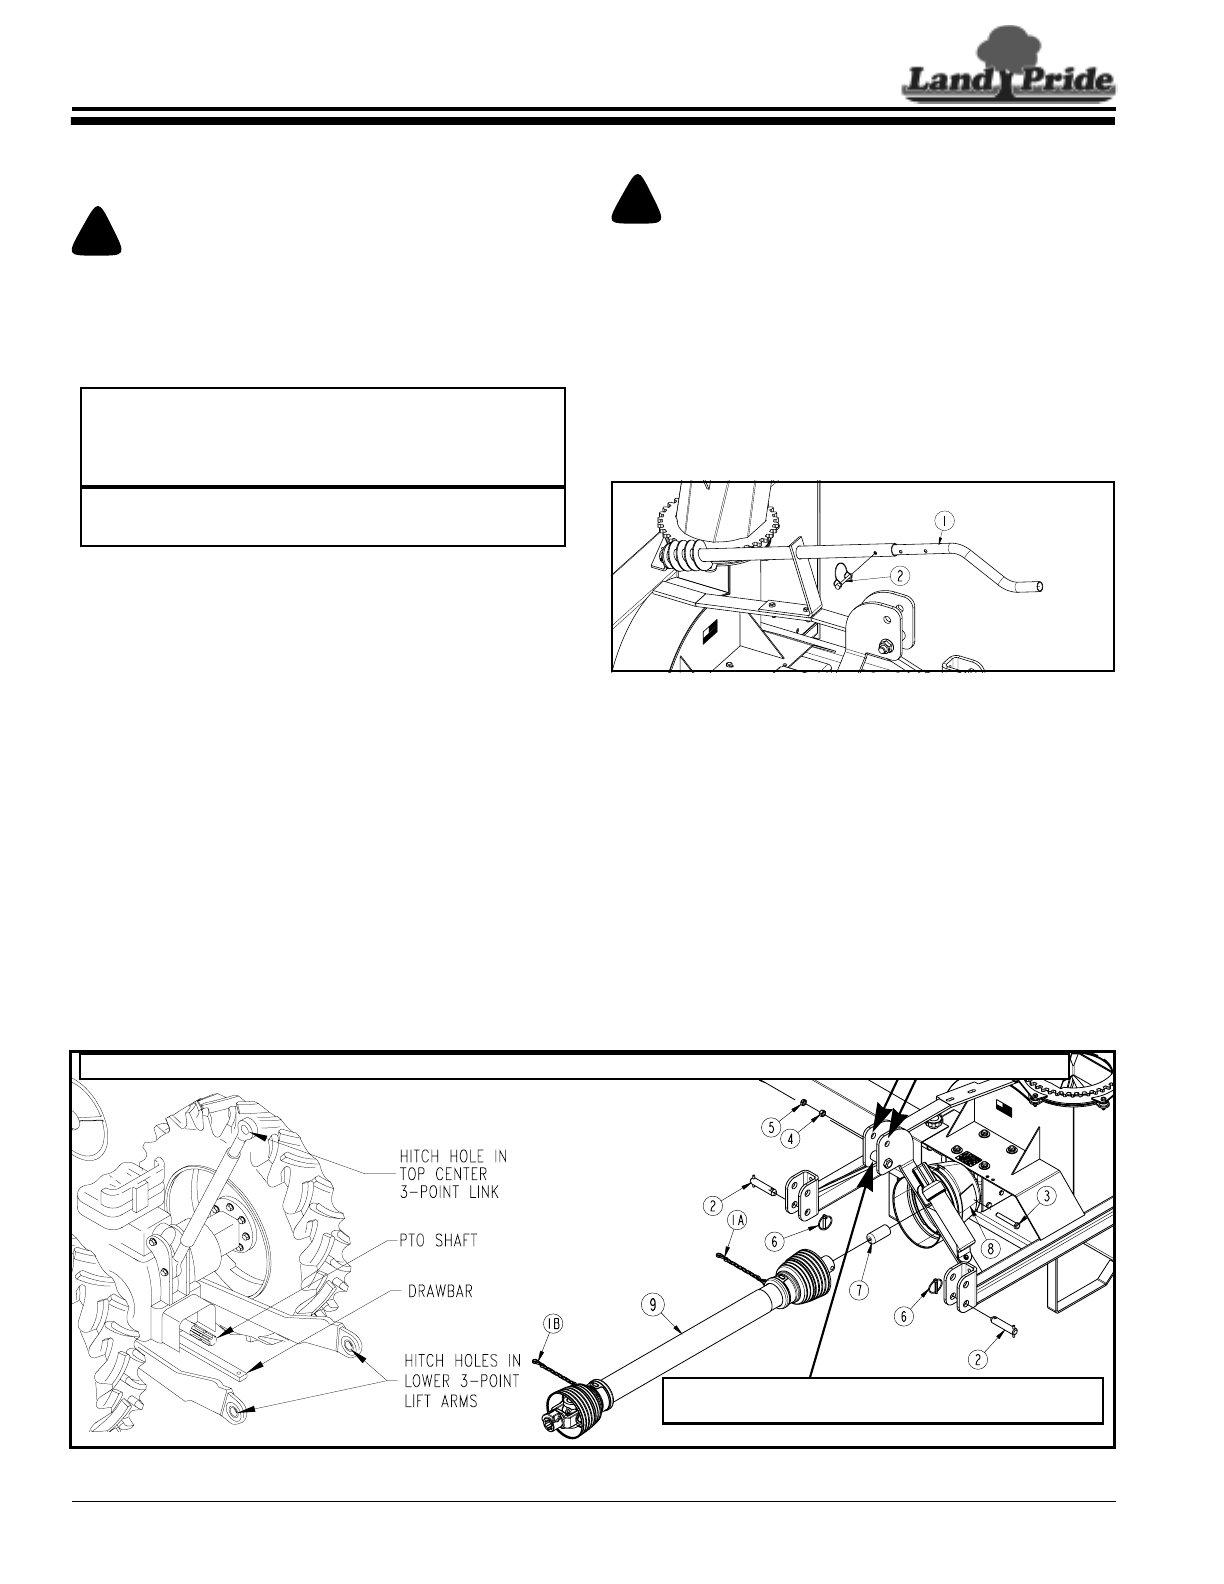
1. Bolt, hex flange locknut, and Quick-Hitch bushing
are moved to the lower clevis holes as shown when
making a 3-point hooking-up. Review “Hitch Pin
Locations” on page 19 before hooking-up to tractor.
2. Slowly back tractor to the Snow Blower while using
tractor’s 3-point hydraulic control lever to align lower
3-point arm hitch holes with clevis hitch pin holes.
3. Engage tractor park brake, shut tractor engine off,
and remove key before dismounting from tractor.
4. Attach lower 3-point arms to clevises with hitch
pins (#2). Secure hitch pins with linchpins (#6).
5. Connect top center link hitch hole to upper clevis
hitch holes with hitch pin and hitch pin keeper.
(Hitch pin and keeper are supplied by customer.)
NOTE: Land Pride’s Quick-Hitch can be attached to
the tractor to provide quick and easy 3-point hook-
up and detachment. See your nearest Land Pride
dealer to purchase a Quick-Hitch.
NOTE: Review “Hitch Pin Locations” on page 19
before hooking tractor to Snow Blower.
33276
Move Bolt, Hex Flange Locknut, & Quick-Hitch Bushing
to Lower Hole AS Shown When Making A 3-Point Hook-
23998
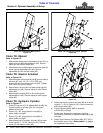
Driveline Installation
Figure 3-1
Section 3: Tractor Hook-up & Unhook
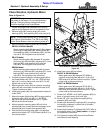
Center 3-Point Hitch Pin And Hitch Pin Keeper Are Supplied By Customer For Upper Hitch Holes When Making A 3-Point Hook-Up.
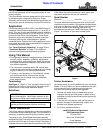
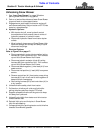
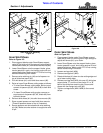
Refer to Figure 3-2:
!
CAUTION
If adjusted too long, the rotational handle for manual chute
rotation option can come in contact with tractor or create a
pinch point between tractor and Snow Blower causing bodily
injury.
6. Remove wire retaining pin (#2) and move rotation
handle (#1) in or out as needed to keep rotation
handle from making contact with tractor or creating a
pinch point between tractor and Snow Blower.
7. Replace wire retaining pin (#2). Make sure wire
retainer is caught over end of pin.
Manual Chute Rotation Handle
Figure 3-2
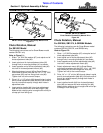
8. Return to tractor and slowly and carefully raise and
lower Snow Blower to ensure drawbar, tractor tires,
and other equipment on the tractor do not come in
contact with Snow Blower. If necessary, move or
remove tractor drawbar.
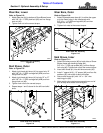
Leveling The Snow Blower
Refer to Figure 3-1:
1. Manually adjust one of the lower lift arms up or down
to level the Snow Blower from left to right.
2. Manually adjust length of top-center-link to level the
Snow Blower from front to back.
33290