


Automower from 49
6. Menu functions
™
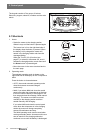
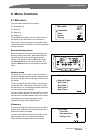
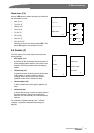
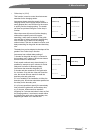
6.3 Commands (1)
This option in the main menu allows you to access
the following functions on the Automower.
• Charge then AUTO (1-1)
in order for the Automower to drive immediately
to the charging station, charge the battery and
then return to the automatic operating mode.
Select the function and press YES when the
cursor is on Yes.
• Show latest faults (1-2)
to show the list of saved fault messages. Browse
with the arrow buttons. The list can contain up to
20
fault messages and each message is shown
with the date and time.
• Make factory settings (1-3)
to restore all settings to their original values.
Everything except the language, PIN code and the
settings under the buttons A, B and are reset.
Select the function, enter your PIN code and press
YES when the cursor is on Yes.
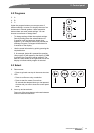
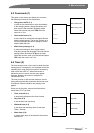
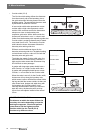
6.4 Timer (2)
The lawn should not be cut too often to obtain the best
mowing result. Consequently, it is important to limit the
operating time using the timer function if the working
area is less than 1800 m
2
. When Automower is
allowed to mow too much, the lawn may appear
flattened. Besides, the mower is subjected to
unnecessary wear.
The timer function is also an ideal means to control
during which periods the Automower should not mow,
for example, when the children are playing in the
garden.
When you set the timer, assume that Automower
mows about 75 m
2
per hour.
• Timer override (2-1)
to temporarily disconnect the timer function.
• Day timer (2-2)
to set the start and stop times.
• Weekend timer (2-3)
to set other start and stop times for the days
Friday
- Sunday.
• Week timer (2-4)
to select which days of the week the Automower
should mow.
1-
1
Charge then AUTO
Show latest faults
Make factory sett.
Commands
Timer
Garden
Settings
2-
2
Timer override
Day timer
Weekend timer
Week timer
Commands
Timer
Garden
Settings