


8
41457-01 7/2000
®
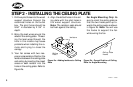
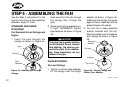
STEP 2 - INSTALLING THE CEILING PLATE
4. Align the slotted holes in the ceil-
ing plate with the pilot holes in
the wood support structure.
Note: The isolation pads should
be flush against the ceiling.
1. Drill two pilot holes into the wood
support structure through the
outermost holes on the outlet
box. The pilot holes should be
9/64" in diameter by 2 3/4" in
depth.
2. Bring the lead wires around the
sides of the ceiling plate. Thread-
ing the lead wires through the
hole in the middle may cause
problems when installing the re-
mote and trying to close the
canopy.
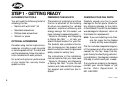
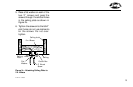
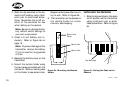
3. Your fan comes with two neo-
prene noise isolators. Position the
isolators between the ceiling plate
and ceiling by inserting the raised
areas on each isolator into the
holes in the ceiling plate. Refer to
Figure 2a.
Figure 2a - Adding Isolators to Ceiling
Plate
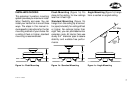
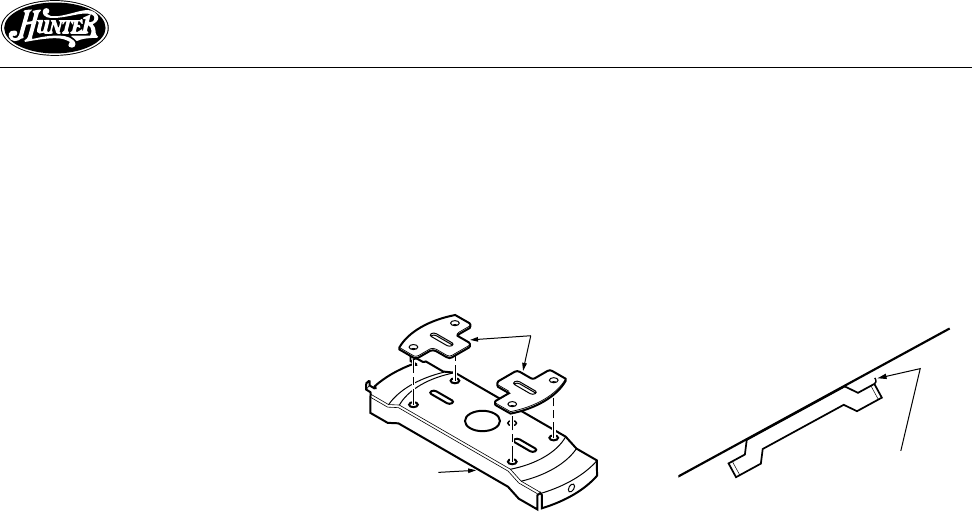
Figure 2b - Correct Position of Ceiling
Plate for Angle Mounting
Ceiling Plate
Hooks
Isolators
Ceiling
Plate
For Angle Mounting Only: Be
sure to orient the ceiling plate so
that the two hooks point up to-
wards the ceiling peak as shown
in Figure 2b. Note: You will use
the hooks to support the fan
while wiring the fan.