


4-25
Routine Service and Maintenance
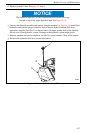
Replacing the Drive Sprocket
Overtime, the drive sprocket will wear, especially when used in sandy or clay soils. When this
happens, the digging chain will begin to slip. If the chain slips, replace the drive sprocket,
as follows:
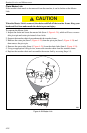
1. Raise the trencher a few inches above the ground.
2. Stop the engine and remove the key.
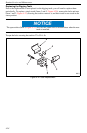
3. Remove the spoils auger (Item 1, Figure 4–22).
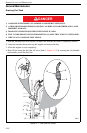
4. Loosen the chain tensioning bolt lock nut (Item 14, Figure 4–22) and then rotate the chain
tensioning bolt (Item 13, Figure 4–22) to loosen the trencher chain, until you can remove the
chain from the boom.
5. Remove the chain (Item 2, Figure 4–22) from the drive sprocket (Item 4, Figure 4–22) by
removing the master link pivot pin. See Chain Master Link later in this section.
6. Remove and discard the old drive sprocket, making sure to keep the drive key (Item 3,
Figure 4–22).
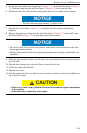
7. Clean the sprocket mounting surface on the trencher.
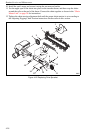
8. Slide the new sprocket onto the drive shaft, align the key ways and insert the key locking the
sprocket to the shaft.
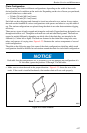
Inspect the trencher boom for signs of wear. If excessive wear is noted, flip the boom over or
replace it as needed. See Trencher Boom Replacement earlier in this section.
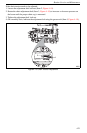
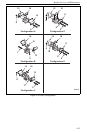
9. Loop the chain over the auger drive shaft and onto the drive sprocket, making sure that the
teeth point forward on the upper span.
NOTICE