MAINTENANCE
VERSA PRO 03/09 Maintenance Section 5-20
© 2009 Alamo Group Inc.
MAINTENANCE
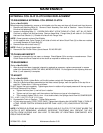
EXTERNAL COIL SLIP CLUTCH DISK REPLACEMENT
TO DISASSEMBLE EXTERNAL COIL SPRING CLUTCH
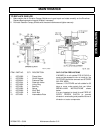
(Refer to Mnt-FL-0083)
Before beginning disassembly, remove or fold shields out of the way and clean off dirt and trash from the area.
1. Remove two Attaching Bolts (6). Remove Clutch Assembly from shaft of Gearbox. Leave Driveline or
Driveline Half attached to Clutch.
2. Loosen six Adjusting Bolts (1). LOOSEN EACH BOLT A FEW TURNS AT A TIME - NOT ALL AT ONCE.
Continue in rotation until Nuts are loose. Remove these Bolts. Flange Yoke (9) will slide off. On Clutches
that have Dust Shields (11), Shields will slide off with Flange Yoke.
NOTE: Some types do not have Dust Shields.
3. On the opposite side, Outer Flange (2) will slide off which will allow Clutch Plate (3) to slide over notches
on outside diameter of Clutch Body (5).
4. Remove Plate with six bolt holes (7).
NOTE: Bolts (1) go through these holes.
5. Remove the four Friction Disks (4) and discard. DO NO RE-USE.
TO CLEAN AND INSPECT
1. Inspect all components for rust, wear, or damage. Check Spacer (8) for scoring or excessive wear. Clean
Clutch Plates and Drive Plates with a wire brush as required to remove any rust.
TO REASSEMBLE
(Refer to Mnt-FL-0083)
1. After all parts have been inspected, cleaned or replaced as necessary, replace components in reverse
order from disassembly USING THE NEW, IMPROVED DISKS. Do not tighten the six Adjusting Nuts and
Bolts (1) until assembly is complete.
TO ADJUST
(Refer to Mnt-FL-0083)
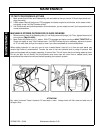
1. To adjust Slip Clutch, tighten Bolts until the Nut makes contact with Compression Spring.
2. After all six Bolts have been assembled so that Nuts contact Springs, mark the position of the top flat on
each Nut. Tighten Nuts 1-3/8 turns as follows:
Do NOT tighten one bolt completely. Tightening as shown in rotation will put equal pressure all the way around
on Friction Disks and Drive Plates.
a. Tighten the Nuts (Item 1) one-half turn in rotation.
b. Tighten one-half turn again until the marks on the Nuts are on top as in the beginning.
c. Then, carefully tighten 3/8 of a turn. As a double check, the Springs should now be COMPRESSED
TO 1-11/32" (1.34") TO 1-5/16" (1.31") long.
3. Re-assemble Clutch to Gearbox. Tighten Bolts securely.
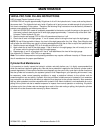
4. If Clutch slips too easily, STOP PTO AT ONCE. Tighten each Adjusting Nut NO MORE THAN ¼ TURN AT
A TIME. NEVER TIGHTEN SPRINGS SHORTER THAN 1-9/32" (1.28") LONG EVEN AFTER DISK
WEAR.
NOTE: EXCESSIVE SLIPPING WILL BURN UP DISKS AND SLIP CLUTCH TO THE POINT WHERE THE
CLUTCH IS NOT REPAIRABLE. HOWEVER, EXCESSIVE TIGHTENING WILL PREVENT THE SLIP
CLUTCH FROM SLIPPING AND CAN LEAD TO FAILURES OF DRIVETRAIN COMPONENTS WITH
RESULTING DOWNTIME.


