EPSON Stylus Color 900 Revision C
Disassembly and Assembly Disassembly Procedures 106
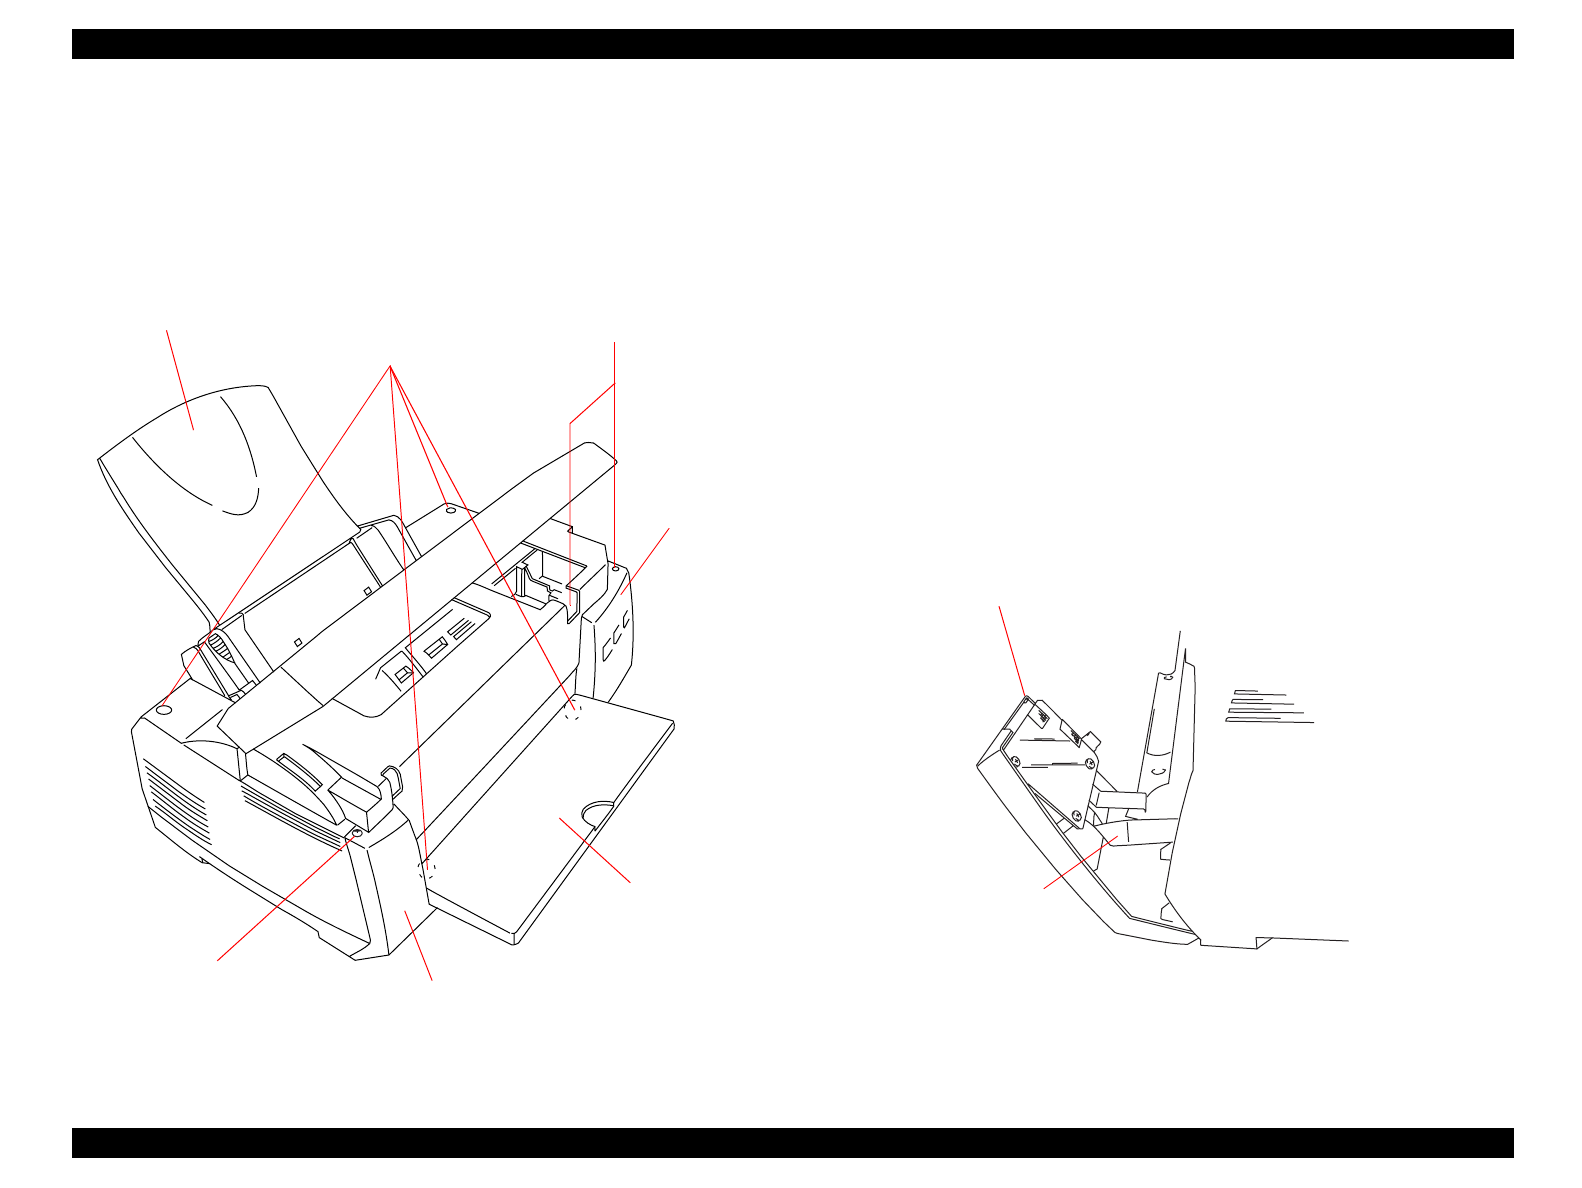
4.2.1 Upper Case and Control Panel Removal
1. Remove the sheet guide.
2. Open the upper case.
3. Open the output tray.
Figure 4-2. Upper Case Removal
4. Remove one screw securing the front case (on the left) to the printer
mechanism, then pull the front case forward and remove it from the
printer.
5. Pull the output tray to the left and remove it.
6. Remove two screws securing the control panel to the printer
mechanism to release the control panel. Then disconnect the FFC
from the control panel and remove the control panel from the printer.
7. Remove four screws securing the upper case. When assembling,
note the only CBS Tight screw among four must be used at the rear
right of the upper case.
8. Lift up the front edge of the upper case, then remove the whole case
by tilting it along the ASF.
Figure 4-3. Control Panel Removal
Sheet Guide
Screws securing
the Upper Case
Screws securing
the Control Panel
Output Tray
Screws securing the
Front Case
Front Case
Control
Panel
FFC for the
Control Panel
Control Panel


