


9
S Charge c ontinuously when notin use. Con-
tinuous charging will not damage the bat-
tery. The charger will automatically keep
the battery charged and ready for use dur-
ing st orage.
S During charging, the char ger becomes
warm. This is normal and means the char-
ger is operating correctly.
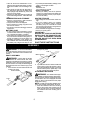
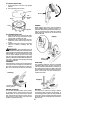
TO CH AR GE YOUR UNIT:
1. Place the tr im mer in the wall bracket.
2. Plug the charger into a standard house-
hold electrical outlet.
3. When properly connected, theredcharge
indicator light (LED) will glow.
NOTE: The red charge indicato r light
(LED) on the charger glows continuously
during charging.
4. The battery will be fully charged in 24
hours.
RECHARGING YOUR UNIT
S Recharge thebattery as soonas thecutting
power ofyourcordless trimmeris no longer
effective.
S A void running the battery into full dis-
charge, i.e.avoid dr ainingthe battery com-
pletely.
S Follow the procedure outlined in the
CHAR GING YOUR UNIT section.
S Recharging the battery according to these
instructions should ensure maximum bat-
tery life.
S Donotrechargethe batt eryin anarea ofex-
treme heat or cold. It will work best at nor-
mal room temperature.
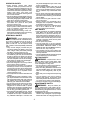
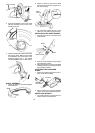
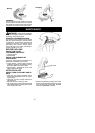
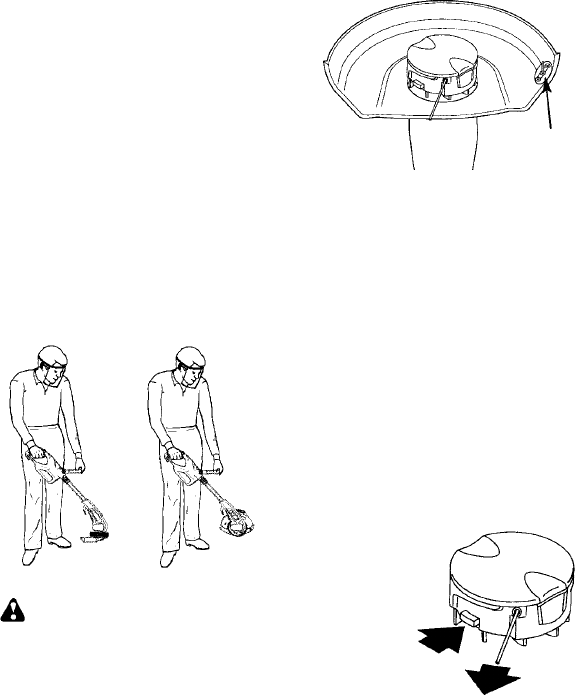
CORRECT OPERATING POSITION
Trimming Edging
WARNING: Always weareyeprotec-
tion. Never lean over the trimmer head.
Rocksor debr isca nricochet orbe thr owninto
eyes and face and cause blindness or other
serious injury.
When operating unit, stand as shown and
check for the following:
S Wear eye protection and heavy clothing.
S Hold trigger handle with right hand and as-
sist handle with left hand.
S Keep unit below waist level.
S Cut only from your right to your left to en-
sure debris is thrown away from you. Wit h-
out bending over, keep line near and paral-
lel to the ground and not crowded into
material being cut.
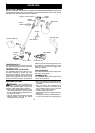
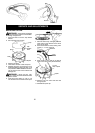
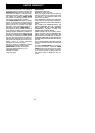
ADVANCING THE CUTTING LINE
Thecut tingheadadvanceslineautomat-
ically. Do not tap head on the ground to
advance line. This may br eak parts and
caus e c utting head to malfunc tion.
Always keep the shield in placewhen the tool
is being operated.
Line Limiter Pin
Shield
After approximately 5seconds,thelinewillbe
cut to the correct length by the line limiter pin
as the motor reaches full speed. Make sure
the motor is up to full speed before trim-
ming. If the noise of the cutt ing line be ing cut
cannot be heard, more l ine will need to be fed
out.
To feed more line:
S Allowthemotortostopcompletely; then,re-
start the motor and allow it to reach full
speed.
S Repeat untilyouhear theline hittingagainst
the l ine limiter pin(do not r epeatthis proce-
dure more than 6 times).
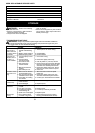
If problems a re exper ienced with the auto-
matic line feed, refer to t he TROUBLE-
SHOOTING TABLE.
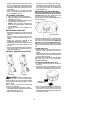
To manually feed the nylon line:
S If required, the cutting line can be fed out
manually .
S To operate, press and release manual line
feed button while gently pulling on one of
the line until it reaches the line limiter pin.
Manual Line
Feed Button
S If the line extends past the line limiter pin,
too m uch linehas been fedout. If too much
line is fed out, remove the spool cap and
clickspoolcounterclockwiseuntiltheline is
at the desired length.