


Se rvice
7
15
Augers
The augers are secured to the spiral shaft with four shear pins and
cotter pins. If you hit a foreign object or ice jam, the snow thrower
is designed so that the pins may shear.
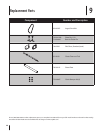
If the augers do not turn, check if the pins have sheared. Replace,
if needed, with proper shear pins. Refer to Parts List for correct
part number.
CAUTION: NEVER replace the auger shear pins
with standard pins or fasteners. Any damage to the
auger gearbox or other components, as a result of
doing so, will NOT be covered by your snow
thrower’s warranty.
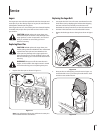
Replacing Shear Pins
CAUTION: NEVER replace the auger shear pins
with anything other than OEM Parts No. 738-04124A
replacement shear pins and 714-04040 bow-tie
cotter pins. Any damage to the auger gearbox or
other components as a result of failing to do so will
NOT be covered by your snow thrower attachment’s
warranty.
WARNING! Always turn off the snow thrower’s
engine, as instructed in the engine owner’s manual
and remove the key prior to replacing shear pins.
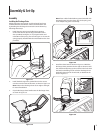
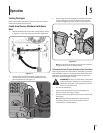
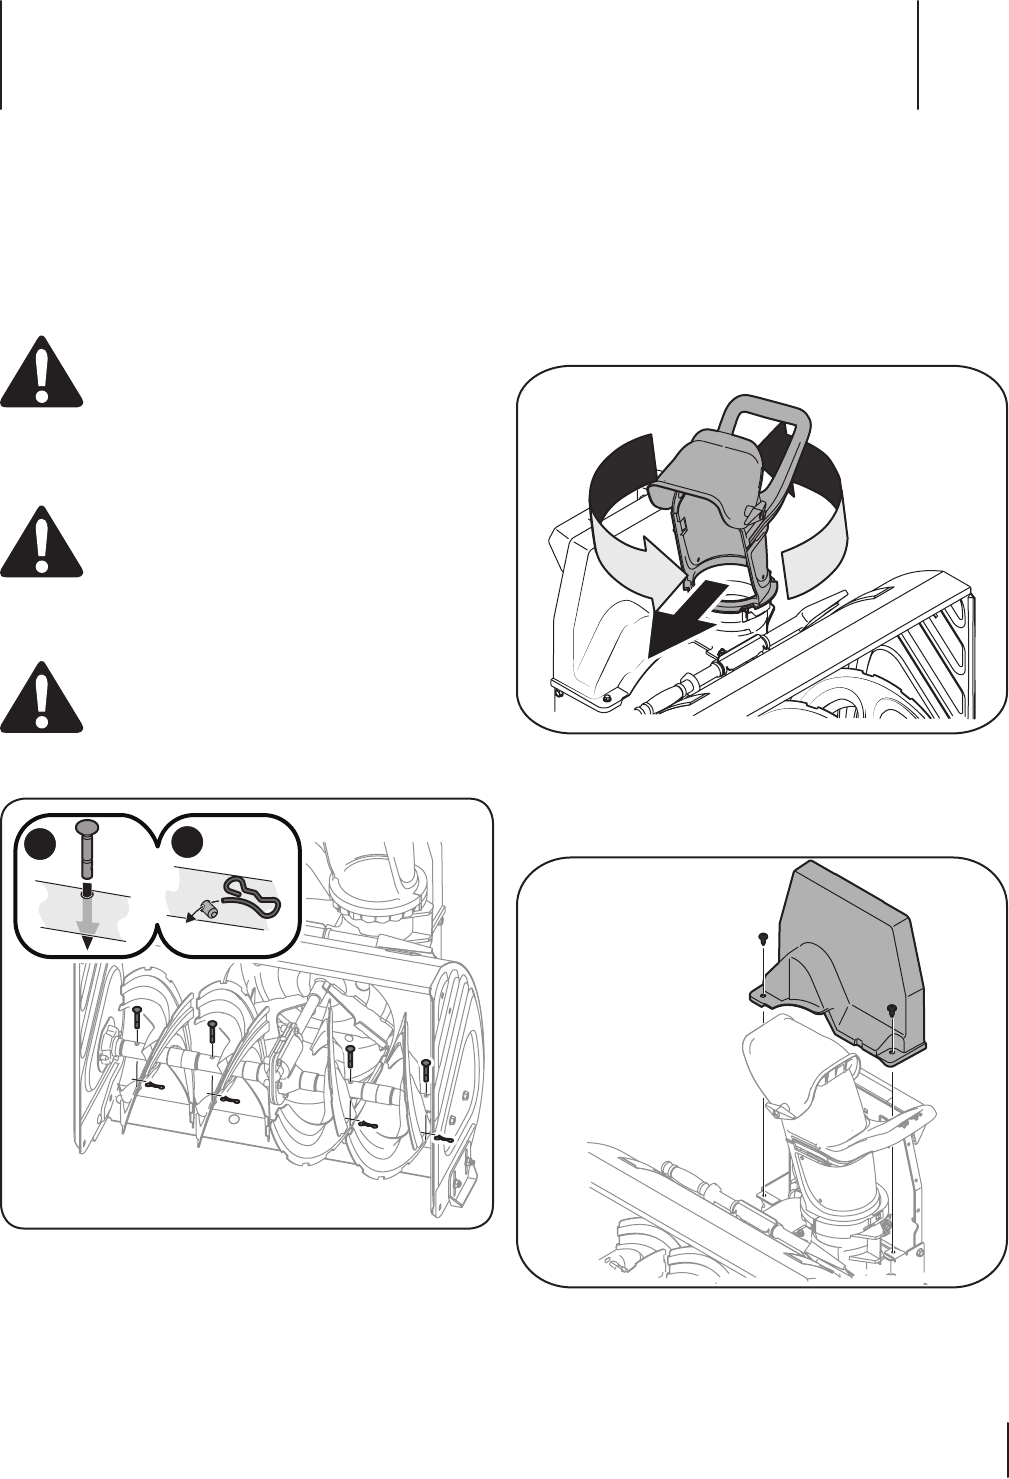
1. Replace the shear pins as shown in Figure 7-1.
1
2
Figure 7-1
Note: Two replacement shear pins and bow-tie cotter pins
were included with this attachment.
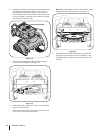
Replacing the Auger Belt
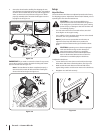
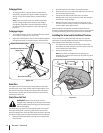
2. Uncouple the FLEX™ Snow Thrower attachment from the
FLEX™ Base Unit by deploying the kickstand and tipping
the base unit forward. Carefully move the base unit
backwards and away from the snow thrower attachment.
3. Park the FLEX™ Base Unit in a safe and stable location.
4. Rotate the discharge chute to the right as shown in Figure
7-2.
Figure 7-2
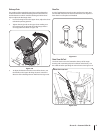
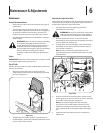
3. Remove the two self-tapping screws shown in Figure 7-3,
and lift the belt cover up and away from this device. Set it
and the screws aside and save.
Figure 7-3