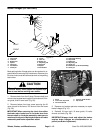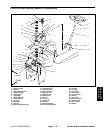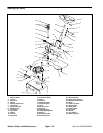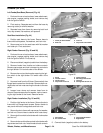
Upper Steering Disassembly (Fig. 19)
NOTE: If disassembly above the steering knuckle is re-
quired, use the following procedure.
1. Park machine on a level surface, lower attachment,
stop engine, engage parking brake, and remove key
from the ignition switch.
NOTE: The fuel tank must be removed from the frame
to allow separation of the upper steering shafts from the
steering knuckle.
2. Remove fuel tank from the machine (see Fuel Tank
Removal in Chapter 3 – Briggs & Stratton Vanguard En
-
gines).
3. Drive out roll pin securing upper steering shaft to
steering knuckle with drift punch.
4. If it is required to remove the steering knuckle at this
time, drive out roll pin securing the lower steering shaft
to the steering knuckle with drift punch.
5. Pull upper steering shaft from steering column and
steering knuckle. If desired, pull steering knuckle from
the lower steering shaft.
6. Remove both lock nuts and cap screws securing
both steering column to the frame.
Upper Steering Assembly (Fig. 19)
1. Secure steering column to the frame with both cap
screws and lock nuts.
2. If removed, install steering knuckle onto the lower
steering shaft with roll pin.
3. Position upper steering shaft down through the
steering post into the steering knuckle. Align holes of the
shaft and steering knuckle and secure with roll pin.
4. Install fuel tank to the machine (see Fuel Tank
Installation in Chapter 3 – Briggs & Stratton Vanguard
Engines).
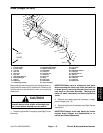
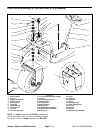
Lower Steering Disassembly (Fig. 13 and 14)
NOTE: If disassembly of the steering mechanism be-
low the steering knuckle is required, precede as follows:
1. Park machine on a level surface, lower attachment,
stop engine, engage parking brake, and remove key
from the ignition switch.
NOTE: The fuel tank must be removed from the frame
to allow separation of the lower steering shafts from the
steering knuckle.
2. Remove fuel tank from the machine (see Fuel Tank
Removal in Chapter 3 – Briggs & Stratton Vanguard En
-
gines).
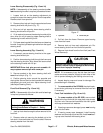
3. Loosen lock nut on the steering adjustment bolt
enough to allow the steering chain to come off the
sprocket. Remove chain from sprocket.
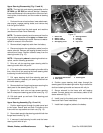
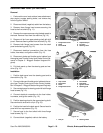
4. Remove drive–lock pin from the sprocket and lower
steering shaft with drift punch (Fig. 17).
5. Drive out roll pin securing lower steering shaft to
steering knuckle with drift punch.
6. If it is required to remove the steering knuckle at this
time, drive out roll pin securing upper steering shaft to
the steering knuckle with drift punch.
7. Pull lower steering shaft from the frame and steering
knuckle. If required, pull steering knuckle from the upper
steering shaft.
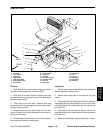
Lower Steering Assembly (Fig. 13 and 14)
1. If removed, secure steering knuckle to the upper
steering shaft with roll pin.
2. Position lower steering shaft through the frame and
into the steering knuckle. Align holes and secure shaft
to the steering knuckle with roll pin.
IMPORTANT:Drive–lock pins are not reusable. Al-
ways replace removed pin with a new pin.
3. Secure sprocket to the lower steering shaft with a
new drive–lock pin.
4. Position steering chain around the sprocket and
chain guide. Secure chain to chain bracket with steering
adjustment pins and lock nuts. Adjust steering chain
(see Adjust Steering Chain).
5. Install fuel tank to the machine (see Fuel Tank
Installation in Chapter 3 – Briggs & Stratton Vanguard
Engines).
Whells, Brakes,
and Miscellaneous
Sand Pro 2020/3020/5020 Page 6 – 21 Wheels, Brakes,and Miscellaneous


