


7
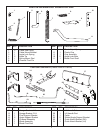
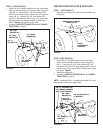
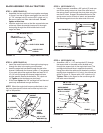
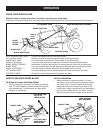
FIGURE 6
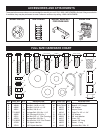
3/8" x 1"
HEX BOLT (D)
3/8" LOCK
WASHER (R)
3/8" FLAT
WASHER (N)
1/2" LARGE
WASHER (M)
R.H. HANGER
BRACKET
STEP 2: (SEE FIGURE 6)
• Attach the R.H. hanger bracket to the two front empty
holes on the right side of the tractor frame using two
new 3/8" x 1" hex bolts (D), 3/8" lock washers (R),
and3/8"atwashers(N)asshown.Fortherearhole,
use a 3/8" x 1" hex bolt (D), 3/8" lock washer (R)
and3/8"atwasher(N)withalarge1/2"washer(M)
placed between the hanger bracket and the tractor
frame. Tighten. Repeat for the left side.
• Proceed to INSTRUCTIONS FOR ALL 917 MODEL
TRACTORS on page 8.
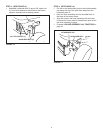
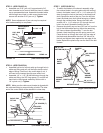
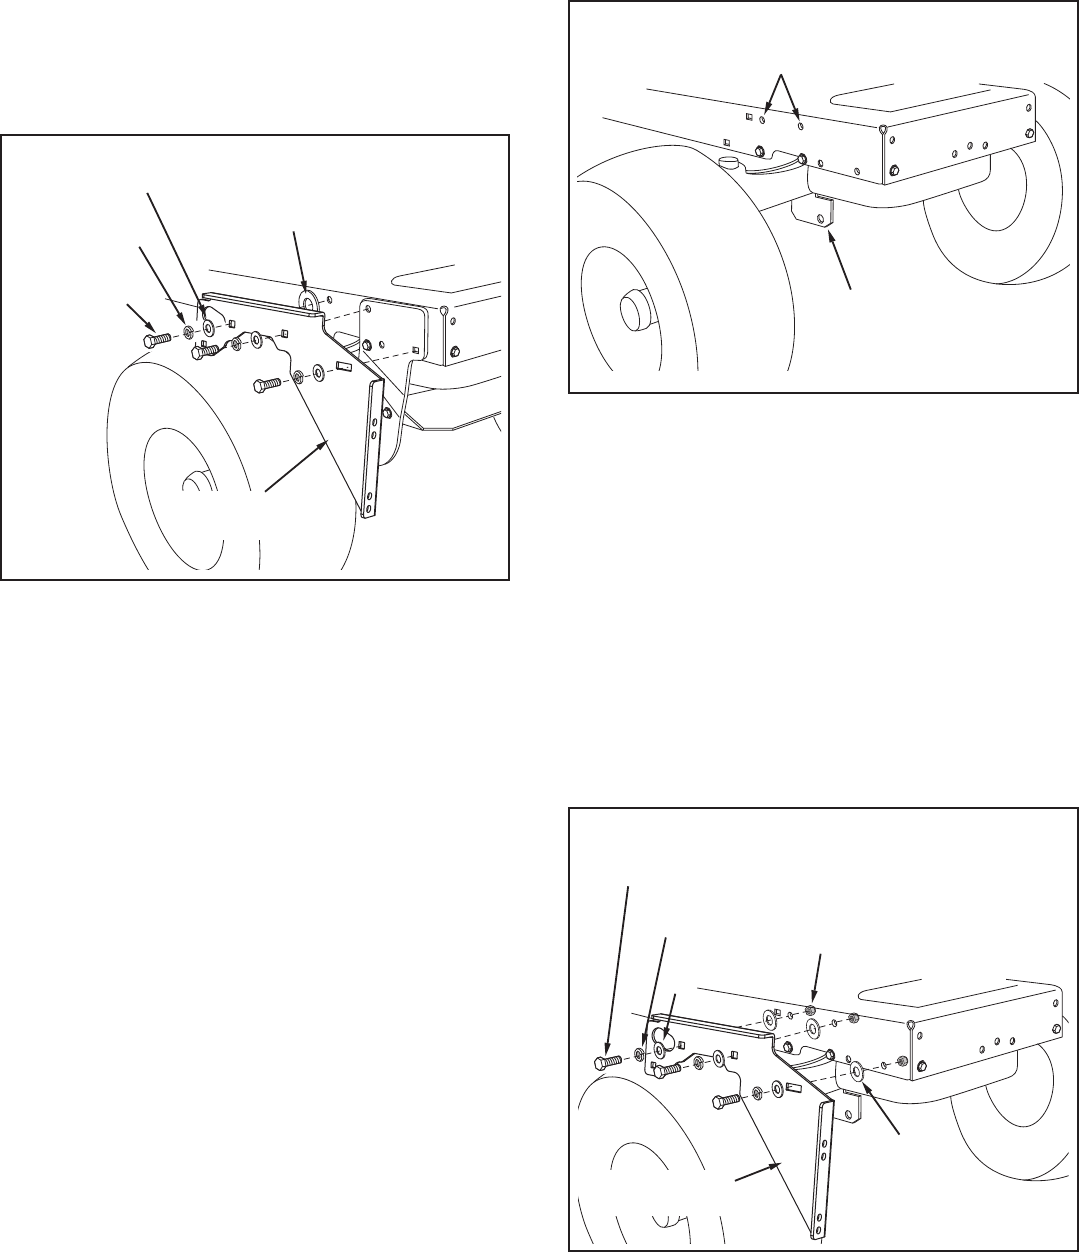
FIGURE 7
REMOVE BOLTS FROM
THESE HOLES
FRONT
SUSPENSION
BRACKET
INSTRUCTIONS FOR TYPE B TRACTORS
STEP 1: (SEE FIGURE 7)
• Remove any bolts found in the holes indicated in the
illustration.
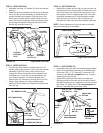
STEP 2: (SEE FIGURE 8)
• Attach the R.H. hanger bracket to the three holes
shown on the side of the tractor frame using three
3/8" x 1" hex bolts (D), 3/8" lock washers (R), 3/8"
atwashers(N)and1/2"largewashers(M).Use3/8"
nylock nuts (L) on inside of frame if bolts insert freely
into holes. Tighten.
• Repeat for other side.
• Proceed to INSTRUCTIONS FOR ALL 917 MODEL
TRACTORS on page 8.
NOTE: Use special 3/8" x 1" thread forming bolts (G) in any
holes that are too small for regular bolts.
FIGURE 8
3/8" x 1" HEX BOLT (D)
(OR THREAD FORMING
BOLT (G) IF NEEDED)
3/8" LOCK
WASHER (R)
3/8" FLAT
WASHER (N)
3/8" NYLOCK NUT (L)
(IF NEEDED)
R.H. HANGER
BRACKET
1/2" LARGE
WASHER (M)