


16
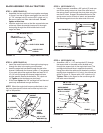
To Adjust Blade Spring
• The tension of the blade adjust spring may be altered
to permit the blade to tilt forward to bypass solid
obstructions. To change the spring tension, adjust the
nuts at upper end of the spring bolt. Standing in front
of blade, turn the nuts counterclockwise to relieve
tension and clockwise to increase tension. Refer to
gure21onpage11.
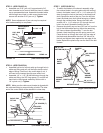
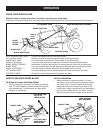
To Adjust Blade Shoes
• The blade shoes at the ends of blade may be raised
for close work on smooth surfaces or lowered to raise
the blade to work on rough or uneven areas. Make
sure both shoes are set evenly and that the nuts are
tightened securely.
SERVICE AND ADJUSTMENTS
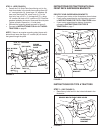
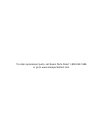
FIGURE 30
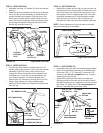
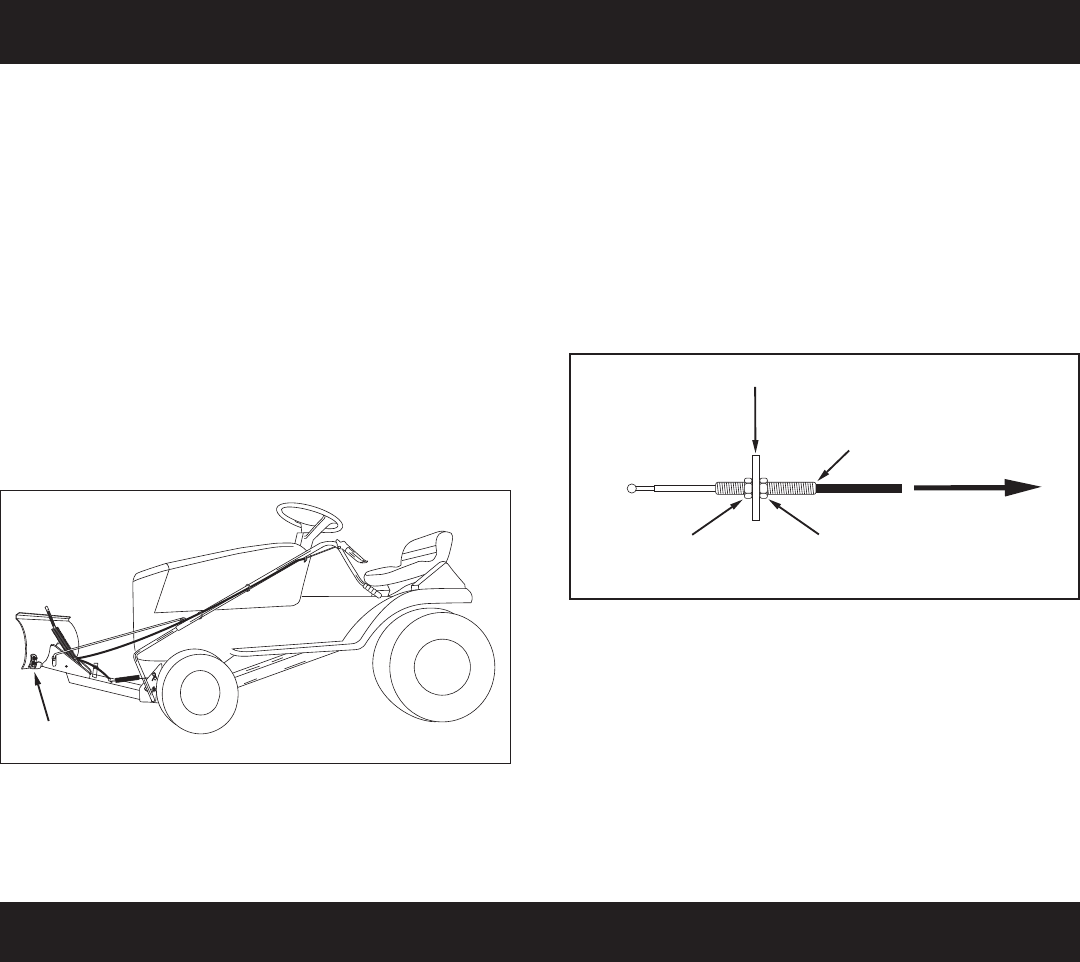
To Adjust the Blade Pivot Lock Mechanism
• If the blade will not unlock and pivot, the angle lock
bars are not disengaging from the slots in the pivot
plate. To correct, adjust the 5/16" hex jam nuts to
draw the end of the control cable back towards the
cable mount bracket. The less the threaded end of
the cable extends through the bracket, the more the
angle lock bars can retract to disengage from the
slots in the pivot plate.
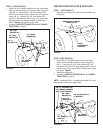
FIGURE 31
BLADE SHOE
CABLE MOUNT BRACKET
5/16" HEX
JAM NUT
CONTROL
CABLE
5/16" HEX
JAM NUT
Recommendations When Storing
• When the snow blade is not being used, remove all
dirt and rust and touch up with paint.
• Touch up bare metal with paint or apply a light coat of
grease or rust preventive.
• Lubricate all pivot points and all points shown in
gure29,page15inthemaintenancesection.
• Store in a dry area, protected from weather.
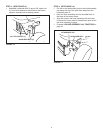
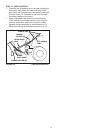
To Remove Blade From Tractor
• Lower the blade to the ground with the blade in the
center (straight ahead) position.
• Remove the hairpin cotter which fastens the blade
pivotrodtothebladepivotshaft.Seegure26on
page 13.
STORAGE
• Remove the hairpin cotter which fastens the lift
handlerodtotheliftlinkpin.Seegure23,page12.
• Remove the hairpin cotter from the channel pivot pin
and remove the pivot pin from the channel assembly.
Seegure22onpage12.
• Remove the blade, the channel assembly and the
lift handle assembly from the tractor. The brackets
assembled to the tractor frame may be left in place.
• To remove the brackets assembled to the tractor
frame (side plates and pivot support brackets) refer
totheguresappropriateforyourtractoronpages6
and 7.
• If the side plates are removed from the tractor frame,
be sure to reassemble any bolts that were removed
fromtheframe.Refertogure5onpage6andgure
7 on page 7.