


Powered Walk Behind Mower Part No. 04016067 Rev E © Copyright 6/2005
4
Rover Mowers Ltd
ABN 11 000 257 303
TM
OPERATION (Continued)
ENGINE
NOTE: The mowers covered in this manual have various engine types from various manufacturers. Included in the Mower
Kit is an engine manual specific to each mower which provides the details for the engine’s operation. Please refer to the
engine manufacturer’s manual for precise instructions.
Starting the Engine
• The engine safety precautions, oil and fuel recommendations, operation instructions, adjustments and maintenance is covered in the
engine manufacturer’s manual which is included in the mower kit. Please refer to and adhere to these recommendations.
• If you do not have the engine manufacturer’s manual please refer to the nearest engine manufacturer’s representative for a
replacement copy.
• The engine is packed without oil or fuel. Please add these as per the engine manufacturer’s recommendations before attempting
to start the engine.
CAUTION
• Refer to the “Warning” notes at the beginning of the “Operation” section.
• Start the mower on a clear level surface.
• Keep your fingers, toes and bystanders clear when starting or operating the engine.
• If fitted with the Powerstart option, always remove the key from the ignition switch and keep in a safe place to prevent unauthorised
cranking of the engine.
WARNING
• Refer to the engine manufacturer’s manual for the starting procedure.
• If fitted with the Powerstart option, insert the key into the ignition switch then follow the instructions in the engine manufacturer’s manual.
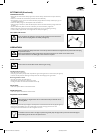
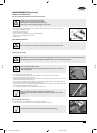
The Rover throttle control uses symbols to indicate the throttle function at various throttle positions:
O (off), (slow speed), (fast speed), (engine choke)
These positions align with settings required in the engine manufacturer’s manual.
The Rover Powerstart option can be started with an ignition key which is fitted to the handle bar. The switch plate uses symbols to
indicate the key function at various positions and refers to the state of the starter motor:
O (off), I (on/start). These positions align with the settings required in the engine manufacturer’s manual.
Stopping the Engine
• Refer to the engine manufacturer’s manual for stopping procedure.
• If fitted with the Powerstart option remove the ignition key and store in a safe place after use.
GRASS CUTTING AND CATCHING
Refer to and abide to the instructions noted in the safety instructions of this and associated manuals.
WARNING
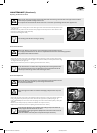
• Fit the Grass catcher to the mower (refer to the “Setting Up” section).
• Start the engine and set the engine speed to fast ( ) on the throttle control.
• Set the desired cut height (refer to “Setting the Cut Height” above).
• Drive the mower forward through the grass until the catcher fills.
• Stop the engine, remove and empty the catcher.
• Repeat the process.
• To maximise the cutting and catching performance it is important to maintain high engine speed, so adjust the mower ground
speed to suit.
• If the grass length or density is excessive (to maintain high engine speed initially) cut the grass at a higher setting, then at the
desired height.
• Replace blades regularly to maintain a sharp cutting edge.
• Keep the mesh in the grass catcher clean to allow the grass catcher to fill properly.
• Keep the underside of the mower deck clean and free of clipping build-up.
SELF PROPELLED OPTION
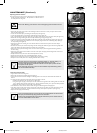
Using the Self Propelled Transmission
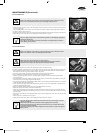
• Start the engine and set the engine speed to fast.
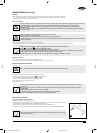
• Push forward on the clutch engagement lever to engage the self-propelled drive to the rear wheels noting that the drive
speed increases as you move the bale closer to the handle bar (refer figure 8).
• Hold the bale at the required drive speed and slow down or speed up as the conditions dictate.
• To disengage the self-propelled drive release the engagement lever and allow it to return to the disengaged position.
Release the self-propelled drive bale and push the machine when changing direction or mowing
in a confined area for safety.
8
6067 Current Artwork 10-2004.indd 5/31/2005, 8:10 AM4