16
10. Select City: The next screen asks for the city closest to the observing site. Use the Scroll
keys to cycle through the database of cities (listed alphabetically). Press ENTER when the
correct city appears on screen.
11. Select Model Number: The next screen asks for the telescope model. Use the scroll keys
to locate your telescope model number. Press ENTER when your model number displays.
12. Initialization Complete: System initialization is complete and the screen reads "Align:
Easy."
Training the Drive
After you initialize Autostar for the first time you need to train the drives of the telescope.
Training the drive allows the telescope to point accurately at astronomical objects. Perform this
procedure every 3 to 6 months to maintain the highest level of pointing accuracy.
1. Verify that Autostar initialization is complete.
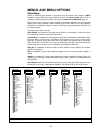
2. Press MODE until "Select Item: Object" displays.
3. Press the Scroll Up key once. "Select Item: Setup" displays.
4. Press ENTER to access the Setup menu. "Setup: Align" displays.
5. Press either Scroll key several times until "Setup: Telescope" displays.
6. Press ENTER to access the Telescope menu. "Telescope: Telescope Model" displays.
7. Press either Scroll key several times until "Telescope: Train Drive" displays.
8. Press ENTER. "Train Drive: Az Train" displays. The next four steps are the prodedure for
training the Az or horizontal drive.
9. Press ENTER. "Drive Setup" and a scrolling message displays. The scrolling message
asks you to center a terrestrial object in the eyepiece. Use a terrestrial object, such as a
telephone pole or lamp post, as your reference object. Press ENTER after reading the
message.
10. "Center reference object" displays. Center the object ONLY using the Arrow keys and then
press ENTER.
11. "Slewing" displays and the telescopes moves left. "Press → until it is centered" displays.
Bring the reference object back to the center of the eyepiece using ONLY the Right Arrow
key. When the reference object is centered, press ENTER.
Important Note: If you overshoot the center of the eyepiece as you perform the
"press [Arrow key] until it is centered" steps (steps 11, 12, 16, 17), you must start this
procedure over again. ONLY use the prompted Arrow key to center the reference
object. For example, if the display reads ""Press
←
(Left Arrow key) until it is cen-
tered," do not use the Right Arrow key to return to the center of the eyepiece if you
overshoot the center. If you do overshoot, press Mode until "Select Item: Object"
displays and begin the procedure again.
12. "Slewing" displays and the telescopes moves right. "Press
←
until it is centered" displays.
Bring the reference object back to the center of the eyepiece using ONLY the Left Arrow
key. When the reference object is centered, press ENTER.
13. "Train Drive: Az Train" displays again. Press the Scroll Down key once. "Train Drive: Alt
Train" displays. The next four steps are the prodedure for training the Alt or vertical drive.
14. Press Enter. "Drive Setup" and a scrolling message displays. The scrolling message once
again asks you to center a terrestrial object in the eyepiece. Press ENTER after reading
the message.
15. "Center reference object" displays. Center the object using ONLY the Arrow keys and then
press ENTER.
16. "Slewing" displays and the telescopes moves down. "Press ↑ until it is centered" displays.
Bring the reference object back to the center of the eyepiece using ONLY the Up Arrow
key. When the reference object is centered, press ENTER.
17. "Slewing" displays and the telescopes moves up. "Press ↓ until it is centered" displays.
Bring the reference object back to the center of the eyepiece using ONLY the Up Arrow
key. When the reference object is centered, press ENTER.
18. Drive training is now complete. Press MODE to exit the Train Drive menus.


