13
Section 1: Preparation and Set-up
9/04/08
RCB6010 & RCB6015 (540 RPM) and RCMB6010 & RCMB6015 (1000 RPM) Rotary Cutters 318-263M
Land Pride
Table of Contents
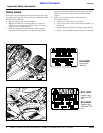
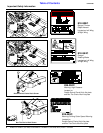
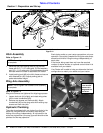
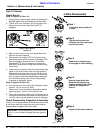
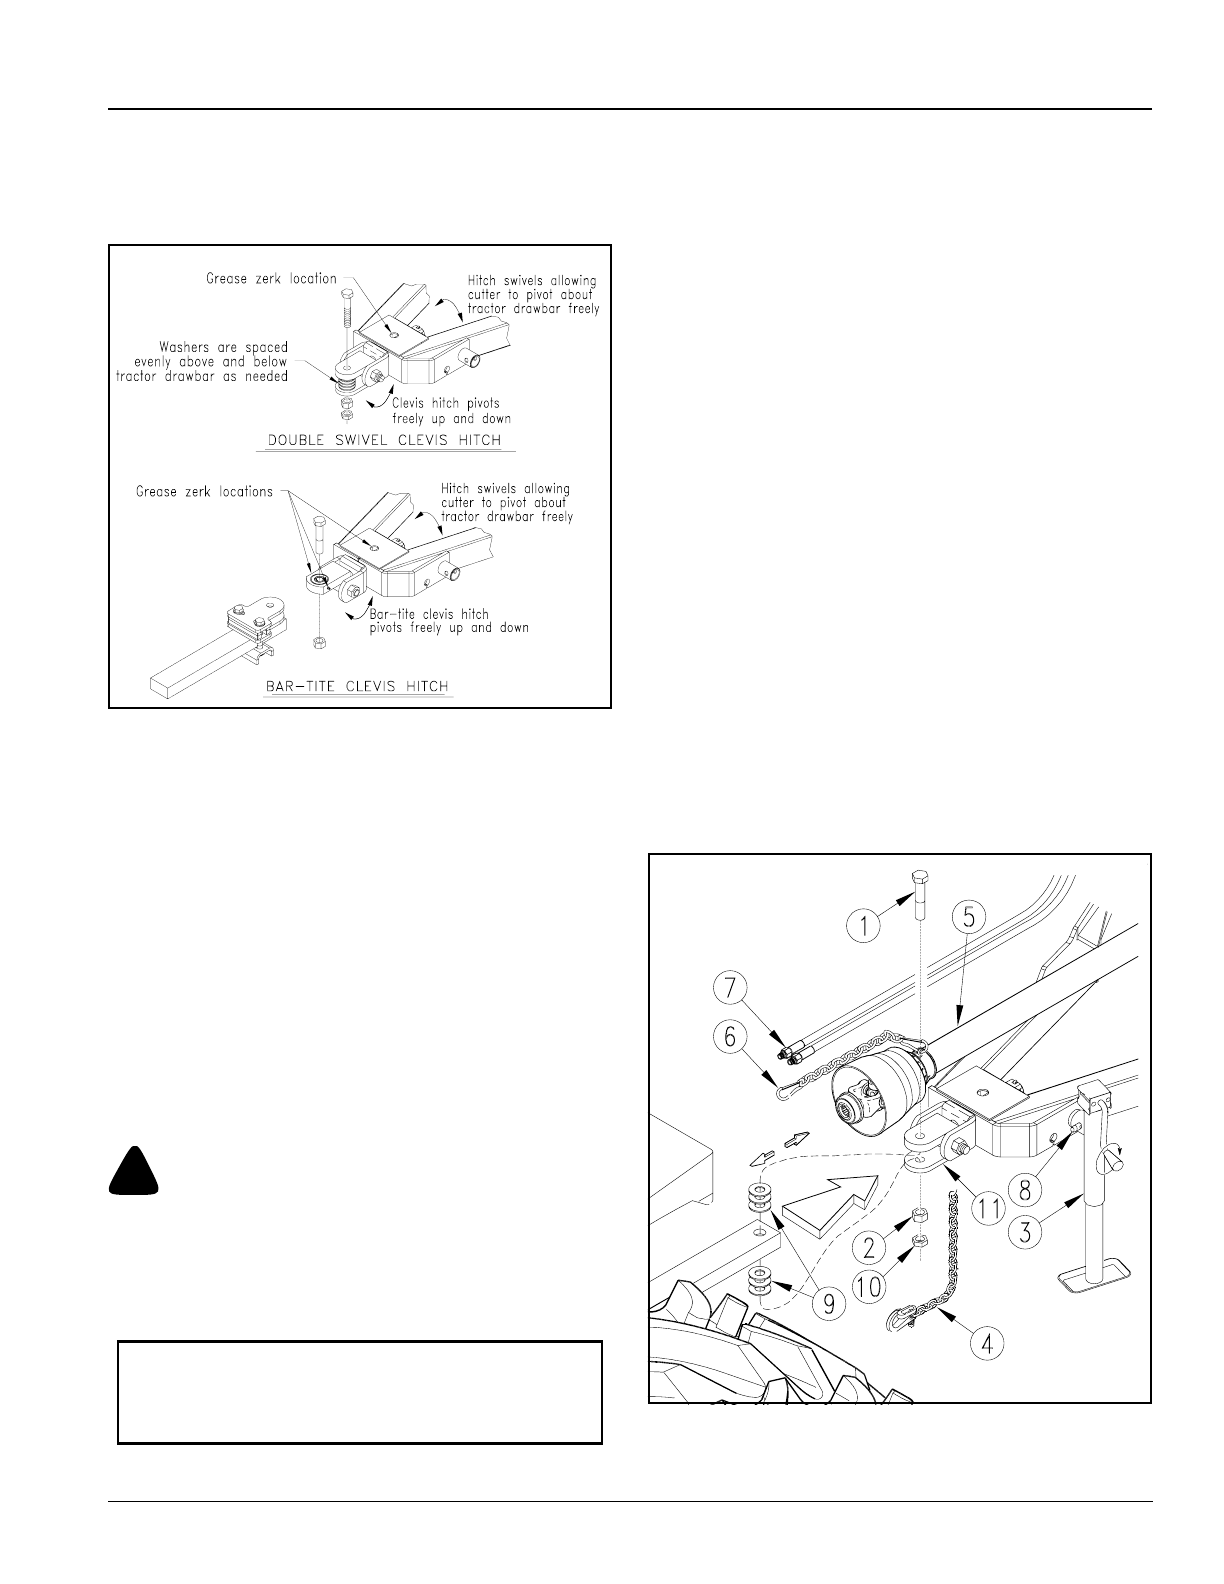
Hitch Types
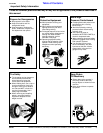
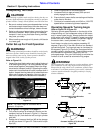
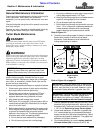
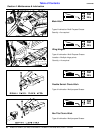
Refer to Figure 1-4:
The cutter will have one of two hitch types shown below.
Hitch Types
Figure 1-4
Swivel Clevis Hitch
The swivel clevis hitch allows the cutter to pivot about the
tractor drawbar freely in two directions. It is designed for
cutting hillsides, reducing the twisting torque on the
cutter hitch and tractor drawbar. Hitch swivel is
greaseable.
Bar-Tite Clevis Hitch
The Bar-Tite clevis hitch functions the same as the
swivel clevis hitch except it is constructed of case
hardened steel and has a bushing in the tongue to
extend hitch life. Bushing and hitch swivel are
greaseable.
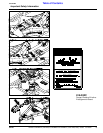
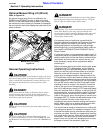
Tractor Hook-up to Swivel Clevis
Hitch
!
DANGER!
Crushing Hazard between tractor and implement. Do not allow
anyone to stand between the tractor and implement while
backing-up to an implement. Never operate the hydraulic
3-point lift controls while someone is directly behind the tractor.
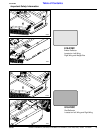
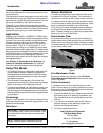
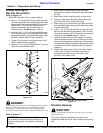
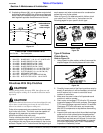
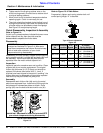
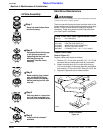
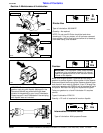
Refer to Figure 1-5:
22268
IMPORTANT: Jack attachment pin (#8) must be
fully inserted and secured before working on or
around a cutter that is not hooked to the tractor
drawbar.
1. Make certain the parking jack (#3) is properly at-
tached to the cutter hitchand secured with attachment
pin (#8).
2. Back tractor within close proximity of cutter
clevis (#11).
3. Raise or lower the parking jack (#3) to align clevis
(#11) with the tractor drawbar. Drawbar should fit
between lower and upper plates of clevis.
4. Back tractor up to cutter hitch until holes in the
drawbar and clevis (#11) are aligned.
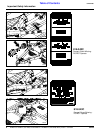
5. Insert 1" flat washers (#9) equally above and below
tractor drawbar until both spaces between drawbar
and clevis plates are filled.
6. Insert 1" x 5" gr5 hex bolt (#1) through top of clevis
(#11), 1" washers (#9), drawbar, remaining 1"
washers (#9) and out through bottom of clevis (#11).
Secure hex bolt with nut (#2). Tighten nut snugly to
remove all play and then back nut one-quarter turn.
Tighten jamb nut (#10) against nut (#2).
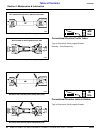
7. Lower jack stand (#3) until hitch weight is removed.
Remove jack stand from hitch and store on left hand
deck wing storage base or weight box. Prevent water
and freeze damage by storing it so that the foot is level
or lower than the head, especially when the wing is
folded up.
8. Attach hitch safety chain (#4) to the tractor. Adjust
chain length to remove all slack except what is
necessary to permit turning. Lock chain hook
securely to the safety chain.
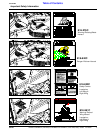
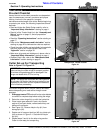
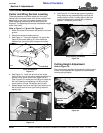
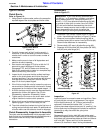
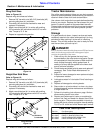
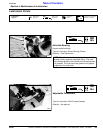
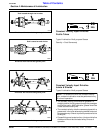
Tractor Hookup to Double Swivel Clevis Clamp Hitch
Figure 1-5
22271