


9
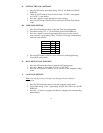
1. Press the SET button nine times to enter the Graphic Time Display Options
setting mode.
2. The default setting “1” will flash in the DATE DISPLAY.
3. To shift to other Graphic Time Display Options, press the + button. The
flashing option number in the DATE DISPLAY will shift from 1 through to
4 (depending on how many times the + button is pressed).
4. Press the SET button to confirm the setting, and to advance to the Local
Time setting mode.
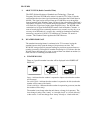
XI. TIME AND DATE SETTINGS
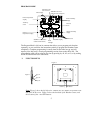
Note:
Any time and dates that have been programmed manually will be
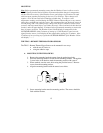
overridden once reception from the WWVB has been established. A flashing
WWVB Tower icon (displayed between the hour and minute of the time) indicates
that the Weather Center is receiving the WWVB radio signals. A non-flashing
tower icon indicates the time and date signal has been received.
1. Press the SET button 10 times to enter the Local Time setting mode.
2. The “12:00” default setting will flash in the TIME DISPLAY.
3. To change the hour press the + button.
4. Press the SET button to confirm the hours, and to advance to set the
minutes.
5. Press the + button to change the minutes; holding the + button down will
change the minutes, 5 minutes at a time.
6. Press the SET button to confirm the minutes, and to advance to set the year.
7. The “99” default year will flash in the DATE DISPLAY.
8. Press the + button to advance the year.
9. Press the SET button to confirm the year, and to enter the month setting
mode. The default “1” will flash.
10. Press the + button to change the month.
11. Press the SET button to confirm the month, and to enter the date setting
mode. The default “1” will flash.
12. Press the + button to advance the date.
13. Press the SET button to confirm the date, and to enter the weekday setting
mode. The default “FR” will flash.
14. Press the + button to change the weekday.
15. Press the SET button to confirm the weekday and to exit the programming
mode.