


6
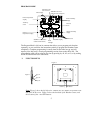
II. SETTING THE LCD CONTRAST
1. Press the SET button, the default setting “LCD 5” will flash in the DATE
DISPLAY.
2. There are 8 LCD contrast levels to choose from—“LCD 0” is the lightest
and “LCD 7” is the darkest.
3. Press the + button to toggle through the various settings.
4. Press the SET button to confirm, and to advance to the Time Zone setting
mode.
III. TIME ZONE SETTING
1. Press the SET button two times to enter the Time Zone setting mode.
2. The default setting “ET –5” will be flashing in the DATE DISPLAY.
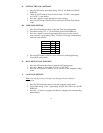
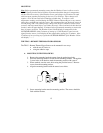
3. Press the + button to select the appropriate time zone (see chart for time
zones and their corresponding codes). The time will change simultaneously
with time zone selection.
Atlantic AT -4
Eastern ET -5
Central CT -6
Mountain MT -7
Pacific PT -8
Alaska AL -9
4. Press the SET button to confirm, and to advance to the Daylight Saving
Time (DST) setting mode.
IV. DAYLIGHT SAVING TIME (DST)
1. Press the SET button three times to enter the DST setting mode.
2. Press the + button to select either “DT On” or “DT OFF.”
3. Press the SET button to confirm, and to advance to the Language setting
mode.
V. LANGUAGE SETTING
Note:
The language setting only affects the language that the weekday is
displayed in.
1. Press the SET button four times to enter the Language setting mode.
2. The default setting “USA” (representing English) will flash in the DATE
DISPLAY.
3. Press the + to select a language (see chart for languages and corresponding
abbreviations).