


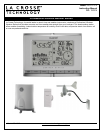
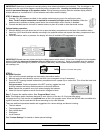
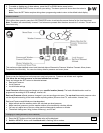

Model: WS-1517 www.lacrossetechnology.com/support 5
IMPORTANT: Make sure to observe the correct polarity when inserting batteries (not included). The + markings on the
batteries must line up with the diagrams inside the battery compartments. Inserting the batteries incorrectly may
result in permanent damage to the weather station. During the setup process, place the wireless display and the
outdoor sensors on a surface with 5-10 feet between each sensor and the display.
STEP 5: Weather Station
1. Connect 7.5 V A/C adapter provided, to the weather station and plug into to the wall power outlet.
Note: The A/C adaptor connection is required for automatic backlight control to function. When the
weather station operates on battery power alone, the auto backlight control function is disabled.
2. Connect the table stand to the back of weather station to place on a table or other horizontal surface.
Optional battery operation:
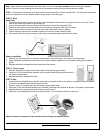
3. Slide the battery cover tab down and pull out to open the battery compartment on the back of the weather station.
4. Insert four (4) AA size Alkaline batteries according to the polarities shown and replace the battery compartment door,
(optional).
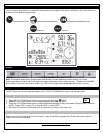
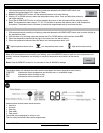
5. Once the weather station is powered, the display will show all available LCD segments for a moment.
IMPORTANT: Do not press any buttons during the setup process which takes 5-15 minutes. During this time the weather
station will flash the pressure and weather icon and InHg (inches of mercury). Setup is completed when the weather
station shows default settings for pressure and altitude (sea level), indoor/outdoor temperature and humidity, wind and
rain readings, etc.
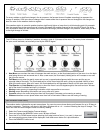
InHg
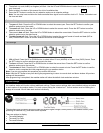
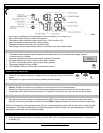
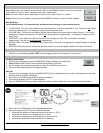
STEP 6:
Set Wind Direction
1. Wait until all the sensor readings are received by the weather station.
2. Manually point the wind direction vane to the North (use a compass or map if necessary).
3. Press the SET opening located inside battery compartment with a paper clip or similar tool. This will set the local wind
direction to North.
Only press once. Continued presses of the SET opening, toggles the wind
direction between the factory defaults preset or manual set direction.
Note: Repeat this procedure every time when changing the batteries.
4. Watch for the next update to ensure the direction changed to North.
Step 7: Program the weather station. See “Program Menu” below.
Note: This weather station has been designed to work right out of the box 10-15 minutes after setup.
Language and City Code are the only required items to set in the program menu. When the WWVB radio-controlled time
signal is received, the time and date will be set according to city code selected.
There are additional operational details and suggestions for custom settings and alarms including:
The time alarms
The temperature alerts
Daily rainfall alerts
Wind alerts
Local Pressure
See “Custom Settings” for details on these optional settings.
Flashes 5-15 minutes during setup