


13
BEFORE REMOVING THE
MOWER FROM THE SKID
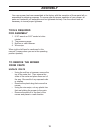
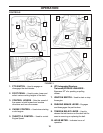
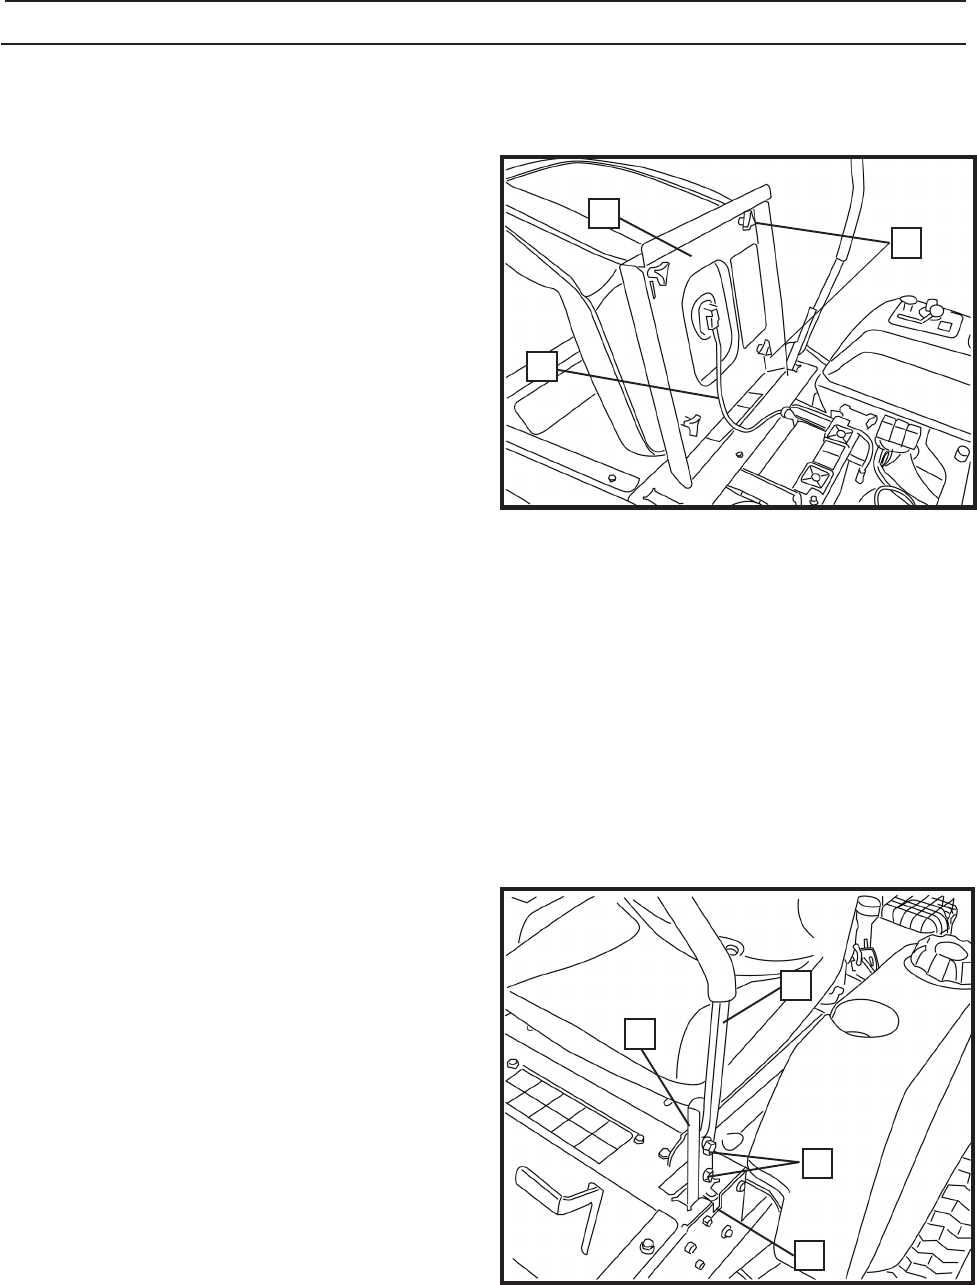
ATTACH SEAT (See Fig. 1)
The seat position should be adjusted forward or
backward so that the operator can comfortably
reach the deck lift pedal and safely operate the
mower. See "Service and Adjustment" Section
of this manual.
• Remove protective wrap from the seat.
• Remove the three prong knobs and
washers from the seat and place in the
storage area in the right side console.
• Raise the seat pan up so that the bottom
can be easily accessed.
• Securing one of the three prong knobs
and washers, insert it thru the seat pan
slot and into the corresponding threaded
hole in the seat bottom.
• Repeat for the other three holes.
• Tighten the three prong knobs in the
approximate position desired for the
seat.
• Connect the wiring harness to the seat
switch.
Adjustments may be required to position the
seat in the desired position. Refer to the
"Service and Adjustment" section of this
manual.
FIGURE 1
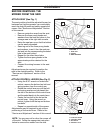
ATTACH CONTROL LEVERS (See Fig. 2)
• Using the 9/16" wrench or socket and
ratchet, remove the bottom hex bolt and
spring washer from the control arm.
• Rotate the control lever up until the bolt
and spring washer can be placed thru
the slot in the bottom of the control lever
and threaded back into the control arm.
• Center the hex bolt in the slot on the
control lever. Using the wrench or
ratchet, tighten both the top and bottom
hex bolts.
• Repeat on opposite side of the mower.
CZ-1
1. SEAT PAN
2. KNOBS
3. WIRE HARNESS
1
2
3
ASSEMBLY
NOTE: You may now roll or drive the mower off
of the skid. Follow the appropriate instruction
below to remove the mower from the skid.
Adjustments may be required to get uniform
positioning of the control lever. Refer to the
"Service and Adjustment" section of this manual.
FIGURE 2
CZ-2
1
2
3
4
1. CONTROL LEVER
2. CONTROL ARM
3. HEX BOLTS
4. NEUTRAL SLOT