TO ADJUST THE BELT GUIDES
After you replace the traction or auger drive
belt, you need to adjust one or both of the
belt guides. Proceed as follows:
• Disconnect the spark plug wire.
• Remove the belt cover (See last figure on
page 19).
• Engage the auger drive clutch lever.
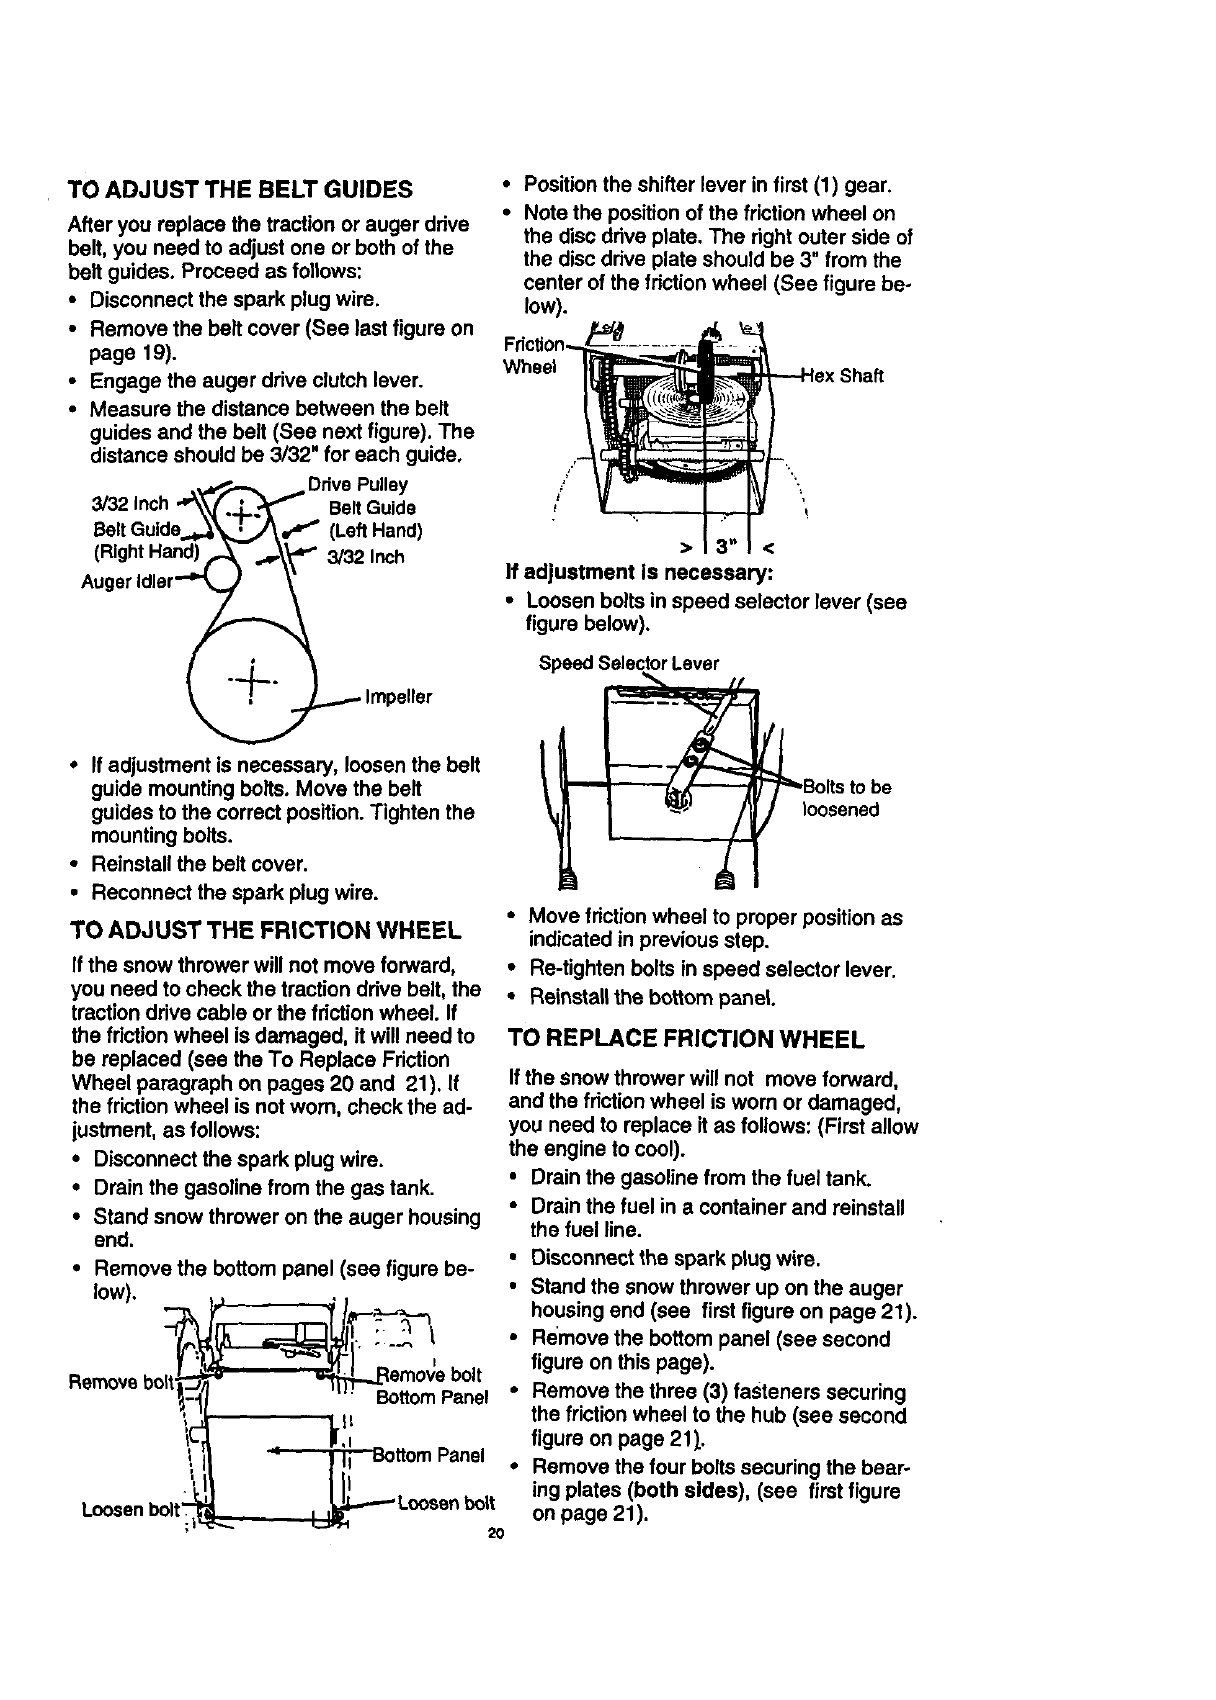
• Measure the distance between the belt
guides and the belt (See next figure). The
distance should be 3/32" for each guide.
Ddve Pulley
3/32 Inch Belt Guide
,_ (LeftHand)
(Right Hand) 3/32 Inch
• Position the shifter lever in first (1) gear.
• Note the position of the friction wheel on
the disc drive plate. The right outer side of
the disc drive plate should be 3" from the
center of the friction wheel (See figure be-
low).
Wheel ira=
---Hex Shaft
bjl_z,p_
_/-jj
f . !
• 3" I<
If adjustment is necessary:
• Loosen bolts in speed selector lever (see
figure below).
• If adjustment is necessary, loosen the belt
guide mounting bolts. Move the belt
guides to the correct position. Tighten the
mounting bolts.
• Reinstall the belt cover.
• Reconnect the spark plug wire.
TO ADJUST THE FRICTION WHEEL
If the snow thrower will not move forward,
you need to check the traction drive belt, the
traction drive cable or the friction wheel. If
the friction wheel is damaged, it will need to
be replaced (see the To Replace Friction
Wheel paragraph on pages 20 and 21). If
the friction wheel is not worn, check the ad-
justment, as follows:
• Disconnect the spark plug wire.
• Drain the gasoline from the gas tank.
• Stand snow thrower on the auger housing
end.
• Remove the bottom panel (see figure be-
low).
Remove
BottomPanel
.it
ttomPanel
Speed SelectorLever
-V
L_Bolts tobe
loosened
• Move friction wheel to proper position as
indicated in previous step.
• Re-tighten bolts in speed selector lever.
• Reinstall the bottom panel.
TO REPLACE FRICTION WHEEL
If the snow thrower will not move forward,
and the friction wheel is worn or damaged,
you need to replace itas follows: (First allow
the engine to cool).
• Drain the gasoline from the fuel tank.
• Drain the fuel in a container and reinstall
the fuel line.
• O_,sc_r_c *,the spark plug w;,re.
• Stand the snow thrower up on the auger
housing end (see first figure on page 21).
• Remove the bottom panel (see second
figure on this page).
• Remove the three (3) fasteners securing
the friction wheel to the hub (see second
figure on page 21)..
• Remove the four bolts securing the bear-
ing plates (both sides), (see first figure
on page 21).
2O


