


40
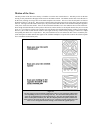
After looking at the night sky for a while you may want to try photographing it. Several forms of photography are
possible with your telescope, including terrestrial and celestial photography. Both of these are discussed in moderate
detail with enough information to get you started. Topics include the accessories required and some simple techniques.
More information is available in some of the publications listed at the end of this manual.
In addition to the specific accessories required for each type of celestial photography, there is the need for a camera -
but not just any camera. The camera does not have to have many of the features offered on today's state-of-the-art
equipment. For example, you don't need auto focus capability or mirror lock up. Here are the mandatory features a
camera needs for celestial photography. First, a “B” setting which allows for time exposures. This excludes point and
shoot cameras and limits the selection to SLR cameras, the most common type of 35mm camera on the market today.
Second, the “B” or manual setting should NOT run off the battery. Many new electronic cameras use the battery to
keep the shutter open during time exposures. Once the batteries are drained, usually after a few minutes, the shutter
closes, whether you were finished with the exposure or not. Look for a camera that has a manual shutter when
operating in the time exposure mode. Olympus, Nikon, Minolta, Pentax, Canon and others have made such camera
bodies.
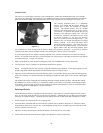
The camera must have interchangeable lenses so you can attach it to the telescope and so you can use a variety of
lenses for piggyback photography. If you can't find a new camera, you can purchase a used camera body that is not
100-percent functional. The light meter, for example, does not have to be operational since you will be determining the
exposure length manually.
You also need a cable release with a locking function to hold the shutter open while you do other things. Mechanical
and air release models are available.
P
P
i
i
g
g
g
g
y
y
b
b
a
a
c
c
k
k
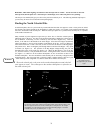
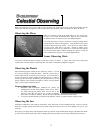
The easiest way to enter the realm of deep-sky, long exposure astrophotography is via the piggyback
method. Piggyback photography is done with a camera and its normal lens riding on top of the telescope.
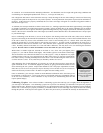
Through piggyback photography you can capture entire constellations and record large scale nebulae that
are too big for prime focus photography. Because you are photographing with a low power lens and
guiding with a high power telescope, the margin for error is very large. Small mistakes made while guiding
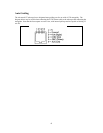
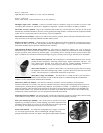
the telescope will not show up on film. To attach the camera to the telescope, use the piggyback adapter
screw located on the top of the tube mounting ring. It may be necessary to remove the finder scope bracket
before attaching the camera.
As with any form of deep-sky photography, it should be done from a dark sky observing site. Light
pollution around major urban areas washes out the faint light of deep-sky objects. You can still practice
from less ideal skies.
1. Polar align the telescope (using one of the methods described earlier) and start the motor drive.
2. Load your camera with slide film, ISO 100 or faster, or print film, ISO 400 or faster!
3. Set the f/ratio of your camera lens so that it is a half stop to one full stop down from completely open.
4. Set the shutter speed to the “B” setting and focus the lens to the infinity setting.