


17
G
G
P
P
S
S
A
A
l
l
i
i
g
g
n
n
m
m
e
e
n
n
t
t
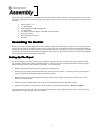
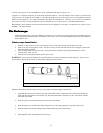
GPS Align must be used with the telescope mounted in altazimuth. With GPS Align mode, the NexStar automatically levels
the optical tube, its built-in electronic compass points the telescope in the direction of the northern horizon, while the GPS
receiver links with and acquires information from 3 of the orbiting GPS satellites. With this information, the built-in GPS
system calculates the scope’s location on Earth with an accuracy of a few meters and calculates universal time down to the
second. After quickly making all these calculations and automatically entering the information for you, the NexStar GPS
orients itself with the sky, slews to an alignment star and asks you to position the star in the center of the eyepiece. The
NexStar is then ready to start finding and tracking any of the objects in its 40,000+ object database. Before the telescope is
ready to be aligned, it should be set up in an outside location with all accessories (eyepiece, diagonal and finderscope)
attached and lens cover removed as described in the Assembly section of the manual. Before turning on the NexStar, make
sure that the tube is pointed downward and both the altitude and azimuth clutches are locked down. To begin the GPS
alignment:
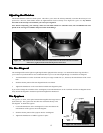
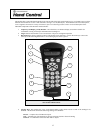
1. Power on the NexStar by flipping the switch located on the
bottom portion of the drive base, to the "on" position. Once
turned on the hand control display will say NexStar GPS.
Press ENTER to choose GPS Align or use the UP/Down
scroll keys (10) to select a different mode of alignment.
Pressing the ALIGN key will bypass the other alignment
options and the scrolling text and automatically begins GPS
Align.
2. Once GPS Align has been selected, the telescope will begin
to move to its north and level position. While the NexStar is
positioning itself, the GPS receiver automatically begins to
establish a link with the GPS satellites orbiting the Earth.
The hand control screen will display the message GPS
Linking to let you know that it is linking with the
satellites.
3. Once the NexStar has established a link with the required
satellites, the hand control display will read GPS
Linked. The GPS satellites will then report the
current time and position directly to your NexStar. The
NexStar now has all the necessary data to make a virtual
model of the sky, select two bright stars for alignment and
begin slewing to the first star.
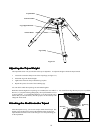
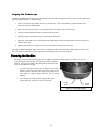
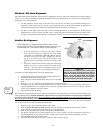
4. When the NexStar has finished slewing to its first alignment
star, the hand control display will ask you to use the arrow
buttons to center the alignment star in the cross hairs of the
finderscope. At this point the telescope is only roughly
aligned, so the alignment star should only be close to the
field of view of the finderscope. Once centered in the
finderscope, press ENTER. If for some reason the chosen
star is not visible (perhaps behind a tree or building) you
can press the UNDO button to have the NexStar select and
slew to a different star.
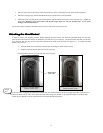
5. If the finderscope has been properly aligned with the
telescope tube, the alignment star should now be visible
inside the field of view of the eyepiece. The NexStar will
ask that you center the bright alignment star in the center of
the eyepiece and press the ALIGN button. This will accept
the star as the first alignment position. (There is no need to
adjust the slewing rate of the motors after each alignment
step. The NexStar automatically selects the best slewing rate
for aligning objects in both the finderscope and the
eyepiece).
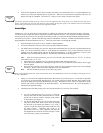
A
Few Words on GPS
:
The NexStar GPS uses an on-board GPS to take
the
g
uesswork out of ali
g
nin
g
y
our telesco
p
e with
the sky. Once GPS Align is selected, the NexStar
automatically initiates the internal GPS module.
However, there are a few thin
g
s
y
ou should be
aware of in order to
g
et the full use of its man
y
capabilities:
GPS ali
g
nment will onl
y
work when the
telescope is set-u
p
outdoors with an
unobstructed view of the sk
y
. If the
NexStar is set-u
p
in a location that has a
limited horizon in an
y
direction, the GPS
ali
g
nment ma
y
still work, however it wil
l
take much lon
g
er for the telesco
p
e to find
and link with the needed satellites.
When usin
g
GPS ali
g
nment for the first
time, it may take 3-5 minutes for the
NexStar to link-u
p
with its satellites.
Once the telesco
p
e is successfull
y
linked,
leave the telesco
p
e
p
owered on for at
least 20 minutes. Durin
g
this time the
NexStar will download the com
p
lete
almanac of orbital elements (called the
e
p
hemeris) for the orbitin
g
GPS
satellites. Once this information is
received it will be stored for future
alignments.
If
y
our NexStar is trans
p
orted over a
lon
g
distance (sa
y
from the northern to
the southern hemis
p
here) it ma
y
take as
long as one hour to establish a satellite
link from its new location. Observers
wishin
g
to travel lon
g
distances with their
telesco
p
e are advised to be
g
in the GPS
ali
g
nment in advance to allow the unit to
acquire the necessary data.