


9
Briggs & Stratton Power Products Standby Generator
Installation, Start-Up and Owner’s Manual
Shipment Contents
The Standby Generator is supplied with:
• Standby generator w/disconnect box
• Pre-attached mounting pad
• One 24” flexible hook-up hose
• Installation, start-up and owner’s manual
• Installation checklist
• Remote LED plate
• Oil drain tray
• Touch-up paint
• One spare 15A fuse
• LP conversion kit
• Roof hardware bag
Required Specialty Tools/Equipment
Tool, P/N 19570, is required if you need to convert the
generator from natural gas (NG) to liquid propane (LP).
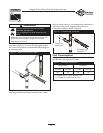
Lifting the Generator
CAUTION!The generator weighs more than
280 pounds. Proper tools, equipment and qualified
personnel should be used in all phases of handling and
moving the generator.
CAUTION! DO NOT lift unit by roof as damage to
generator will occur.
Lifting pockets are provided at each corner between the
base of the generator and its mounting pad. Retouch any
chipped paint with supplied touch-up paint.
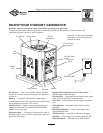
Standby Generator Location
Before installing generator, consult with homeowner and
convey the following guidelines which may affect the
desired location.
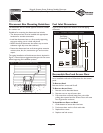
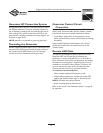
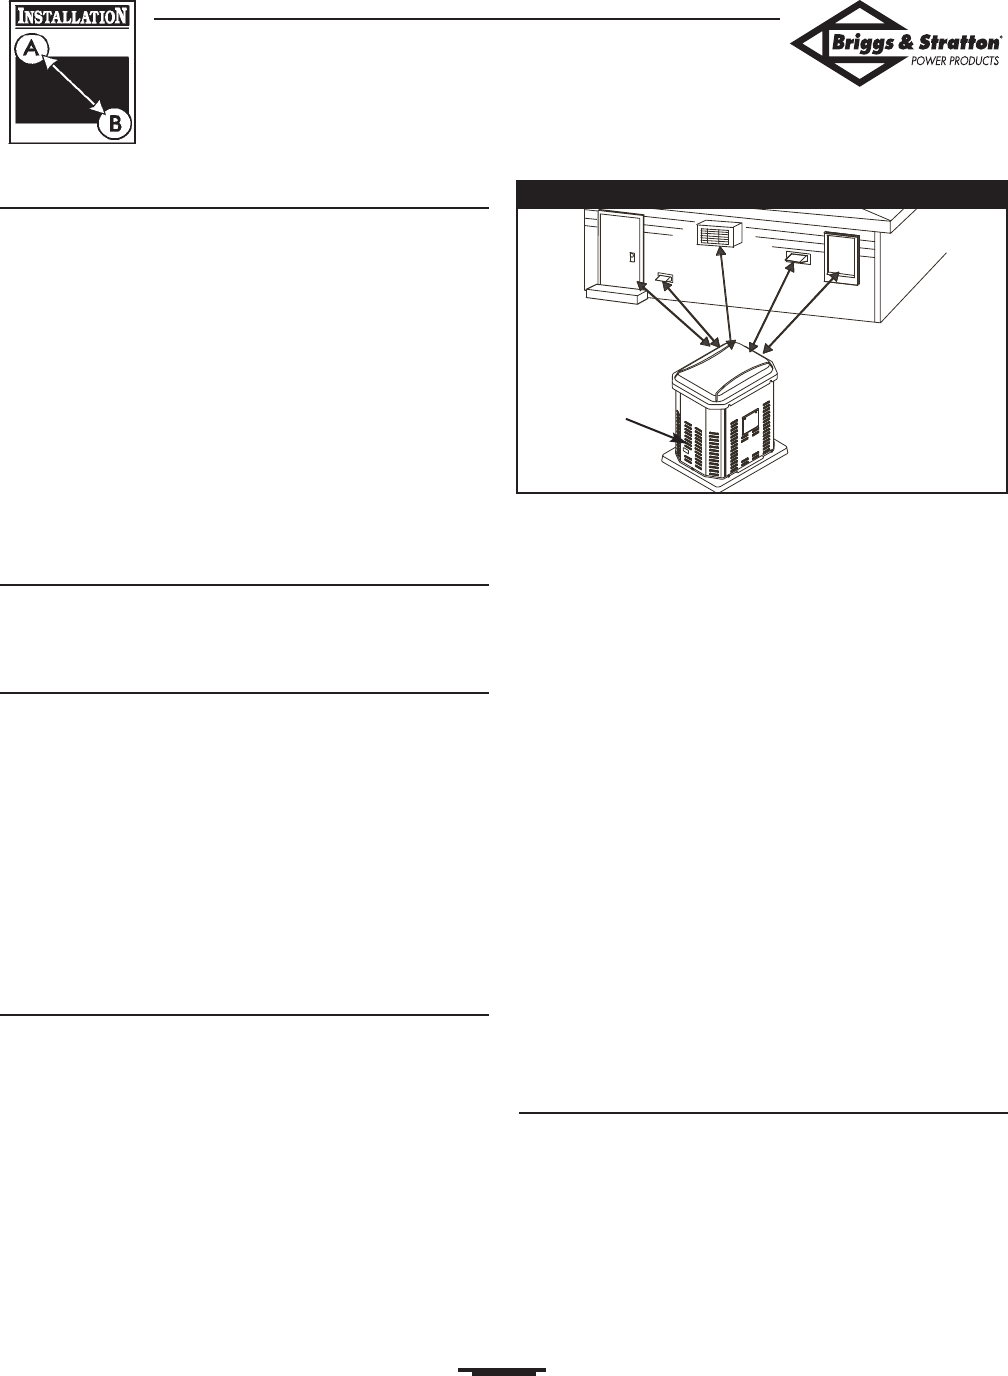
Generator Clearances
The generator enclosure must be a minimum of 3 ft. (92 cm)
from combustible material.Leave at least 3 ft. (92 cm) all
around the enclosure for access to the inside of the enclosure.
The unit’s exhaust port must be at least 5 ft. (152 cm) from
any building opening (window, door, vent etc.), and the
exhaust must not be able to accumulate in any occupied
area (Figure 1).
General Location Guidelines
• Install the unit outdoors ONLY.
• Place the unit in a prepared location that is flat and has
provisions for water drainage.
• Install the unit where air inlet and outlet openings will
not become obstructed by leaves, grass, snow, etc. If
prevailing winds will cause blowing or drifting, you may
need to construct a windbreak to protect the unit.
• Install the generator as close as possible to the Transfer
Switch to reduce the length of wiring and conduit.
• Install the generator as close as possible to the fuel
supply to reduce length of pipes.
IMPORTANT: Laws or local codes may regulate the
distance to the fuel supply.
The Standby Generator is shipped already attached to its
mounting pad. Unless mandated by local code, a concrete
slab is not required.
If mandated by local code, construct a concrete slab at least
3 inches thick and 6 inches longer and wider than the unit.
Attach unit to slab with 1/4” diameter (minimum) masonry
anchor bolts long enough to retain the unit.
Essential Circuits
Consult with owner to clearly identify the circuits in
building that are "essential".
It is important that you understand which circuits the
owner wants to include as "Essential Circuits". Depending
on the power consumed by these circuits, most or all of
them can be switched to the Standby Generator for the
duration of normal power interruption.
Figure 1 — Standby Generator Clearances
Exhaust port must be
5 ft (152 cm) minimum
distance from building
openings
Exhaust
Port