


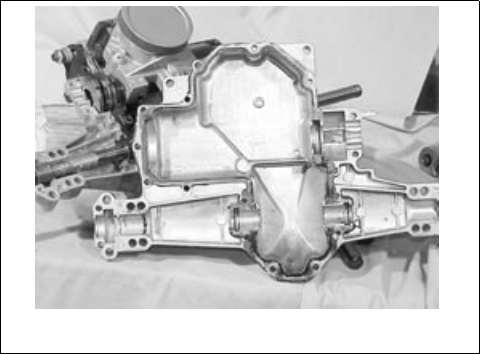
6 - 32
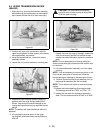
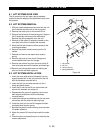
26.Install the differential axle assembly into the
housing.
27.Install a new filter onto the center section check
valve plate.
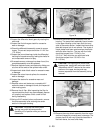
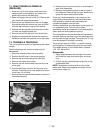
28.Install the rotors and stators. Install a stator, then a
rotor (hub to inside), then a stator, then a rotor (hub
to inside), then two stators.
29.Install the brake bolt (with nut) into the upper
housing.
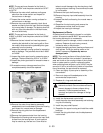
30.Apply the sealant to the lower housing.
NOTE:
Sealant must be of good quality, oil and heat
resistant.
Position the lower housing onto the upper housing and
secure with assembly bolts. Torque the bolts from
135-165 in. lbs. (8-10 Nm).
NOTE:
The bolts around the front of the housing are
installed simultaneously at our factory. The order in
which you torque them is not important.
31.After torquing all bolts, wipe off any excess sealant
from the seam of the housing.
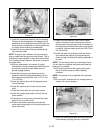
32.Reposition the transaxle assembly and check the
bypass actuator and axle shafts for freedom of
movement. The axle should not lock up but may be
tight, while the bypass actuator must rotate freely.
33.Torque the nut on the brake bolt from 120-185 in.
lbs. (7-11 Nm).
34.Install a new lip seal on the displacement control
shaft and bypass actuator shaft.
35.Install the brake pins and brake arm.
36.Adjust the brake clearance as described in the
brake adjustment section.
37.Install the control arm and friction pack.
38.Install the bypass actuator arm and retaining ring.
Use care to avoid over extending the retaining ring.
39.Prior to adding oil to the transmission it is
recommended that you test for leaks. This may be
performed with a small hand pump or by using
compressed air and a regulator. Do not allow more
than 10 PSI to be applied or seal damage may
occur. To locate a leak, apply a soap mixture
around the housing seam and at all lip seals. Do
not submerge unit or the brake will be damaged.
Oil Fill & Start-Up Procedures
Fill the transmission with a 20W-50 engine oil. The
correct volume for fill should be 2-1/2 quarts (2.4 L).
It is recommended that the unit be purged prior to
installing into the unit frame. The following is the
suggested purging procedures for repaired transaxle.
1. Spin the input shaft in a clockwise direction at
1000-1500 RPM. This may be performed in a drill
press (or equivalent).
2. Engage (actuate) the bypass.
3. Stroke the control lever forward for five seconds
and then reverse for five seconds. Do this three
times in each direction.
4. Return the control lever to neutral.
5. Disengage the bypass.
6. Stroke the control lever forward for five seconds
and then reverse for five seconds. Do this three
times in each direction.
NOTE:
It may be necessary to repeat these steps in
the vehicle to fully purge the transmission.
7. Check the oil level after fully purging the unit of air.
It should be between 1.25-1.62" (3.1-4.1 cm) from
the top of the housing.
8. After installing the transmission, make sure all
linkages and actuators are functioning properly.
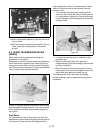
Figure 40
936-24