


Assembly 25
15148 (Rev. 2/9/2007)
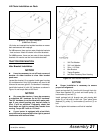
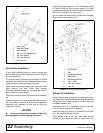
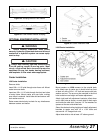
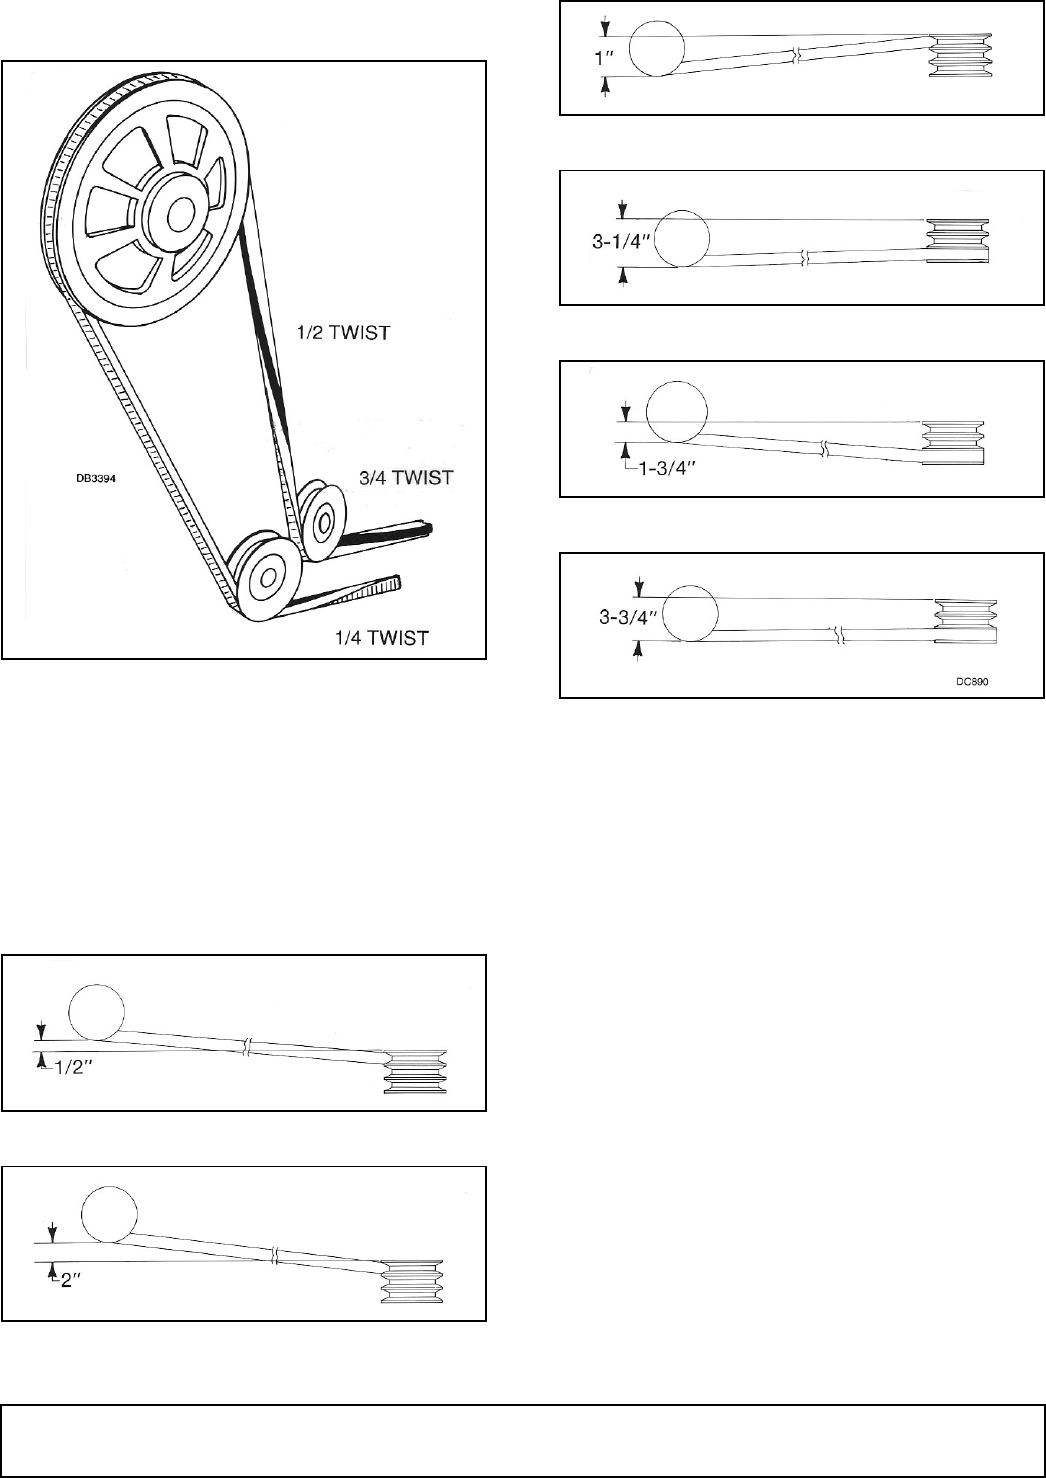
Remove rear belt shield. With mower level and cutting
height set, check belt alignment.
Figure 20. Drive Pulley to Idler Alignment
Belt alignment is accomplished by adjusting idler pul-
leys and/or moving the mower forward or rearward with
push channel arm adjustment.
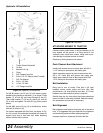
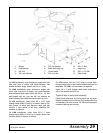
Alignment tolerances are shown in Figure 21 thru Fig-
ure 26. The best idler alignment is shown in Figure 21
& Figure 24. However, it is not always possible to
achieve. Alignment may be set within the tolerances
given, but the left idler must always be at least 1"
higher than the right.
Figure 21. Best Possible Alignment of Left Idler
Figure 22. Maximum Left Idler Should Be Raised
Figure 23. Maximum Left Idler Should Be Lowered
Figure 24. Best Possible Alignment for Right Idler
Figure 25. Maximum Right Idler Should Be Raised
Figure 26. Maximum Right Idler Should Be Lowered
NOTICE
Belt must not rub deck or crosswise support.
Belt Tension
Cycle belt through at least two revolutions after any
adjustment before checking tension.
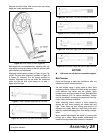
Set belt tension using a spring scale or other force
measuring device. Remove left belt shield and attach
scale between the center and left pulleys. Apply
between three and four pounds of force. Belt deflection
should measure 5/16" for normal conditions. Tension
may be increased if necessary to prevent belt from slip-
ping in heavy mowing conditions.
When checking tension without a force measuring
device, the belt, when properly set, should feel very
tight. These belts are very strong and need to be
adjusted very tightly. Belts are more likely to be dam-
aged by excessive slippage than from being overtight-
ened.
Minor tension adjustments are made by moving idler
pulleys up or down. Major tension adjustments are
made by moving mower deck forward or rearward.