


76
Maintenance Instructions
REPLACING/REPAIRING
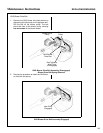
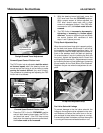
Blower Wheel Installation
1. To install the blower wheel, reverse the remov-
al procedures. The front bearing is mounted
on the blower wheel shaft, secured by a locking
collar. Drive the locking collar clockwise with a
punch, and tighten the set screw.
2. Press blower wheel and front bearing into the
blower housing. Use Loctite
®
RC/680 retaining
compound on the outer bearing race and inside
the bearing housing.
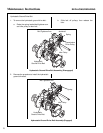
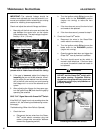
3. Press the rear bearing into place, using Loctite
®
on both the outer bearing race and the housing.
4. Install the locking collar on the rear bearing and
install the blower pulley to complete the blower
assembly. Torque the blower pulley set screws
to 250 in-lb (28.3 N·m).
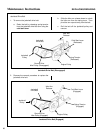
GHS Blower Assembly Installation
Reinstall the blower assembly into the mower using
the reverse procedures of GHS Blower Assembly
Removal.
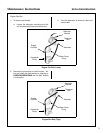
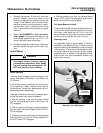
Replacing Fuel Valve Solenoid
For checking operation of the solenoid, refer to
CHECKING/SERVICING the Fuel Valve Solenoid
in this section. To replace the solenoid:
1. Remove the engine air intake hose for access
to the solenoid.
2. Disconnect the electrical plug, remove the two
(2) mounting bolts and the cotter pin on the link-
age, then remove the solenoid.
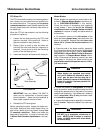
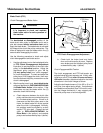
3. Unscrew the linkage rod out of the old solenoid
and reinstall in the new solenoid. Leave the jam
nut on the linkage rod loose.
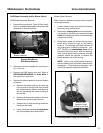
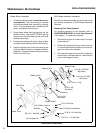
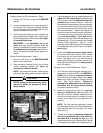
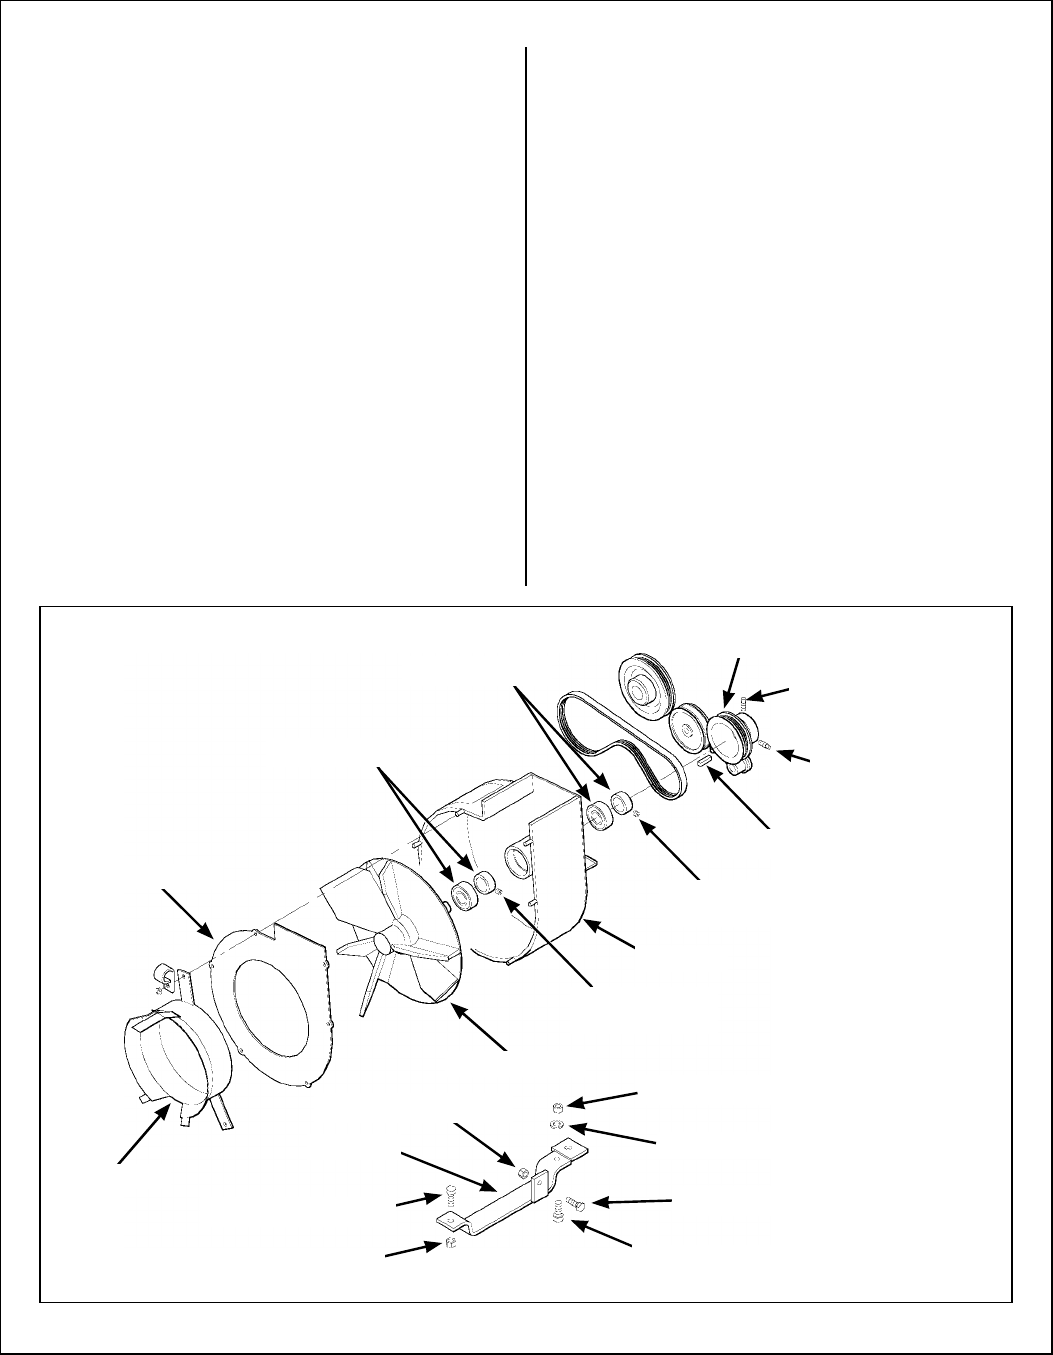
Blower Pulley
5/16-18 x 5/8 SQH
Set Screw
Face Plate
7/16-14 Hex Nut
7/16 Split Lock Washer
5/16-18 x 3/4 SQH
Set Screw
3/16 x 3/16 x 1 Key
1/4-20 x 3/8
Set Screw
Housing
1/4-20 x 3/8
Set Screw
Blower Wheel
Bearing (3/4)
Bearing (3/4)
Intake Tube
5/16-18 Whiz Locknut
Skid Bar
3/8-16 x 1 Hex Bolt
3/8-16 Keps Nut
5/16-18 x 3/4 Hex Bolt
7/16-14 x 1-1/4 Hex Bolt
GHS Blower Components