


Re move the bolt and blade sup port which
holds the blade and adapter to the en gine
crank shaft. Re move the blade and adapter
from the crank shaft.
WARNING: Pe ri odically in spect the
blade adapter for cracks, es pe cially if
you strike a for eign ob ject. Re place
when nec es sary.
For best re sults your blade should be sharp.
The blade may be resharpened by re mov ing it
and ei ther grind ing or fil ing the cut ting edge
keep ing as close to the orig i nal bevel as pos -
si ble. It is ex tremely im por tant that each
cut ting edge re ceives an equal amount of
grind ing to pre vent an un bal anced blade. Im -
proper blade bal ance will re sult in ex ces sive
vi bra tion caus ing even tual dam age to the en -
gine and mower. Be sure to care fully bal ance
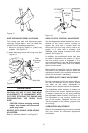
blade af ter sharp en ing. The blade can be
tested for bal ance by bal anc ing it on a round
shaft screw driver. Re move metal from the
heavy side un til it bal ances evenly.
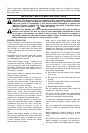
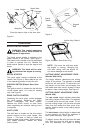
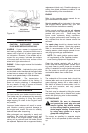
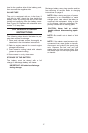
Be fore re as sem bling the blade and the blade
adapter to the unit, lu bri cate the en gine crank -
shaft and the in ner sur face of the blade
adapter with light oil. In stall the blade adapter
on the crank shaft with the “star” away from the
en gine. Re fer to Fig ure 18. Place the blade
with the side marked bot tom (or with part
num ber) fac ing away from the adapter. Align
the blade bell sup port over the blade with the
tabs in the holes of the blade and in sert the
hex bolt. Tighten the hex bolt to the torque
listed be low:
Blade Mounting Torque
Cen ter Bolt 450 in. lb. min., 600 in.lb. max.
To in sure safe op er a tion of your unit, ALL
nuts and bolts must be checked pe ri od i cally
for cor rect tight ness.
CAUTION: Cutting grass in sandy
soil conditions causes abrasive
wear to the blade.
Af ter pro longed use, es pe cially in sandy soil
con di tions, the blade will be come worn and
lose some of the orig i nal shape. Cut ting ef fi -
ciently will be re duced and the blade should be
re placed. Re place with an ap proved fac tory re -
place ment blade only. Pos si ble dam age
re sult ing from blade un bal ance con di tion is not
the re spon si bil ity of the man u fac turer.
BELT REMOVAL AND REPLACEMENT
1. Dis con nect the spark plug wire and
ground it against the en gine.
2. Drain the fuel tank or place a piece of plas -
tic be neath the cap to pre vent gas o line
leak age.
3. Tip the mower on its side. Block se curely.
4. Re move the blade and blade adapter as
de scribed previously.
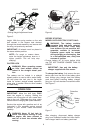
5. Move rear height ad juster to the high est
po si tion. See Fig ure 21.
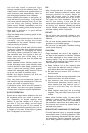
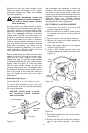
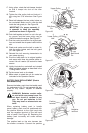
6. Using a 3/8" socket re move three hex
screws hold ing the baf fle to the deck. See
Fig ure 19.
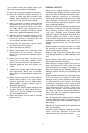
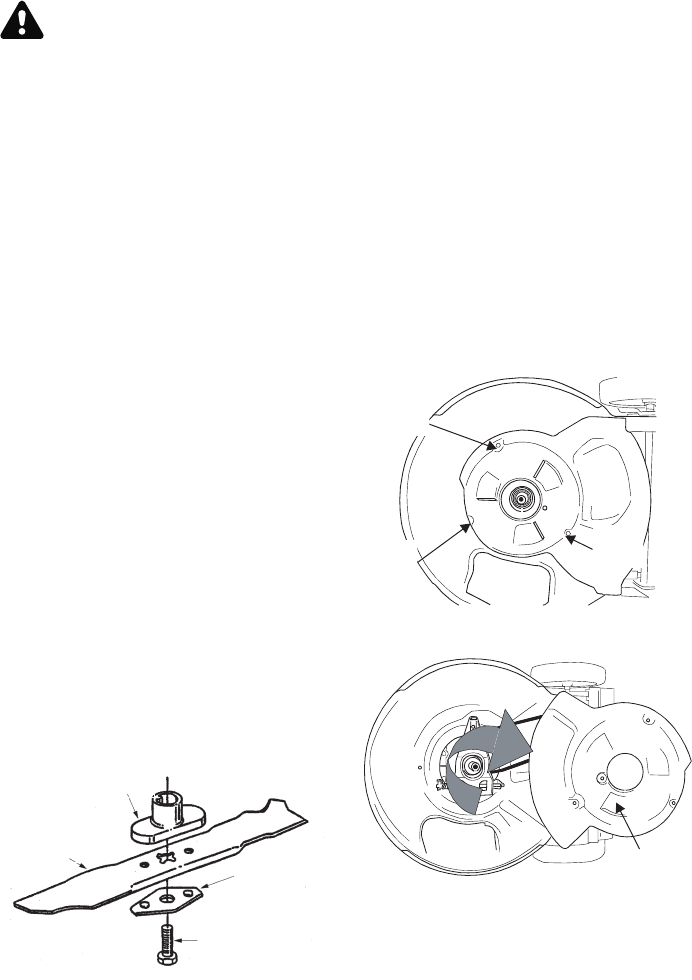
7. Pivot baf fle to wards the rear of the mower.
See Fig ure 20.
8. Re move the hex bolt hold ing the trans mis -
sion to the mower hous ing. See Fig ure
21.
14
Figure 18
Blade Adapter
Blade
Hex Bolt
Blade Bell
Support
Figure 19
Hex
Screw
Hex
Screw
Hex
Screw
Figure 20
Baffle