


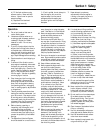

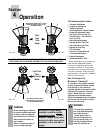

STEP 3: Attach Upper Handlebar
Section to Lower Handlebar Section
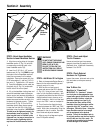
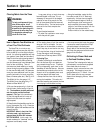
1. Align the mounting holes in the upper
handlebar section (F, Fig. 2-4) with the
corresponding mounting holes in the
lower handlebar section (G).
2. Insert four 5/16"-18 x 1-1/2" curved
head screws (H, Fig. 2-4) DOWN through
the holes in the two handlebar sections.
Install the top screws first for easiest
installation. Secure the screws with four
5/16" lockwashers (I), and four 5/16"-18
hex nuts (J). Tighten with a 1/2" wrench.
3. Press the handlebar control cable into
the plastic clip (K, Fig. 2-4) underneath
the left side of the control panel.
4. Lift up the handlebar locking lever and
swivel the handlebar toward the engine
starter rope to test hardware tightness at
the base of the handlebar. If the handlebar
seems secure and swivels smoothly, the
hardware is tightened properly. Tighten
the front bolt (D, Fig. 2-3) more if the
handlebar doesn’t seem secure enough.
Loosen the front bolt (D) a little if the
handlebar is hard to swivel. IMPORTANT:
This bolt must be tightened properly for
the handlebar to swivel properly. The
other long bolt next to it should not be
tightened now, but may at some time in
the future require tightening which is
explained in the Maintenance Section.
WARNING
DO NOT START THE ENGINE
UNTIL ENGINE CRANKCASE HAS
BEEN FILLED WITH OIL.
FAILURE TO FOLLOW THIS
INSTRUCTION WILL RESULT
IN SERIOUS ENGINE DAMAGE.
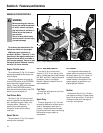
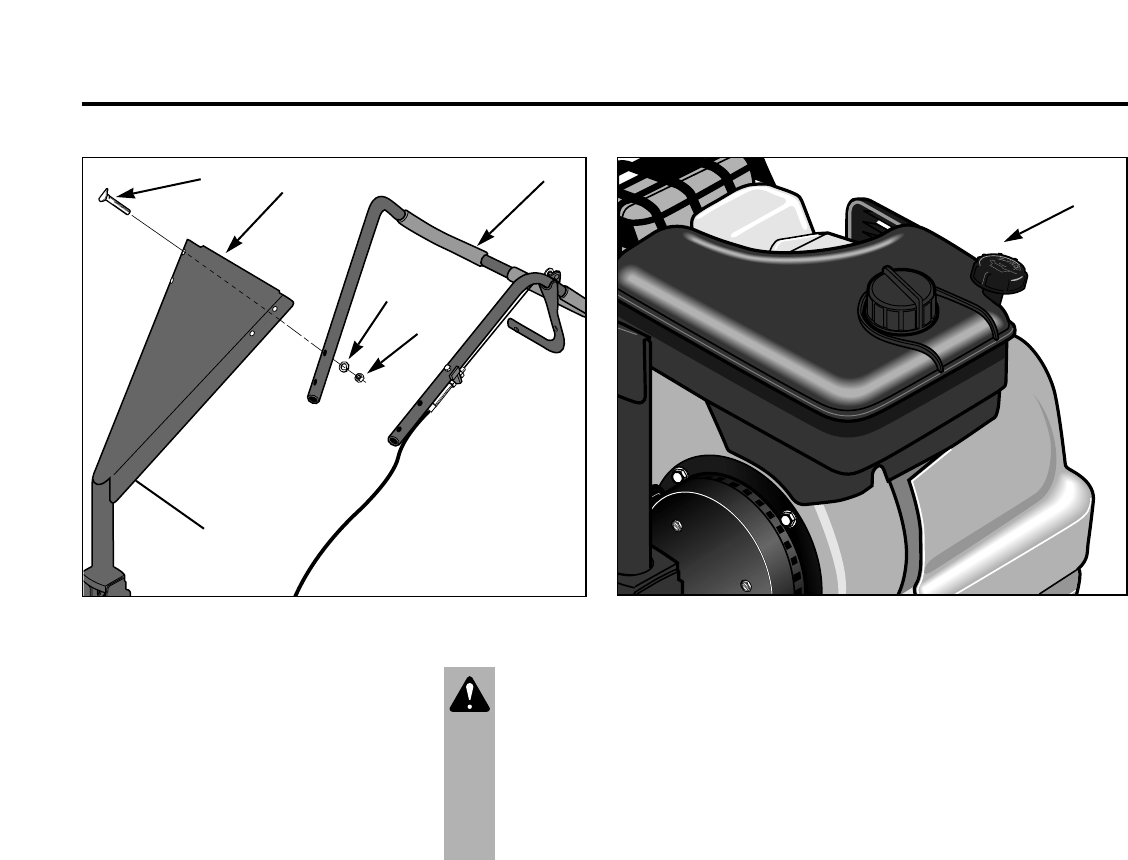
STEP 4: Add Motor Oil to Engine
1. Refer to the separate Engine Owner’s
Manual for the recommended type and
viscosity motor oil to use.
2. With the tiller on level ground,
unscrew and remove the oil fill dipstick
(L, Fig. 2-5). Using a funnel, pour fresh
motor oil into the dipstick opening. Add
oil gradually and check the level with the
dipstick several times to be sure not to
overfill the engine. Add oil until the level
is up to the “FULL” mark on the dipstick.
3. The oil level on the dipstick should
always be between the “ADD” and “FULL”
marks. Wait a few minutes after filling the
crankcase for the oil to settle. Re-check
the oil level and adjust as needed.
4. Wipe up any oil spillage and replace
the oil fill dipstick securely.
STEP 5: Check and Adjust
Tire Air Pressure
Use an automotive-type tire pressure
gauge to check the air pressure in both
pneumatic tires. Inflate both tires evenly
between 15-to-20 PSI.
STEP 6: Check External
Hardware for Tightness
Inspect the screws, bolts and nuts on the
tiller and make sure they are securely
tightened.
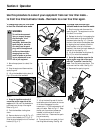
How To Move the
Machine in “Freewheel”
IMPORTANT: To “freewheel” (wheels
turn freely due to disengagement from
transmission gears) the machine off the
pallet to another location, unlock the
handlebar locking lever (see Pg. 9),
then swivel the lower section of the
handlebar (stand on the engine muffler
cage side only) 180
0
to position it over
the engine. Relock the lever. Using the
lower handlebar section for leverage,
roll the equipment to the desired
location. Swivel the handlebar back to
its original position over the tine hood to
return to the rear tine tiller mode. Do
not pick up the machine by the fenders
to avoid damage to the fenders.
8
Section 2: Assembly
Fig. 2-4
Fig. 2-5
F
G
H
I
J
K
L
Lower
Handlebar
Section
Upper
Handlebar
Section