


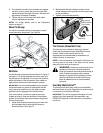


11
Before Stopping
1. Run engine for a few minutes to help dry off any
moisture on engine.
2. Avoid freezing of the starter by following these
steps before stopping the snow thrower:
Recoil Starter
a. With the engine running, pull the starter rope
with a rapid, continuous full arm stroke three
or four times.
Electric Starter
a. Connect power cord to switch box, then to
120 Volt AC receptacle.
b. While the engine is running, push the starter
button and spin the starter for several
seconds.
c. Disconnect power cord from the receptacle
first, then from the snow thrower.
NOTE: The unusual sound from pulling the starter rope
in case of the recoil starter, or from spinning the starter
in case of the electric starter, will not harm the engine.
To Stop The Snow Thrower
1. To stop the wheels, release the drive control on the
snow thrower.
2. To stop throwing snow, release auger control.
3. To stop engine, push throttle control lever to “stop”
or “off” and remove ignition key (Do not turn key)
to prevent unauthorized use of equipment.
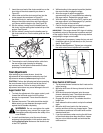
To Engage Drive
1. With the engine running near top speed, move shift
lever to one of six FORWARD positions or two
REVERSE positions. Select a speed appropriate
for the snow conditions that exist. Use slower
speeds until you are familiar with the process.
2. Squeeze drive control against the right handle and
the snow thrower will move. Release it and the
drive motion will stop.
To Engage Augers
1. To engage augers and start snow throwing,
squeeze the left hand auger control against the left
handle. Release to stop augers.
2. While the auger control is engaged, squeeze the
drive control to move, release to stop. Do not shift
speeds while the drive is engaged.
NOTE: This same lever also locks auger control so you
can turn the chute directional control without
interrupting the snow throwing process.
3. Release the auger control; the interlock mechanism
should keep the auger control engaged until the
drive control is released.
4. Release the drive control to stop both the augers
and the wheel drive. To stop the auger, both levers
must be released.
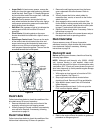
To Thro w Snow
CAUTION: Check the area to be cleared for foreign
objects. Remove, if any.
1. Start the engine following starting instructions.
2. Rotate the discharge chute to the desired position,
(away from bystanders and/or buildings) by moving
the chute control.
3. Select the speed according to snow condition.
CAUTION: Never move the shift lever without first
releasing the drive control.
4. Engage the auger and drive controls following
instructions above.
5. The interlock feature will allow you to remove your
left hand from the auger control.
6. When clearing the first pass through the snow,
control speed of snow thrower according to the
depth and condition of snow.
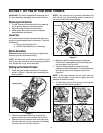
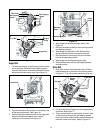
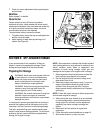
7. To turn the unit left or right, squeeze the respective
wheel steering control. See Figure 8.
8. On each succeeding pass, readjust the chute to the
desired position and slightly overlap previous path.
9. After the area is cleared, stop the snow thrower
following instructions given below.
Operating Tips
NOTE: Allow the engine to warm up for a few minutes
as the engine will not develop full power until it reaches
operating temperature.
• For most efficient snow removal, remove snow
immediately after it falls.
• Discharge snow downwind whenever possible.
Slightly overlap each previous swath.
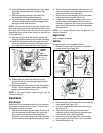
• Set the skid shoes 1/4" below the scraper bar for
normal usage. The skid shoes may be adjusted
upward for hard-packed snow.
NOTE: It is not recommended that you operate this
snow thrower on gravel as loose gravel can be easily
picked up and thrown by the auger causing an injury or
damage to the snow thrower.
• If for some reason, you have to operate the snow
thrower on gravel, keep the skid shoe in the highest
position for maximum clearance between ground
and shave plate.
• Clean the snow thrower thoroughly after each use.
WARNING: The temperature of muffler and
surrounding areas may exceed 150
o
F. Avoid
these areas.