


Two Stage Snowthrower Drive Systems Manual 2 - 7
Belts, Controls and Linkages
CONTROL AND LINKAGE ADJUSTMENT
Note: Before making any control adjustments, verify
that the handles are secured to the traction frame. If
the handles move at all, the linkages will not maintain
adjustment.
Auger Control Adjustment — Toro Models
38065, 38080, 38085
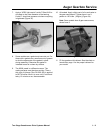
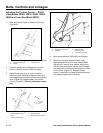
Install Auger Drive Control Rod
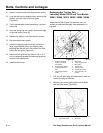
1. Move auger drive control backward to
DISENGAGE and hold it in that position.
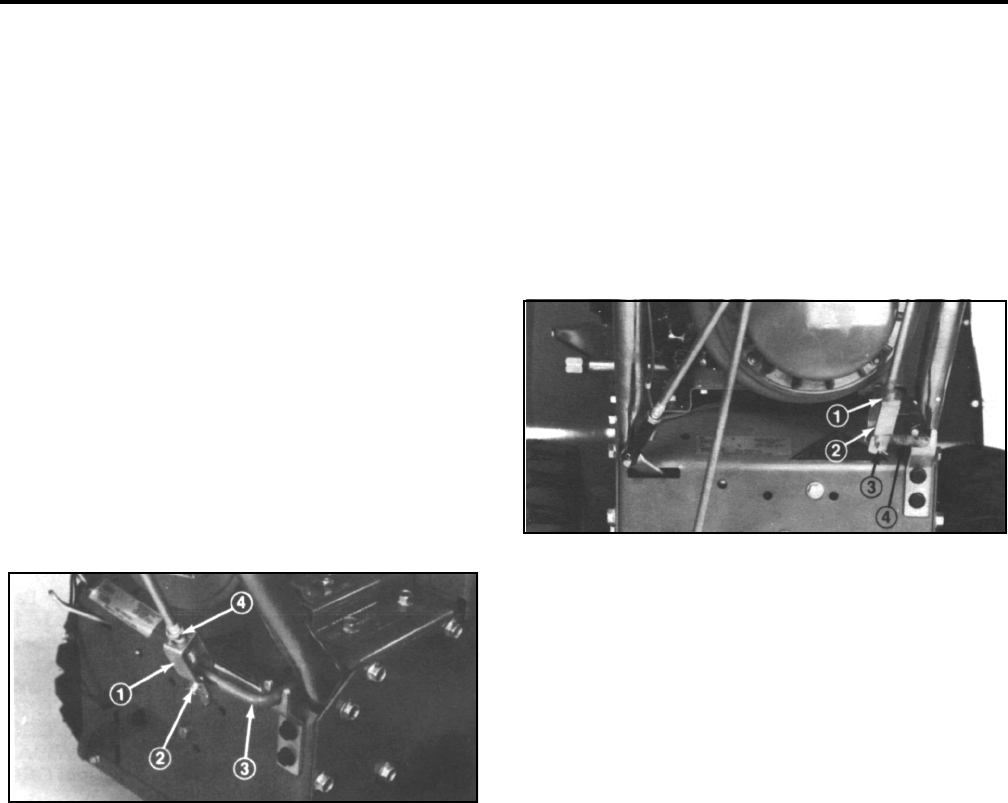
2. Rotate clevis at end of auger drive control rod until
holes in clevis line up with hole in bent rod
(Figure 51). Next, secure clevis and bent rod
together with clevis pin and cotter pin.
Figure 51
13299-4
3. Tighten the jam nut firmly against top of clevis.
Note: Move auger drive control forward to
ENGAGE. If excessive force is required to move
the control, adjust the auger drive control: refer to
Adjusting Auger/Impeller Drive Belt (below).
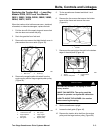
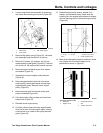
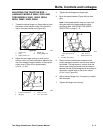
Adjusting Auger/Impeller Drive Belt
If auger slips, which means the auger drive belt is
slipping, an adjustment is required. When a new auger/
impeller drive belt is installed, an adjustment may also
be required.
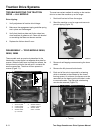
1. Loosen jam nut from clevis at bottom of auger
drive control rod (Figure 52). Next, remove cotter
pin and clevis pin holding clevis to bent rod.
Figure 52
13299-33
2. Rotate clevis counterclockwise — out — to
increase belt tension. By contrast, rotate clevis
clockwise — in — to decrease belt tension.
3. Connect clevis to bent rod with clevis pin and
cotter pin. Next, tighten jam nut against top of
clevis.
4. Check tension of belt by operating the auger. If
belt still slips, or if the auger does not stop when
disengaged, adjust clevis again.
IMPORTANT: Do not adjust belt too tight because
the belt will wear out quickly or possibly cause
damage to the snowthrower.
1
.
Cl
ev
i
s
2. Clevis pin and
cotter pin
3
.
B
en
t
ro
d
4. Jam nut
1
.
J
am nu
t
2. Clevis
3
.
Cl
ev
i
s p
i
n an
d
cotter pin
4. Bent rod