


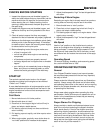
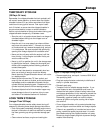

Oil Level
1.Oil level must be full. Check the oil level by removing
oil fill plug. Oil level should be up to the bottom of the
fill plug opening (see Figure 10).
2.Add SAE 30 oil (5W30 for winter use) as necessary..
3.Do not overfill the oil sump! Excess oil will result in
frothing of oil, reducing the effectiveness of the oil
and shortening engine life.
4.After the proper oil level is reached, screw fill-plug in
tightly, and clean surrounding area of any spillage to
prevent sticking of debris that could fall into engine
during next oil check.
Changing Oil
Effective lubrication of the engine is critical to the life
expectancy of internal engine components. Because of
this, engine oil should be changed yearly when the chip-
per/shredder is used only occasionally, and more fre-
quently depending on the amount of time the
chipper/shredder is in use.
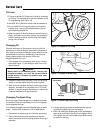
1. Drain engine oil by unscrewing drain plug in engine
base (see Figure 11) and letting oil drain into a suit-
able container.
2. Dispose of used oil by returning it to an oil recycling
center or service station with a oil recycling tank.
3. After all old oil has been drained, screw drain plug in
securely, and add oil as instructed in the "Oil Level”
section, or see the engine manufacturer’s manual for
complete details and oil specifications.
Changing The Spark Plug
An annual spark plug change is an inexpensive preven-
tive measure that can help keep your unit running prop-
erly throughout the year.
This chipper/shredder uses the following types of spark
plugs: Autolite 356, Champion J-8C or equivalents.
1. Disconnect the spark plug wire from the spark plug.
2. Clean the area around the spark plug to remove
debris that could fall into the engine when the plug is
removed.
16
Normal Care
*2556
WARNING
Never drain oil immediately after running the
chipper/shredder, as it will be hot and could
cause burns if allowed to splash onto your
hands or body.
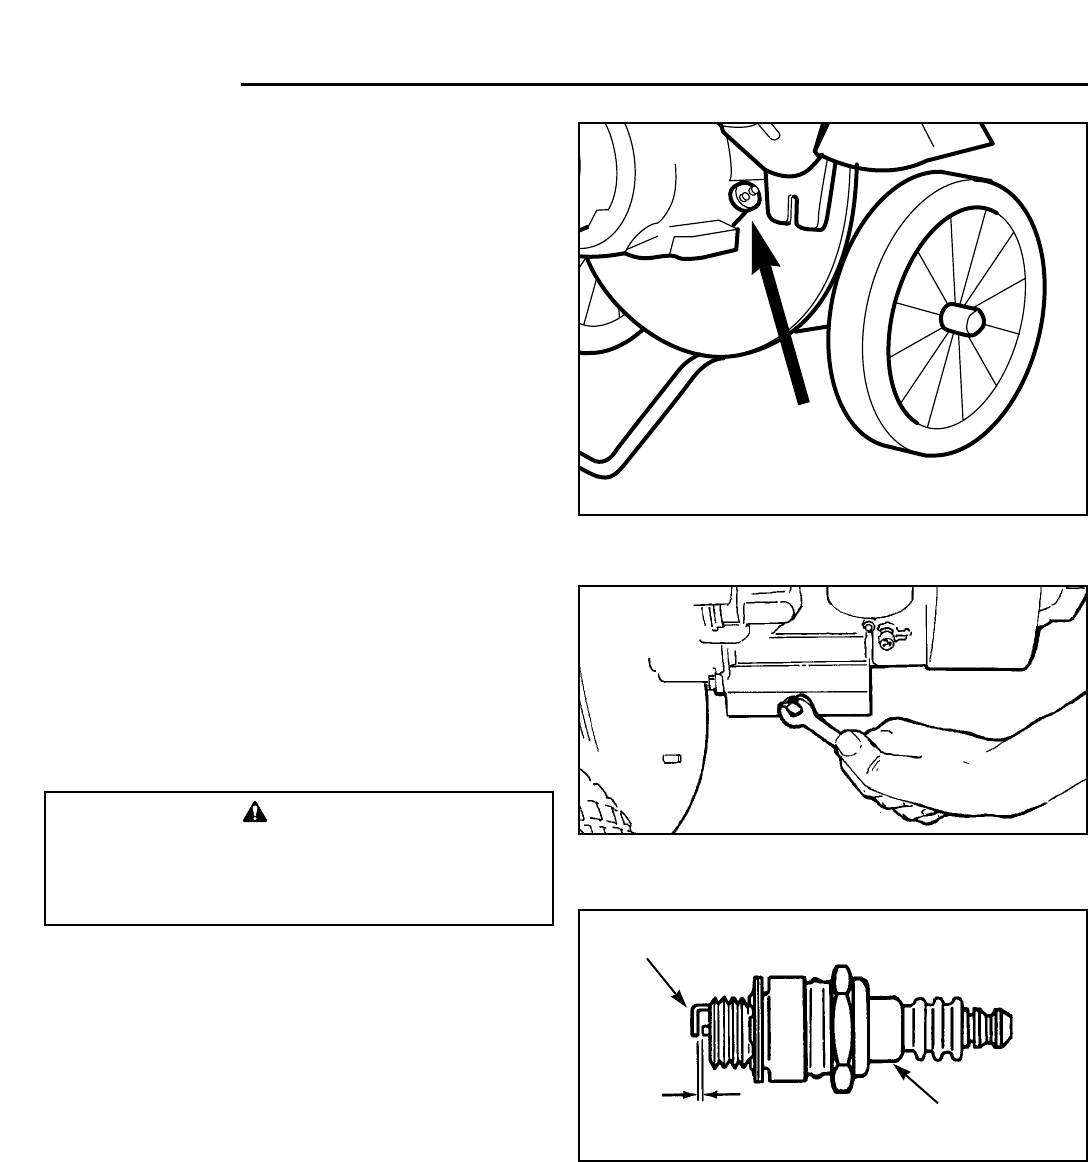
Figure 11. Engine Oil Drain Plug
Figure 10. Engine Oil Fill Plug
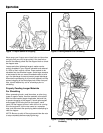
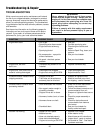
Figure 12. Spark Plug Gap Setting
.030 Gap
Electrodes
Porcelain
3. Using a spark plug socket and appropriate wrench,
unscrew the spark plug from the engine.
4. After first setting the proper gap on the replacement
spark plug, screw the new plug in and tighten. Don’t
over tighten, as this could crack the porcelain insula-
tor and ruin the plug.