


19
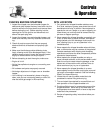
General
The following information will help you make the neces-
sary checks and perform the procedures required to fol-
low the normal care recommendations made for your
chipper/shredder unit.
Your local authorized dealer can make these checks and
perform the required procedures for you.
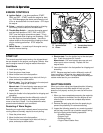
CHECK FOR LOSE PARTS AND
HARDWARE
Check the following areas, and tighten as required:
1. Chipper Cone & Cone Mounting
2. Shredder Hopper
3. Rotor Housing
4. Deflector Shield
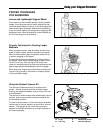
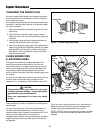
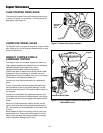
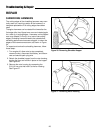
OIL LEVEL
1. Oil level must be full. Check the oil level by removing
and checking the engine dip-stick (Figure 15). The
oil level should be up to the full mark on the dip-stick.
2. Add the recommended oil a little at a time so as not
to overfill.
3. Do not overfill the engine oil! Excess oil can be detri-
mental to the engine.
4. After the proper oil level is reached, replace the dip-
stick and clean surrounding area of any spilled oil to
prevent the sticking of debris that could fall into
engine during the next oil check.
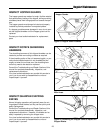
CHANGING OIL
Effective lubrication of the engine is critical to the life
expectancy of internal engine components. Because of
this, engine oil should be changed yearly when the chip-
per/shredder is used only occasionally, and more fre-
quently depending on the amount of time the
chipper/shredder is in use.
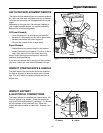
1. Drain engine oil by unscrewing drain plug (Figure 16)
in the engine base and letting oil drain into a suitable
container.
2. Dispose of the used oil by returning it to an oil recy-
cling center or service station with a oil recycling
tank.
3. After all old oil has been drained, screw drain plug in
securely, and add oil as instructed in the "Oil Level”
section, or see the engine manufacturer’s manual for
complete details and oil specifications.
CAUTION
Do not change the engine oil if the engine has
just been run. Hot oil causes burns.
*2556
Figure 16. Engine Oil Drain Plug
Regular Maintenance
Figure 15. Oil Dip Stick Location
Dip Stick
Located
Behind
Gas Tank