PREPARING THE SNOW THROWER FOR USE
_ The following section describes steps you must follow to prepare the snow thrower
for use. If after reading this section, you are unsure about how to perform any of the
steps please call (888) 315-3080 M-F 8-5 CT for customer service. Failure to
perform these steps properly can damage the snow thrower or shorten its life.
Visually Inspect the Snow Thrower
Before using the snow thrower for the first time, be sure that the machine is properly
assembled (see the "Assembly" section of this manual). Check that all parts are properly
attached and free from damage. If you are unsure about the assembly or condition of any
of the snow thrower parts, call the customer help line for service.
Before each use of the snow thrower, check the snow thrower for damaged or missing
components. If parts are damaged or missing, do not attempt to use the machine.
Instead, call our customer help line.
Check Tire Inflation
Before each use of the snow thrower, check the tire pressure. The pressure of the two
tires should be equal and in the range of 20-24 PSI for each tire to ensure the best
performance.
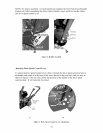
The pressure can be checked using an ordinary tire pressure gauge. Fill the tires using a
portable air compressor or other compressed air source. NOTE: Do not over-inflate the
tires. For more detail about how to check the tire pressure and fill the tires, see the
Maintenance section of this manual.
Add/Check Oil
If this is'your first time using this snow thrower:
The snow thrower requires engine oil to operate properly. The snow thrower, when new
from the package, contains 17ooil in the engine crankcase. To add oil to your snow
thrower for the first time, follow these steps:
1. Make sure the snow thrower is fully assembled and on a level surface.
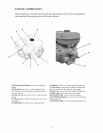
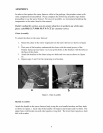
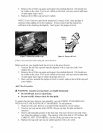
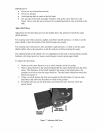
2. Unscrew the oil filler cap from the engine crankcase as shown in figure 6.
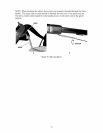
3. Using a funnel, add approximately 21 fluid oz. of motor oil. Use a regular car
motor oil that performs well in cold conditions. The temperature conditions and
recommended oil grade will vary by geographic area.
4. Wipe the dipstick attached to the oil filler cap with a clean dry cloth. Now replace
the cap.
13


