


www.petsafe.net 5
Locate the Fence Transmitter
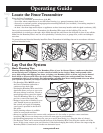
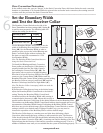
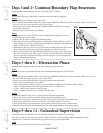
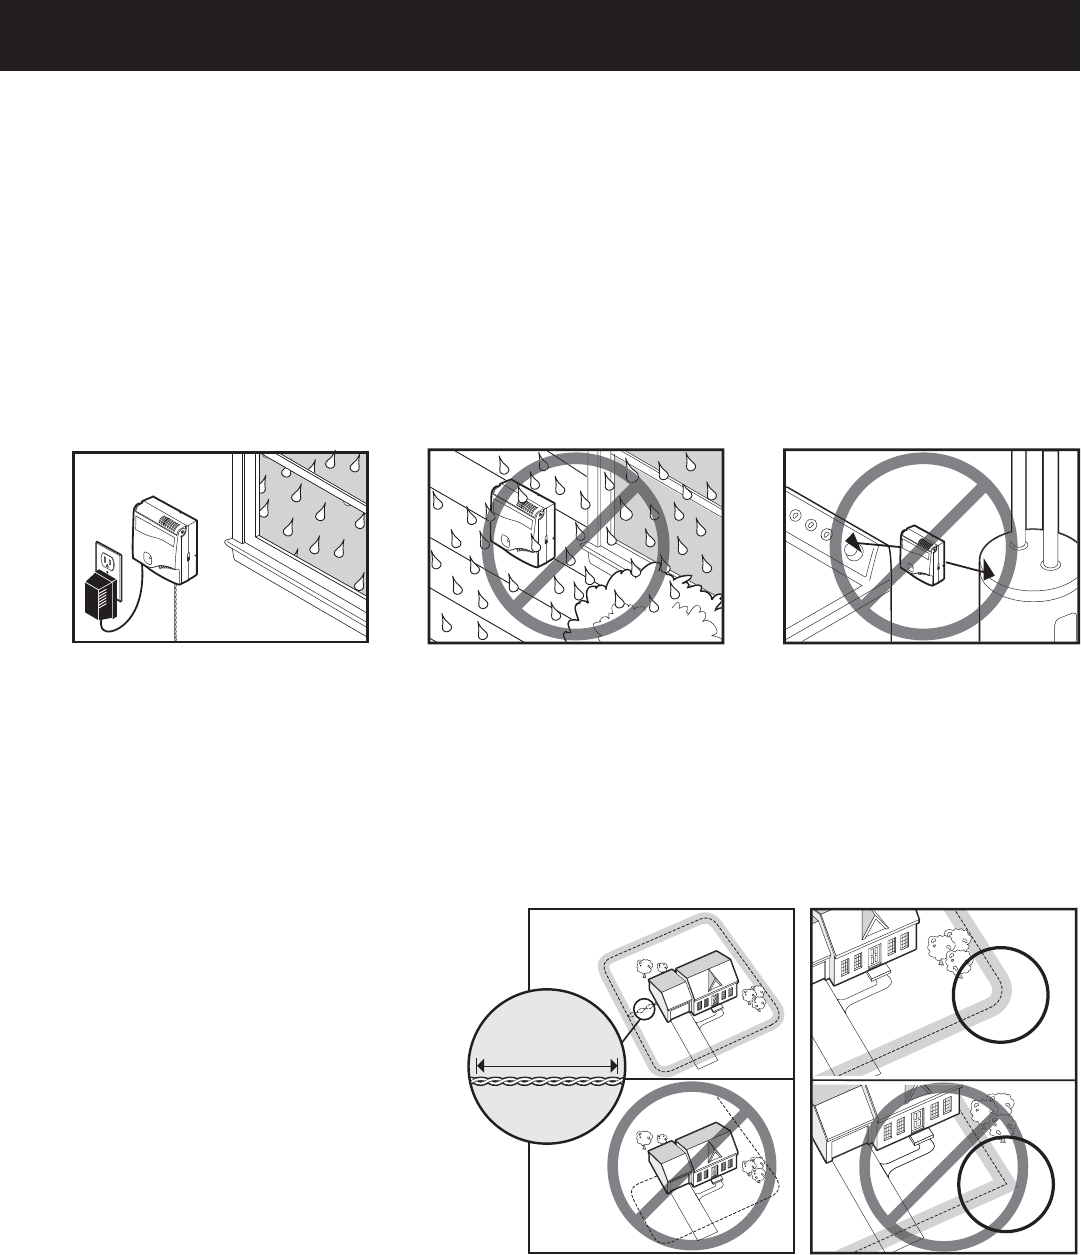
Place the Fence Transmitter:
• In a dry, well ventilated, protected area (1A, 1B).
• In an area where temperatures do not fall below freezing (e.g., garage, basement, shed, closet).
• Secured to a stationary surface using appropriate mounting hardware (not included). A mounting template is
included in the back of this guide.
• At least 3 feet from large metal objects or appliances as these items may interfere with the signal consistency (1C).
Once you have mounted the Fence Transmitter, the Boundary Wire must exit the building. This can be
accomplished via a window or through a hole drilled through the wall. Ensure the drill path is clear of any utilities.
Make sure the Boundary Wire is not cut off or pinched by a window, door, or garage door, as this can damage it
over time.
To prevent fi res and electrical hazards, install the Fence Transmitter in buildings that are in accordance with state
and local electrical codes.
1A
1B
3ft.
1C
__________________________________________________
Lay Out the System
Basic Planning Tips
Warning: Before digging to bury the Boundary Wire of your In-Ground Fence
™
, make sure that there
are no buried power, telephone, or other electrical cables in the vicinity. Many underground cables
carry high voltage and digging into them, or laying your Boundary Wire on them, may lead to hazard
from shock or electrocution. Have the local utility company mark your underground lines. In most
communities this is a free service. For information regarding how these underground wires can affect
your system’s operation, see Step 3 Position the Boundary Wire.
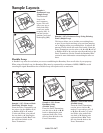
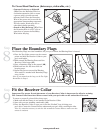
• The Boundary Wire MUST start at
the Fence Transmitter and make a
continuous loop back (2A).
• Twisting the Boundary Wire cancels the
signal and allows your pet to cross over
that area without correction. Plastic or
metal piping will not cancel the signal.
Twist the Boundary Wire 10 to 12 times
per foot to cancel the signal (2A).
• Design a layout that is suitable for your
yard. Sample layouts are provided in
this section, and a grid for designing
your layout is provided in the back of
this guide.
• Fence planning software is available
online at www.petsafe.net/fence.
10 Twists/ft.
2A 2B
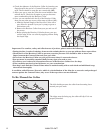
• Always use gradual turns at the corners with a minimum of 3 foot radius to produce a more consistent
boundary (2B). Do not use sharp turns, as this will cause gaps in your boundary.
• Avoid making passageways too narrow for your pet to move about freely (e.g., along the sides of a house).
• The Receiver Collar can be activated inside the house if the Boundary Wire runs along the outside wall of the
house. If this occurs, remove your pet’s Receiver Collar before bringing him inside, decrease the range using the
Boundary Width Control knob or consider an alternative layout.
Operating Guide
Step
1
Step
2