


SP7060 PAVEMENT SAW • OPERATION MANUAL — REV. #0 (02/13/09) — PAGE 33
COLD WEATHER OPERATION/POINTER ADJUSTMENT
COLD WEATHER OPERATION
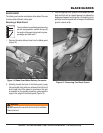
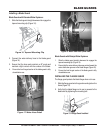
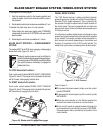
Block Heaters
In extreme cold weather, optional block heaters may be used. Block
heaters are installed directly onto the crankcase and are operated
by plugging into a 110VAC electrical outlet. Be sure to use
appropriate gauge wire when using extension cords and abide by
all safety rules when using electical power, power cords, and
extension cords. Do not use block heaters when the when
temperatures are above 20
o
F (-6.67
o
Celsius).
Draining the Water System
When low temperatures fall below 32
o
F (0
o
C):
1. If the saw is equipped with an optional water pump, open
the drain petcock on the pump and allow the pump to
drain. Turn the water pump switch on for a few seconds to
purge any water remaining inside the pump body.
2. Tilt the saw UP and BACK, to allow water to drain.
3. Tilt the saw FORWARD, to allow water to drain again.
4. If an air compressor is available, blow out the system by
applying compressed air to the water inlet.
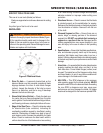
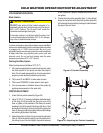
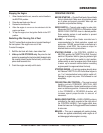
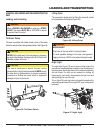
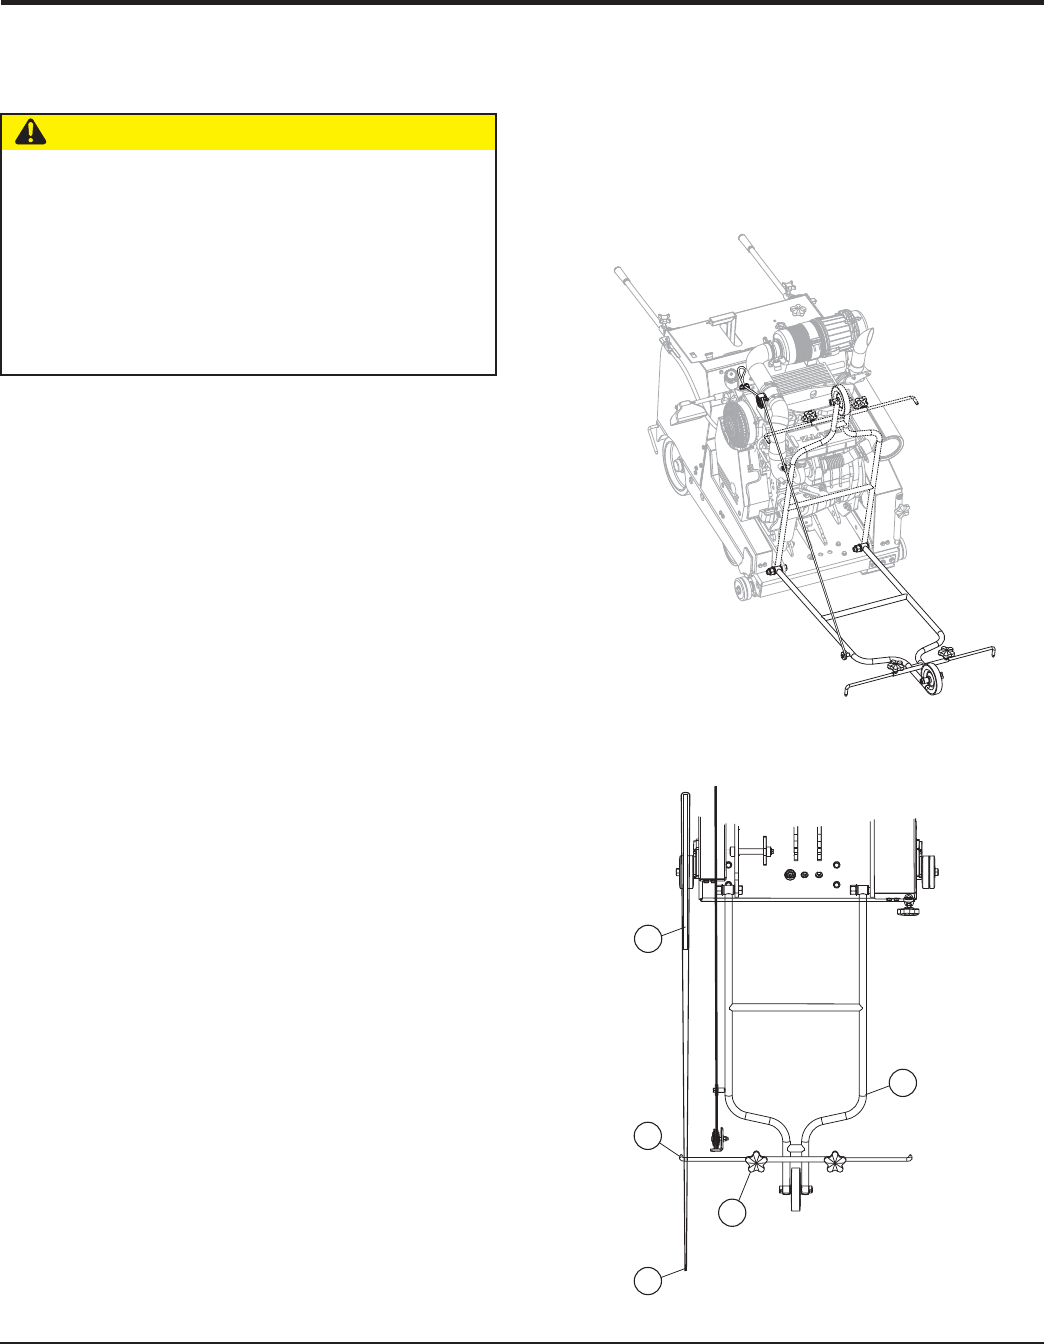
POINTER ADJUSTMENT
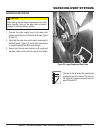
1. Lower the front pointer assembly (Figure 25).
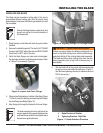
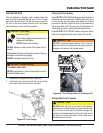
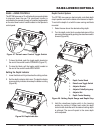
2. Using 10-12 ft. (3-3.7 meters) of stringline, divide the length
of the string in half and slide the string into one of the
slots or gullets on the backside of the blade (as viewed
standing in front of the pointer) SeeFigure 26, Item 2. Hold
both ends of the string in one hand and pull the string taut
(Item 3). Move your hand from side to side until both strings
are touching both sides of the blade.
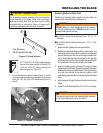
3. Adjust the pointer rod (Item 5) by loosening the lock knob
(Item 4). Move the pointer directly over the middle of the
two strings in your hand and tighten the pointer setscrew
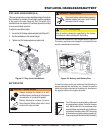
CAUTION — Block Heaters
DO NOT leave optional block heaters plugged in for
extended periods when temperatures may rise above
20
o
F, (-6.67
o
Celsius). The oil could “cook” inside the
crankcase and damage the engine.
If the water system is not drained when the saw is not
in use and temperatures fall below 32
o
F (0
o
C), damage
may occur to optional water pumps.
Figure 25. Pointer Assembly
1
4
2
3
5
Figure 26. Adjusting the Pointer Assembly
Top View
to lock the pointer in position. Repeat this process for the
rear pointer.
4. To raise the front pointer assembly (Item 1), first pull back
and up on the pointer cable. Secure the pointer assembly
in the desired raised position by locking the cable between
the jaws of the cam cleat.