


DCA-400SSK — PARTS AND OPERATION MANUAL (STD)— REV. #3 (09/17/01) — PAGE 51
DCA-400SSK — GENERATOR START-UP PROCEDURE (CONTROLLER)
1. Follow instructions as with key switch numbers 1-6.
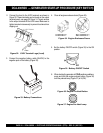
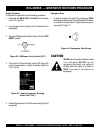
Figure 49. Off/Manual/Auto Switch (Manual)
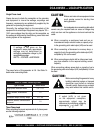
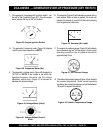
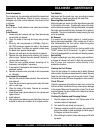
3. After engine starts, verify that the "Engine Running"
status LED (Figure 50) on the Microprocessor Engine
Control Module (Engine Controller) display is "ON" (lit).
Figure 50. Engine Controller Status LED
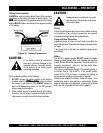
2. Place the Off/Manual/Auto switch (Figure 49) in the
MANUAL position. Observe that the engine begins to
crank.
4. Continue instructions with key switch 8-17.
Manual Start-up
Before connecting this generator to any
building’s electrical system, a licensed
electrician must install an isolation
(transfer) switch. Serious
injuryinjury
injuryinjury
injury
or
deathdeath
deathdeath
death
may result without this transfer switch.
CAUTION:
When connecting the generator to a
isolation (transfer) switch, ALWAYS have
power applied to the generator's internal
battery charger. This will ensure that the
engine will not fail due to a dead battery.
CAUTION:
Starting the generator in the "AUTO" mode is similar to
starting the generator in the "MANUAL" mode, with a few
exceptions.
When running the generator in the AUTO
mode, remember the generator can start
up at any time without warning. NEVER
attempt to perform any maintenance when
the generator is in the auto mode.
CAUTION:
Auto Start-up
When starting generator in Auto mode use the "Manual Start-
up" procedure except where noted (see below).
1. Perform steps 1 through 6 (Before Starting, page 47-
48) as outlined in the manual starting procedure.
2. Apply commercial power to the internal battery charger
receptacle (to ensure good starting) via commercial
power. An external power cord will be required.
3. Apply commercial power to the jacket water heater
receptacle (not necessary for warm climates) via
commercial power. An external power cord will be
required.
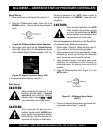
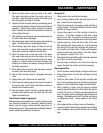
4. Place the Off/Manual/Auto switch (Figure 51) in the
AUTO position.
5. Continue to follow the steps outline in the manual start-
up procedure (start at step 11, page 49).
Figure 51. Off/Manual Auto Switch
(AUTO)