16
• Under heavier conditions it may be necessary to go
back over the cut area a second time to get a clean cut.
• Do not attempt to mow heavy brush and weeds
and extremely tall grass. Your tractor is designed to
mow lawns, not clear brush.
• Keep the blades sharp and replace the blades when
worn. Refer to Cutting Blades on page 25 of this
manual for proper blade sharpening instructions.
IMPORTANT: When stopping the tractor for any reason
while on a grass surface, always
* Place the shift lever in neutral,
• Engage the parking brake,
• Shut engine off and remove the key.
Doing so will minimize the possibility of having your lawn
‘‘browned’’ by hot exhaust from your tractor’s running
engine.
Mulching
The i1000 series tractor decks are equipped with a
mulching kit. The mulch kit which incorporates special
blades, already on your tractor, in a process of recirculating
grass clippings repeatedly beneath the cutting deck. The
ultra-fine clippings are then forced back into the lawn where
they act as a natural fertilizer.
Observe the following points for best results when mulching:
• Never attempt to mulch if the lawn is damp. Wet grass
tends to stick to the underside of the cutting deck
preventing proper mulching of the clippings.
• Do not attempt to mulch more than 1/3 the total height
of the grass or approximately 1-1/2 inches. Doing so
will cause the clippings to clump up beneath the deck
and not be mulched effectively.
• Maintain a slow ground speed to allow the grass
clippings more time to effectively be mulched.
• Always position throttle control lever in the FAST (rabbit)
position and allow it to remain there while mowing. Failing
to keep the engine at full throttle places strain on the
tractor’s engine and does not allow the blades to properly
mulch grass.
4
Operation
NOTE: It is not necessary to remove the chute deflector
to operate the mower with the mulch plug installed.
• The mulch plug installed at the factory was removed
earlier in the “Setting up your Lawn Tractor” section. To
reinstall the mulching plug, proceed as follows:
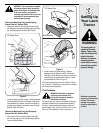
Installing Mulching Plug on 46" Decks ONLY
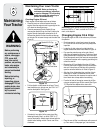
• Raise and hold the chute deflector in up position.
• Locate the 1/4 inch hole in the top of the mulching plug.
With the hole facing upward insert the mulching plug fully
into the discharge opening of the deck.
• Align the mulching plug hole with the hole in the top of the
deck discharge. Insert the carriage bolt through the top of
the deck and the mulching plug and secure with the wing
nut. Refer to Figure 2 on page 9
Installing Mulching Plug on 50” Decks ONLY
• Pivot the chute deflector up to access the deck
discharge opening.
• Locate two notches in the chute deflector hinge bracket
above the deck discharge opening.
• Insert the mulch plug into the deck discharge opening.
Make sure the two tabs on the top of the plug are in the
notches of the hinge bracket. Lightly tap on the plug with
your hand to assure that the tabs fit snugly into the
notches.
• While holding the mulching plug in position, fully lower
the chute deflector.
WARNING: The mowing deck is capable
of throwing objects. Never operate the
mower deck without the chute deflector
in its down position, even with the
mulching plug installed. Failure to do so
could result in serious personal injury
and/or property damage.
WARNING
The mowing deck is
capable of throwing
objects. Never operate
the mower deck with-
out the chute deflector
in the down position
Failure to do so could
result in serious
personal injury and/or
property damage.


