


12
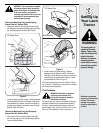
Systems Indicator Monitor/Hour Meter
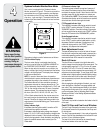
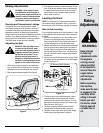
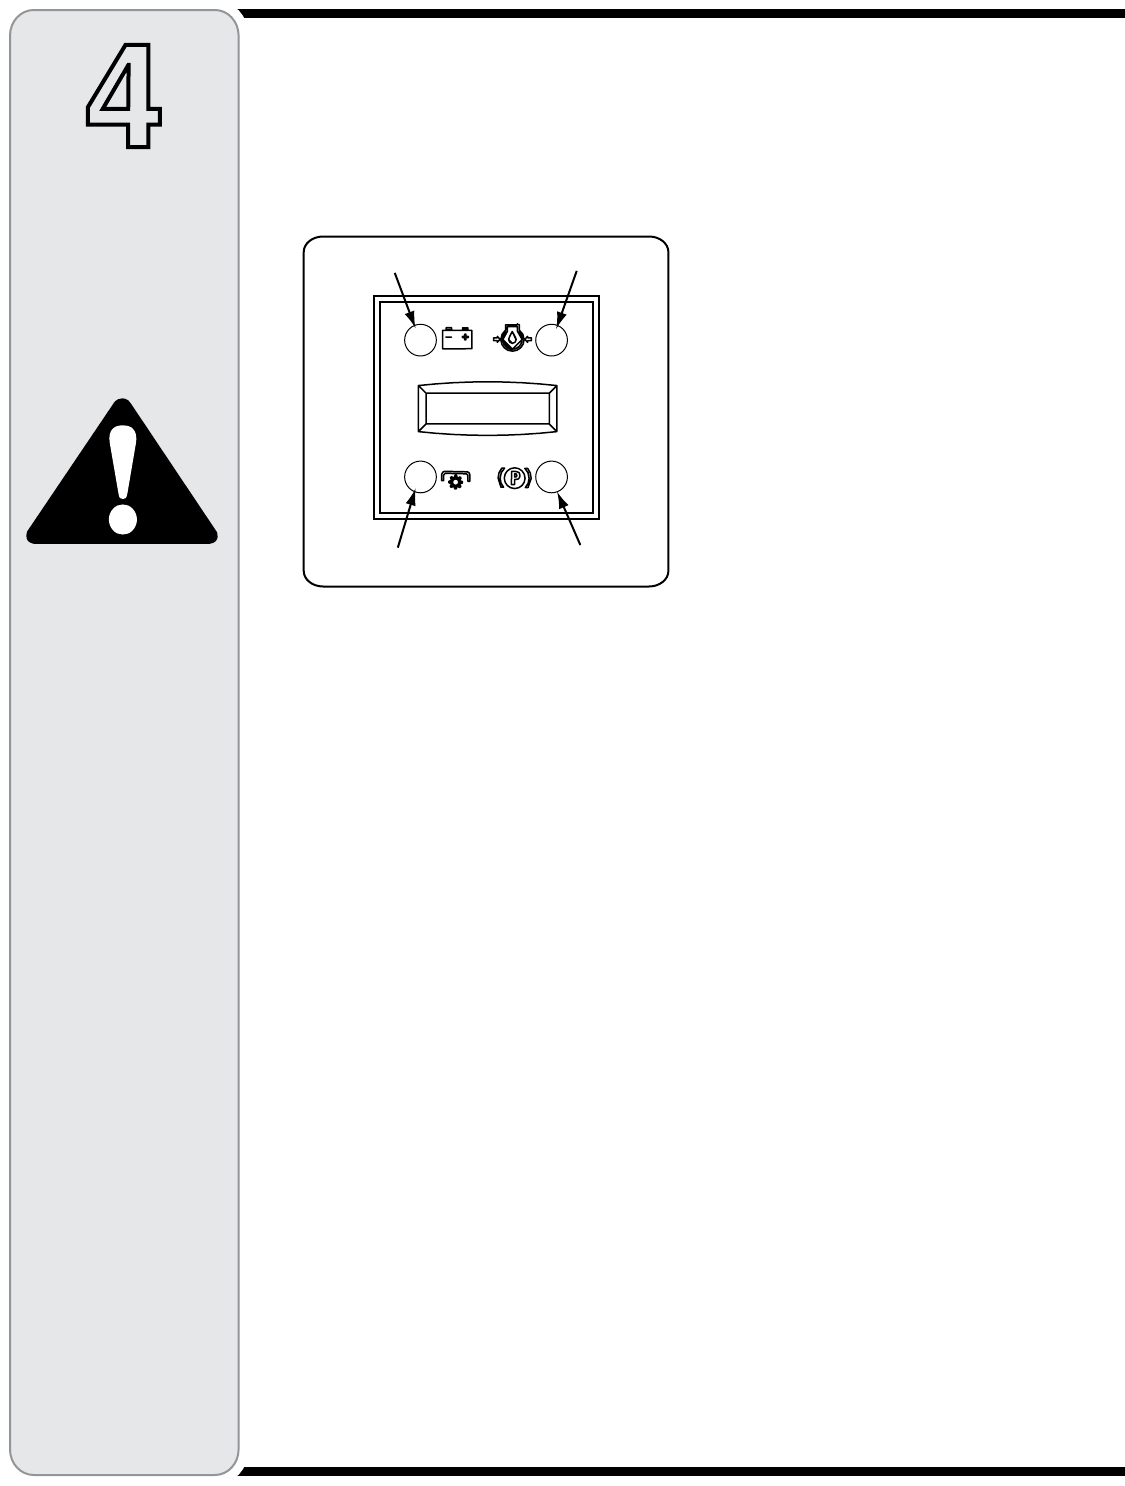
Your tractor is equipped with a Systems Indicator
Monitor as shown in Figure 5. The monitor records the
accumulated hours of tractor operation, and displays
the information on the LCD hour meter display (tenths
of an hour - right most digit). The monitor also has four
indicator lights that show the status of various functions
of the tractor.
The system indicator monitor features are as follows:
LCD Hour Meter Display
The hour meter display is activated when the key
switch is turned to either the “NORMAL MOWING” or
the “REVERSE CAUTION MODE” switch positions.
When the key switch is turned to an on position, the
battery indicator light briefly illuminates and the battery
voltage is briefly displayed. The display then changes
to the accumulated hours.
NOTE: A record of the actual hours of operation
should be kept to assure maintenance procedures are
completed according to the schedule in this manual.
The Indicator Monitor will also remind the operator of
maintenance intervals for changing the engine oil. The
LCD will alternately flash the recorded hours, “CHG” and
“OIL” for five minutes, after every 50 hours of recorded
operation elapse. The maintenance interval lasts for
two hours (from 50-52, 100-102, 150-152, etc.). The
LCD will flash as described for five minutes every time
the tractor’s engine is started during this maintenance
interval. Follow the oil change intervals provided in the
engine manual this the Maintaining your Tractor section
of this Manual.
Battery Indicator Light
Illuminates when the ignition switch it turned to an ON
position and the engine is not started.
Illuminates to indicate the battery voltage has dropped
below 11.5 (+0.5/-1.0) DC volts (the battery voltage is also
displayed on the hour meter). If this indicator and display
come on during operation, check the battery and charging
system for possible causes and/or contact your Cub
Cadet dealer.
4
Never move the key
into the Start position
while the engine is
running. Doing so
may cause damage to
your engine’s starter.
WARNING
Figure 5
Operation
Oil Pressure Indicator Light
This warning lamp indicates low engine oil pressure. If
this indicator illuminates, stop the tractor immediately
and check the engine oil level. If the oil level is within the
operating range, but the light remains on, contact your
Cub Cadet dealer. NOTE: The oil pressure indicator may
illuminate when the key switch is turned to an on position,
but should turn off when the engine is started.
PTO Engaged Indicator Light
This indicator illuminates when the key switch is turned
to the “START” position while the PTO switch is in the
“ENGAGED” position. Check this indicator if the engine
will not crank with the key switch in the “START” position.
Move the PTO switch to the “DISENGAGED” position.
Brake Engaged Indicator
This indicator illuminates when the key switch is turned
to the “START” position and the brake pedal is not fully
depressed. Check this indicator if the engine will not
crank with the key switch in the “START” position. If
necessary, fully depress the brake pedal. ..
Seat Adjustment Lever
The seat adjustment lever is on the left side of the seat.
Use this lever to adjust the seat forward or rearward to a
comfortable operating position. See the Making Adjust-
ments section later in this manual for instructions.
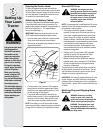
Deck Lift Lever
The deck lift lever is located in the right fender and is
used to change the cutting height of the mower deck. The
cutting heights range from 1-1/2" to 4" for the 46" mower
deck and 1-1/2" to 3-1/2" for the 50" mower deck. Each
of the six index notches represent an approximately 1/2"
adjustment to the deck height. To use, grasp the lift lever
handle and pull slightly upward (rearward) while pivoting
the lever inward and out of its index notch. Move the lift
lever as necessary to place in the notch best suited for
your application.
After changing the cutting height of the deck, you must
check the position of the deck front gauge wheels and
rear rollers. They should be approximately ½-inch above
the ground when the tractor is on a smooth, flat surface
such as a driveway. Refer to “Adjusting Deck Gauge
Wheels and Rollers” in the Making Adjustments section
later in this manual
Cup Holder
The tractor’s cup holder is located on the fender to the left
of the seat.
Fuel Fill Cap and Fuel Level Window
The fuel fill cap is located in the center of the rear fender.
Pivot the seat forward to fully access the fuel fill cap and
fill the fuel tank.
Turn the fill cap approximately 1/4 turn and pull upward to
remove. Push the cap downward on the fuel tank fill neck
and turn 1/4 turn clockwise to tighten.
The level of fuel in the fuel tank can be viewed through
the fuel level window in the rear hitch plate.
Battery
LCD Hour Meter
PTO
Oil
Parking Brake
123.4