24
LINE INSTALLATION
This section covers both SplitLine™ and standard single
line installation.
Always use geniune 2.41mm. (0.095 in) replacement line.
Line other than specified may make the engine overheat
or fail.
WARNING: Never use metal-reinforced line, wire,
chain, or rope, etc. These can break off and become
dangerous projectiles.
There are two methods to replace the trimming line.
• Wind the inner reel with new line
• Install a prewound inner reel
WINDING THE EXISTING INNER REEL
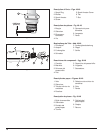
1. Hold the outer spool with one hand and unscrew the
Bump Knob clockwise (Fig. 27). Inspect the bolt
inside the bump knob to make sure it moves freely.
Replace the bump knob if damaged.
2. Remove the inner reel from the outer spool (Fig. 27).
3. Remove spring from the inner reel (Fig. 27).
4. Use a clean cloth to clean the the inner reel, spring,
shaft, and inner surface of the outer spool (Fig. 28).
5. Check the indexing teeth on the inner reel and outer
spool for wear (Fig. 29). If necessary, remove burrs
or replace the reel and spool.
NOTE: SplitLine™ can only be used with the inner reel
with the slotted holes. Single line can be used
on either type of inner reel. Use Figure 30 to
identify the inner reel you have.
• Trim only when grass and weeds are dry.
• The life of your cutting line is dependent upon:
• Following the previous trimming techniques
• What vegetation is being cut
•Where it’s being cut
For example, the line will wear faster when trimming
against a foundation wall as opposed to trimming
around a tree.
DECORATIVE TRIMMING
Decorative trimming is accomplished by removing all
vegetation around trees, posts, fences, etc.
Rotate the whole unit so that the cutting attachment is at
a 30° angle to the ground (Fig. 25).
USING THE CUTTING BLADE
Before operating the unit with the cutting blade stand in
the operating position (Fig. 23). Refer to Holding the
Trimmer.
Cutting Blade Operating Tips
To establish a rhythmic cutting procedure:
• Plant feet firmly, comfortably apart.
• Bring the engine to full throttle before entering the
material to be cut. The blade has maximum cutting
power at full throttle and is less likely to bind, stall, or
cause blade thrust, which can result in serious
personal injury to the operator or others.
• Cut while swinging the upper part of your body from
right to left.
• Always release the throttle trigger and allow the engine
to return to idle speed when not cutting.
• Swing the unit in the same direction as the blade
spins, which increases the cutting action.
•Move forward to the next area to be cut after the
return swing and plant feet again.
• The cutting blade is designed with a second cutting
edge, which can be used by removing the blade,
turning it upside down, and reinstalling it.
To reduce the chance of material wrapping
around the blade, follow these steps
• Cut at full throttle.
• Swing the unit into material to be cut from your right to
your left (Fig. 26).
• Avoid the material just cut as you make the return
swing.
OPERATING INSTRUCTIONS
MAINTENANCE AND REPAIR INSTRUCTIONS


